 US Dollars
Engine Bay Hardline Kit Install
No rubber. No clamps. No fumes. Pre-bent stainless steel tubing, 37° AN flares, and a sealed system you install once and trust for life. The permanent fix for the most fire-prone area of your VW.
"Upgrade your Classic VW with a stainless hardline fuel system — no rubber, no clamps, no fumes. Fire-proof, reliable, and built to protect your engine bay for life."
Classic VWs Burn for a Reason. This Kit Removes Every One of Them.
Cheap fuel filters mounted right on top of the distributor and wires. Cheap pumps and carbs with fuel inlets and outlets that fall out and shoot gas over a hot engine. Fuel hose nobody replaces — ever. The classic VW industry treats hose like it lasts forever. It doesn't. Like tires, fuel hose is a maintenance item. Most people only check after 5 or 6 years. By then it's already weeping.
Cheap hose has more alcohol content in the rubber and dies faster. More expensive hose has more oil content and lasts longer. But it always dies. Replacement is a question of when, not if.
The Airkewld hardline kit eliminates the question. No rubber, no clamps, no aging connections. -6AN throughout. Permanent.
Some customers feel a fire extinguisher or suppression system is a must-have. Maybe psychological. But eliminate the vapor and leak points up front and fires are a thing of the past. Confidence, not luck.
Gas Fumes = Fire Hazard.
If you smell fuel in or around your VW, you're on borrowed time. Vapor leaks don't wait. They ignite. By the time you can smell gasoline near a hot engine, the only thing standing between you and a fire is a spark.
If You're Patching, Do This Now
- Relocate the fuel filter under the gas tank, not on top of the distributor.
- Replace rubber fuel lines every 3–5 years — no exceptions.
- Vent the gas tank with a charcoal filter.
- Check carb and fuel-pump connections every season.
Or Skip the Worry — Permanently
Install the Airkewld stainless hardline kit once. Eliminate the rubber. Eliminate the clamps. Eliminate the 60-year-old fittings. A sealed, vapor-free fuel system you stop having to think about.
Your Classic VW deserves more than a fire hazard under the decklid. Upgrade once. Drive with confidence. Protect your VW — and everyone in it.
The Numbers You Need Before You Cut
Tubing
.375″ StainlessPre-bent · cut to fit
Flares
37° ANNOT 45° automotive
Fittings
B-nut + SleeveDry threads · no sealant
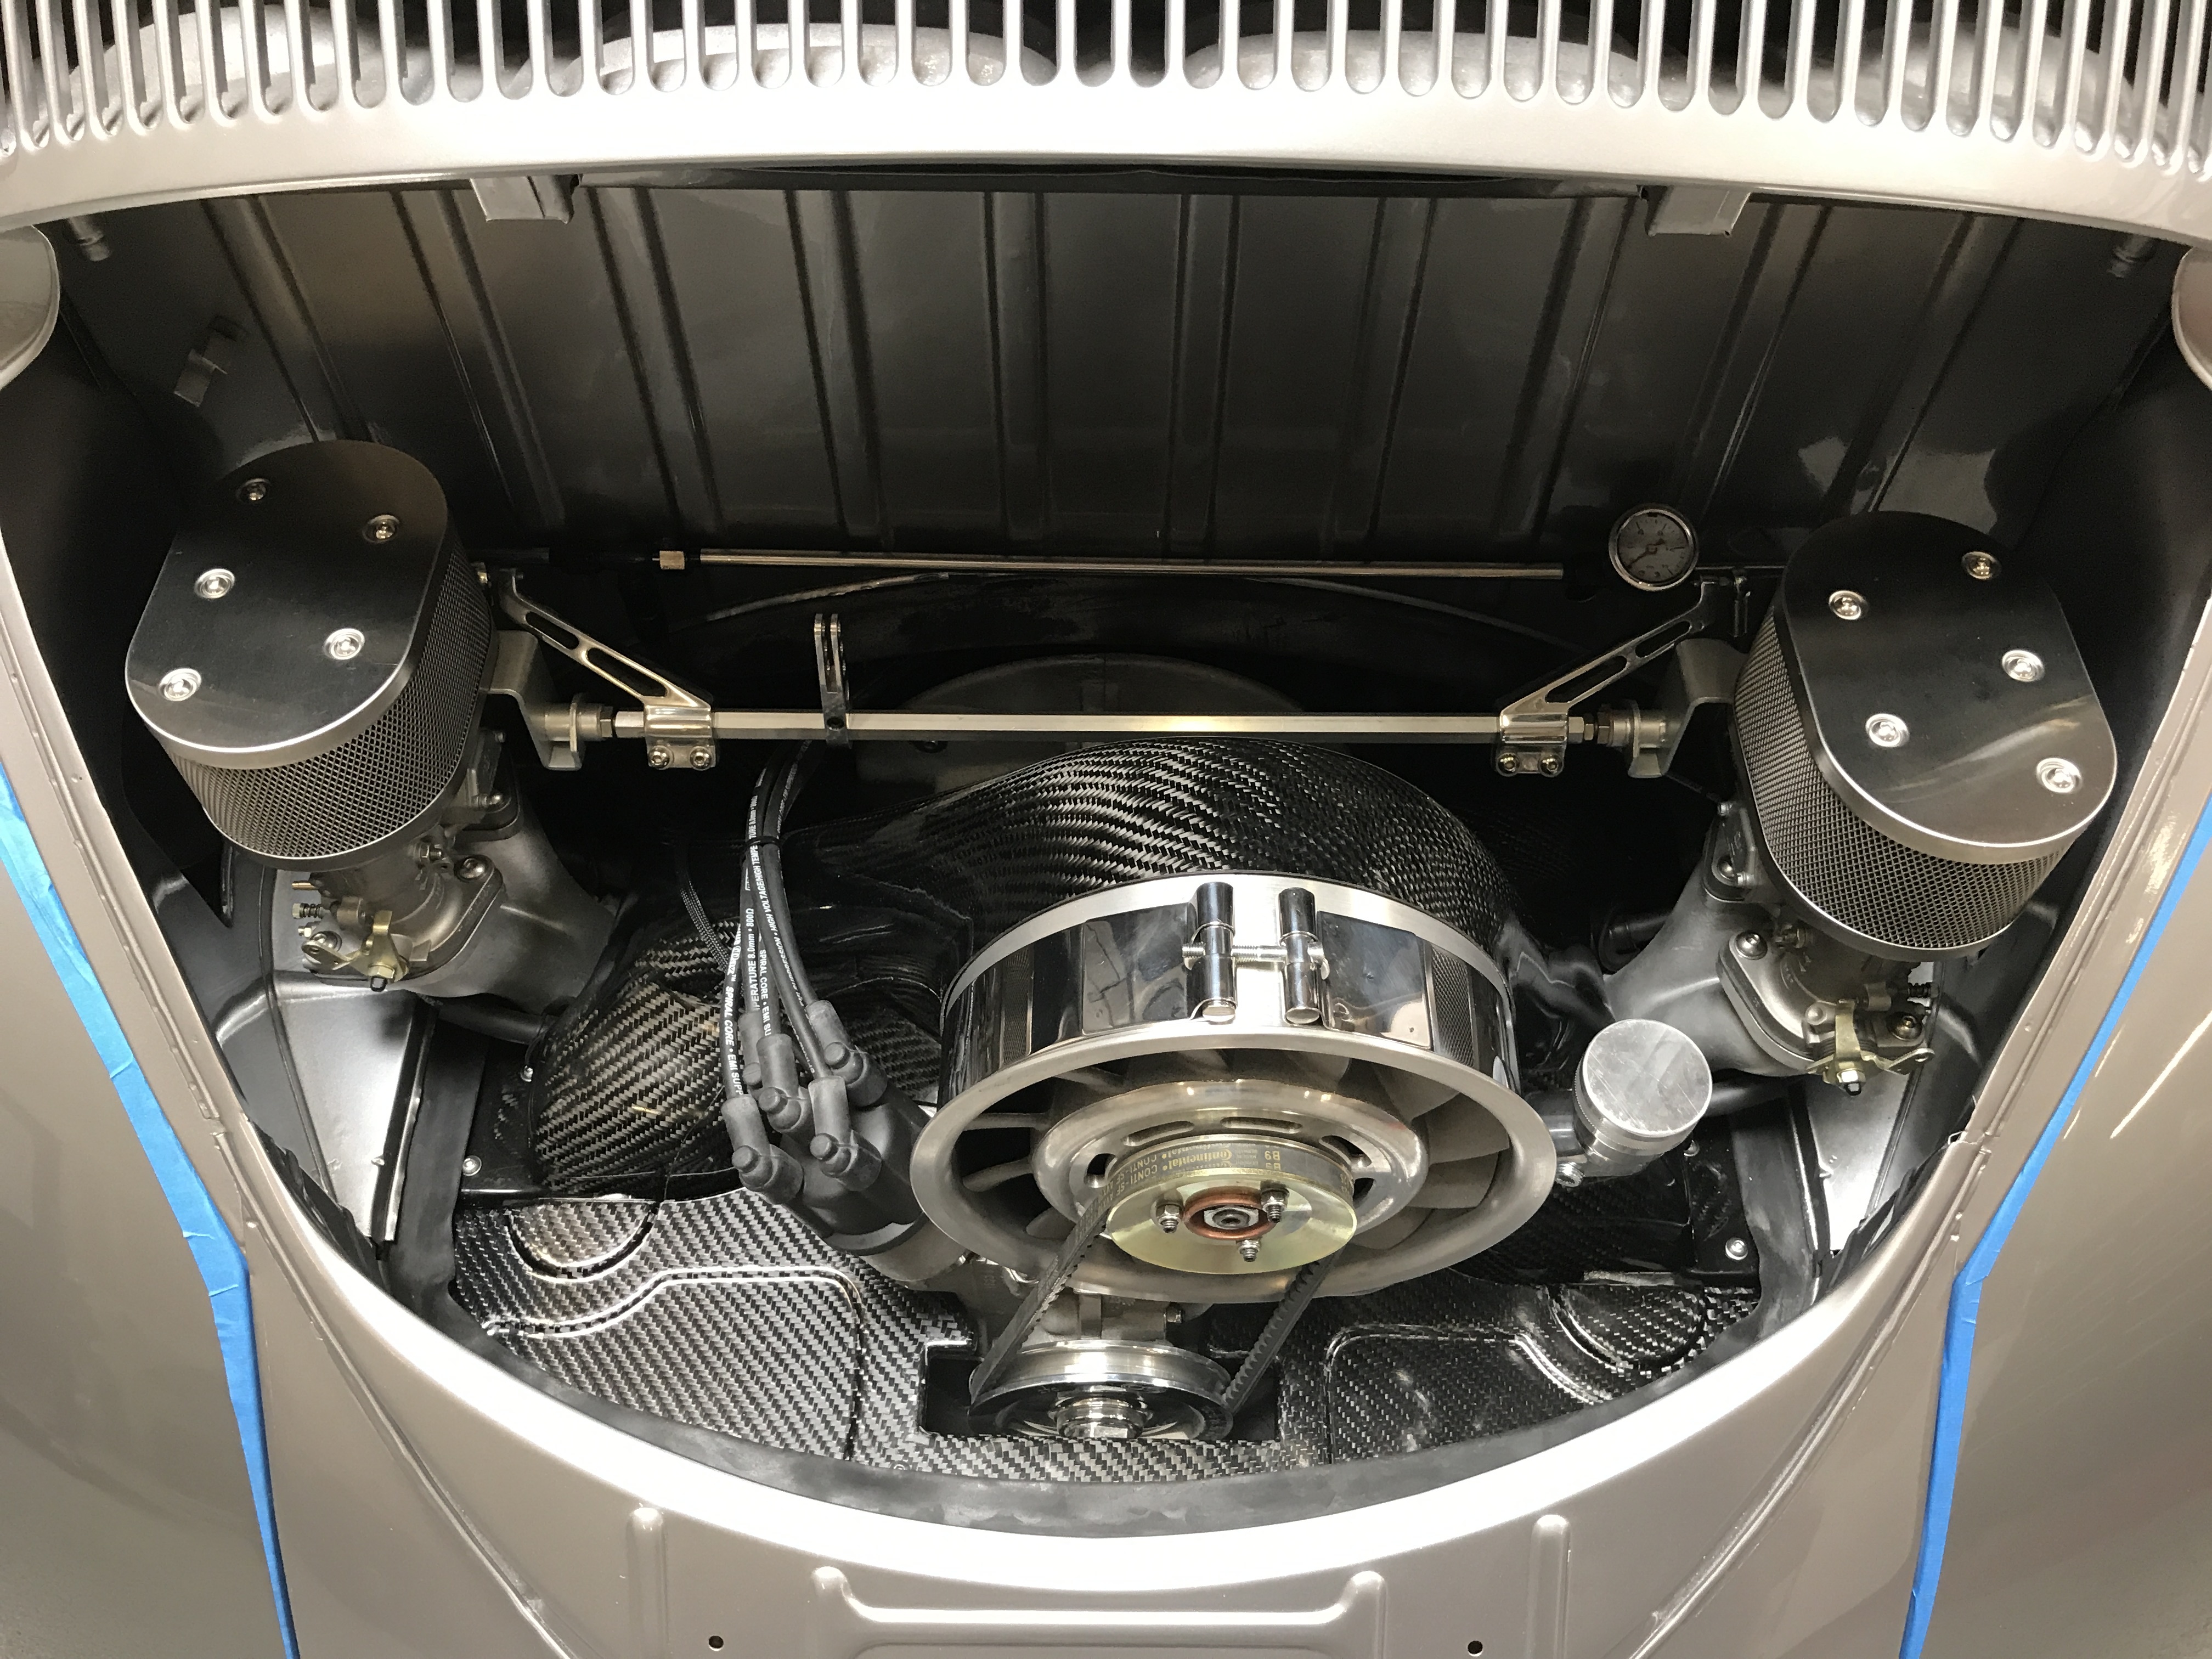
Gauge
Liquid-Filled PSIMounted carb-shroud gap
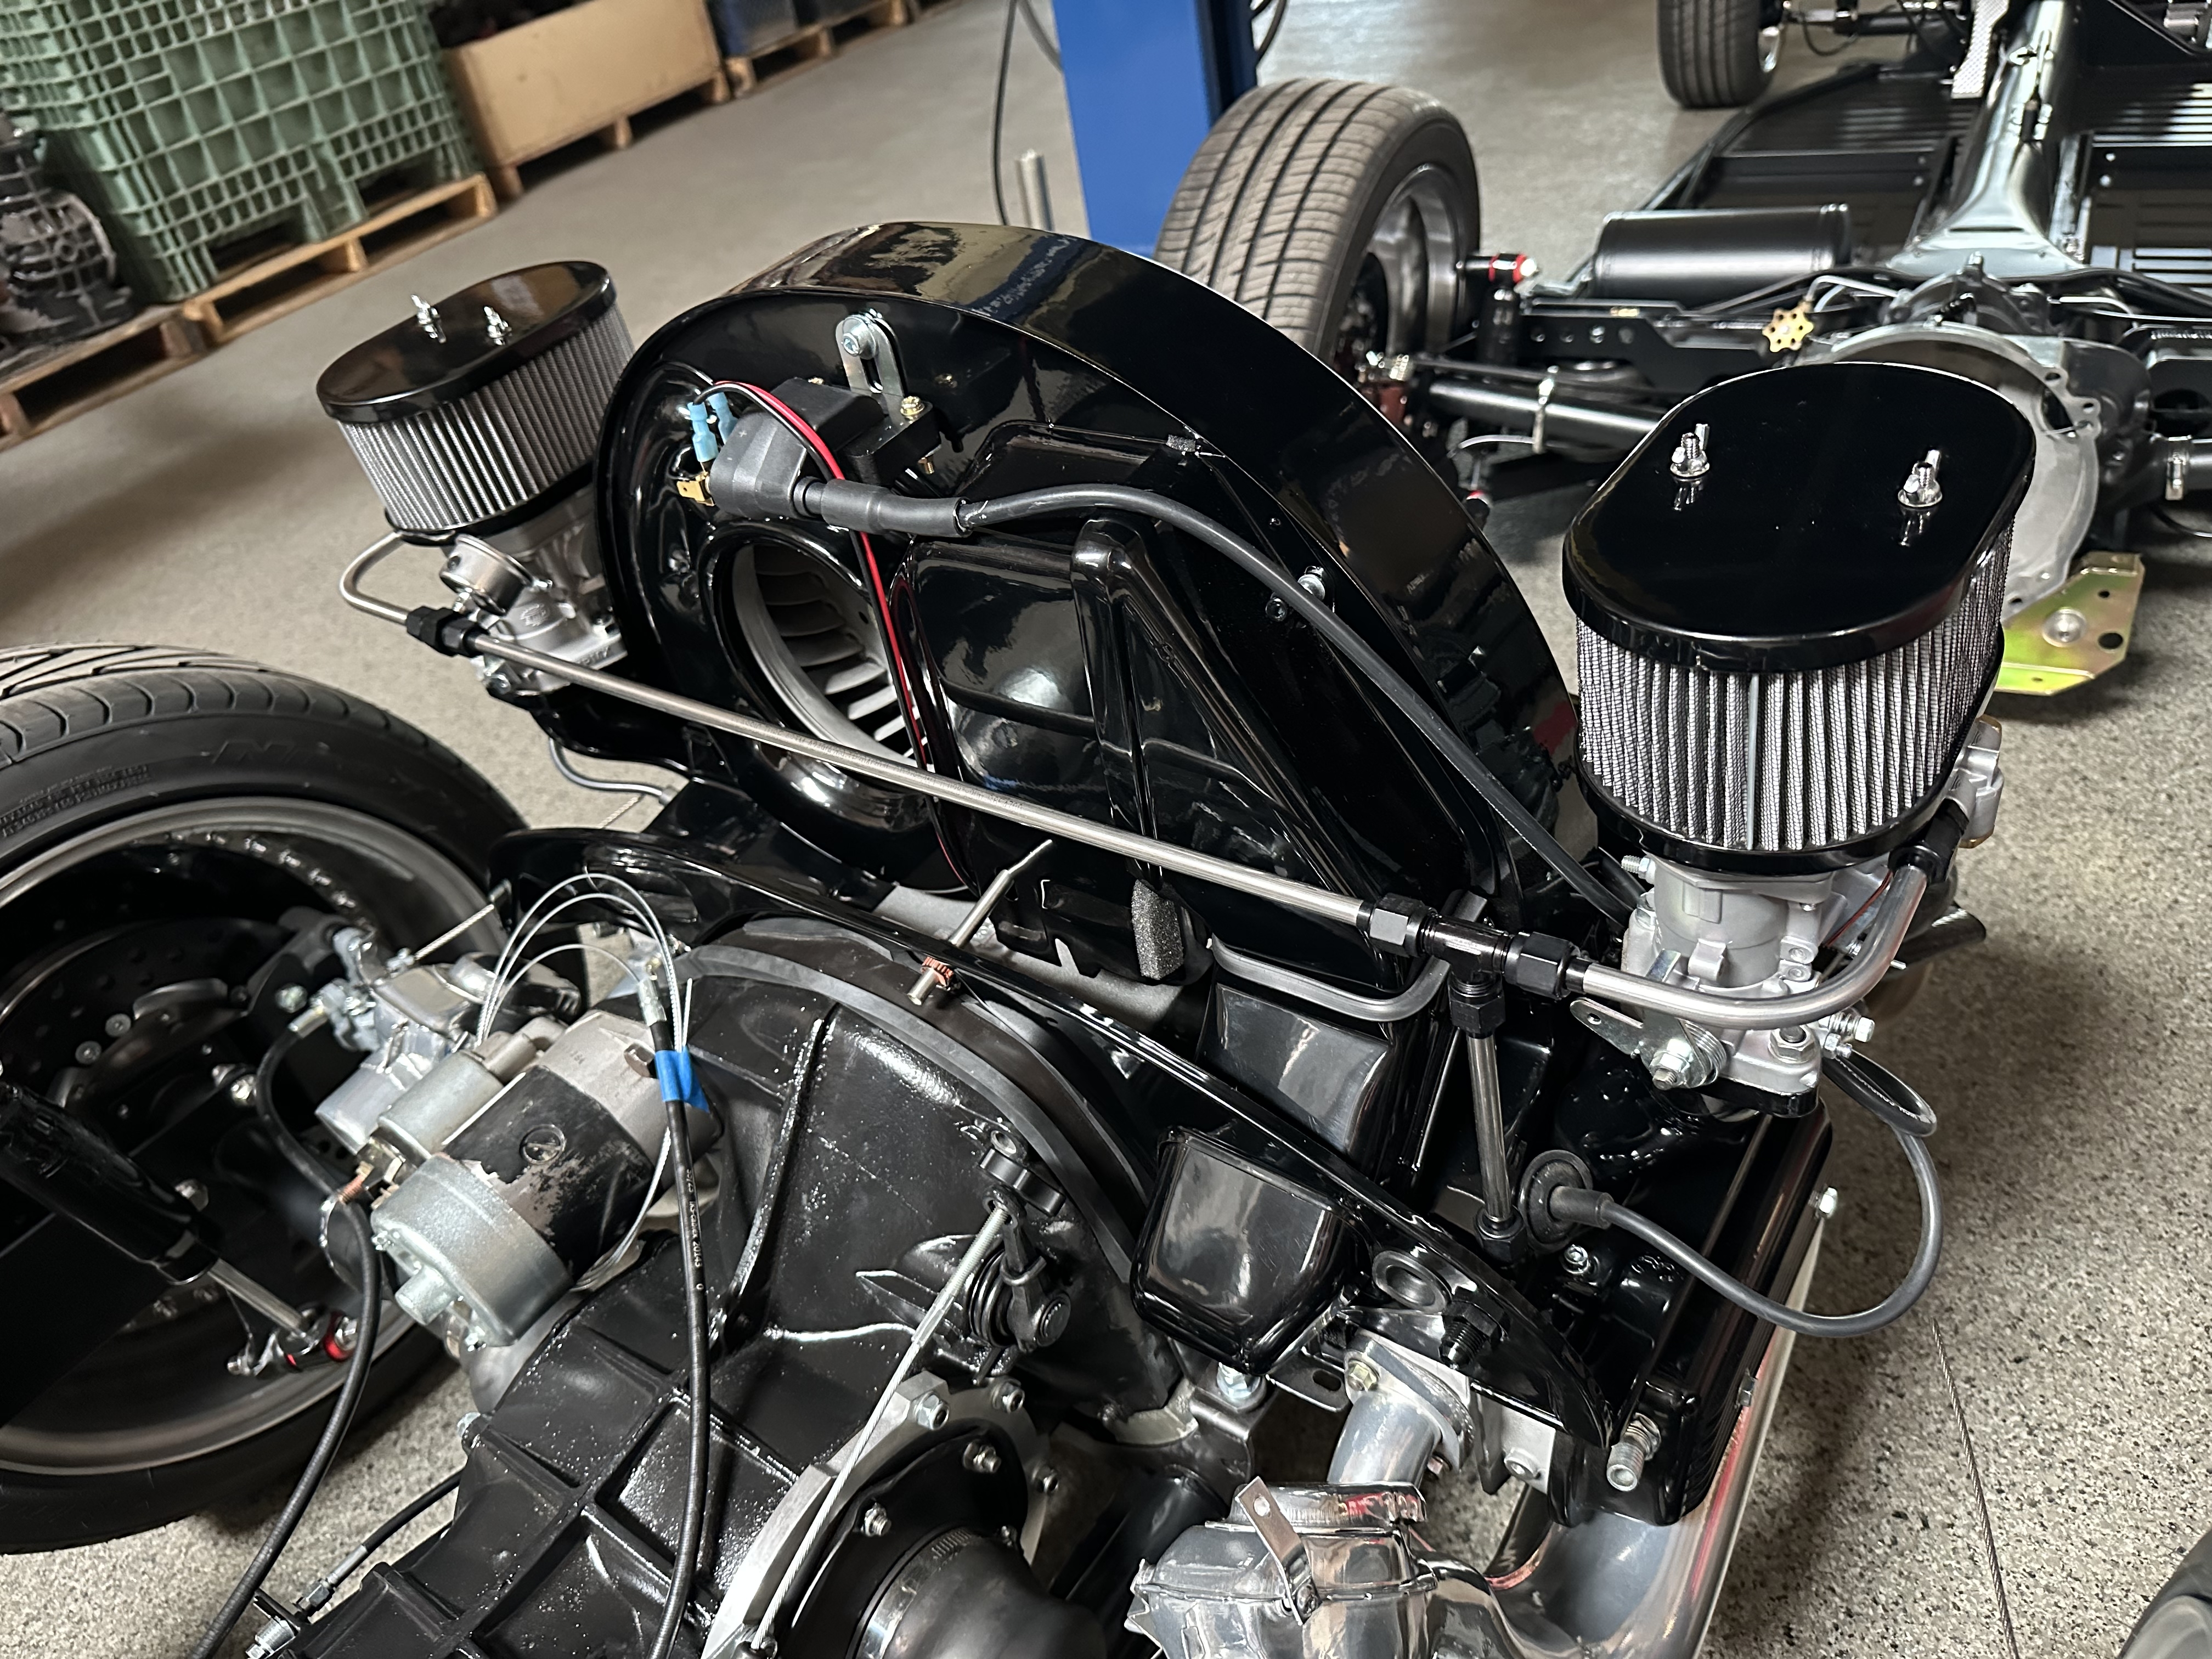
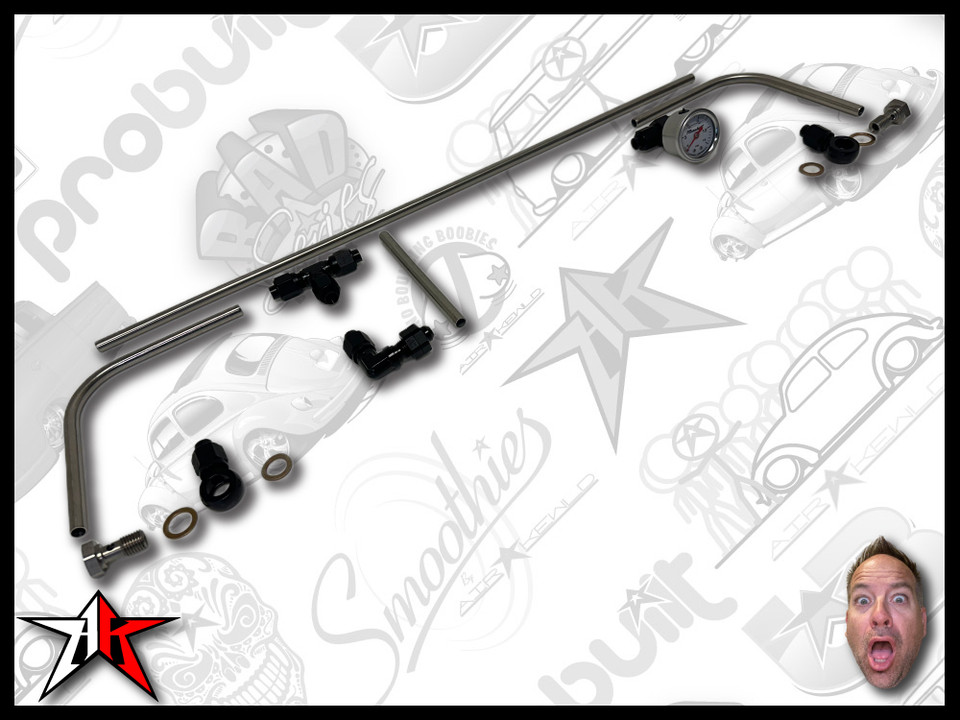
Everything to Plumb the Engine Bay
Each kit ships with all the components you need for a complete engine-bay install. Add a tubing cutter and a 37° flaring tool (next section) and you're ready to start.
- Carb fittings (matched to your carb type)
- B-nuts & tube sleeves (every connection)
- AN tee fitting
- Gauge adapter
- Liquid-filled PSI gauge
- Tin union with nut (bulkhead pass-through)
- (2×) mandrel-bent carb lines
- (1×) center line
- (1×) drop-down line
A Tubing Cutter and a 37° (Not 45°) Flaring Tool
The kit doesn't ship with the cutting tools you'll bring to the bench. Most customers already have a tubing cutter. The flaring tool is the trap: automotive flaring tools are 45° SAE. AN fittings (every connection in this kit) are 37° aerospace. A 45° flare will not seat in an AN cone — fuel weeps no matter how tight you make the B-nut.
Three Carb Types · Two Colors
Pick the carb your engine runs, then pick the color that matches your build. Same install pattern across all six kits.

For Dual 48 IDA Setups
The big-bore high-performance pick. Pre-bent stainless lines and AN fittings sized specifically for the 48 IDA inlet/outlet pattern.
Shop Black 711 100 002 → Shop Blue 711 100 003 →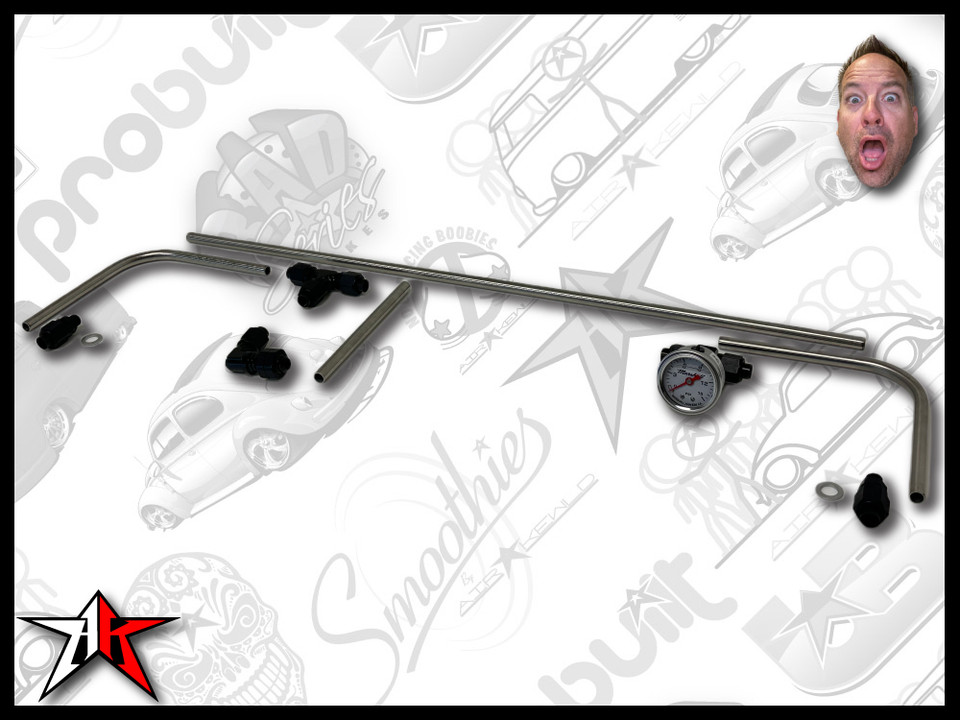
For Dual 40/44 IDF Setups
The most common dual-carb configuration on the road. Lines and fittings tailored for the 40 IDF and 44 IDF inlet pattern.
Shop Black 711 100 004 → Shop Blue 711 100 005 →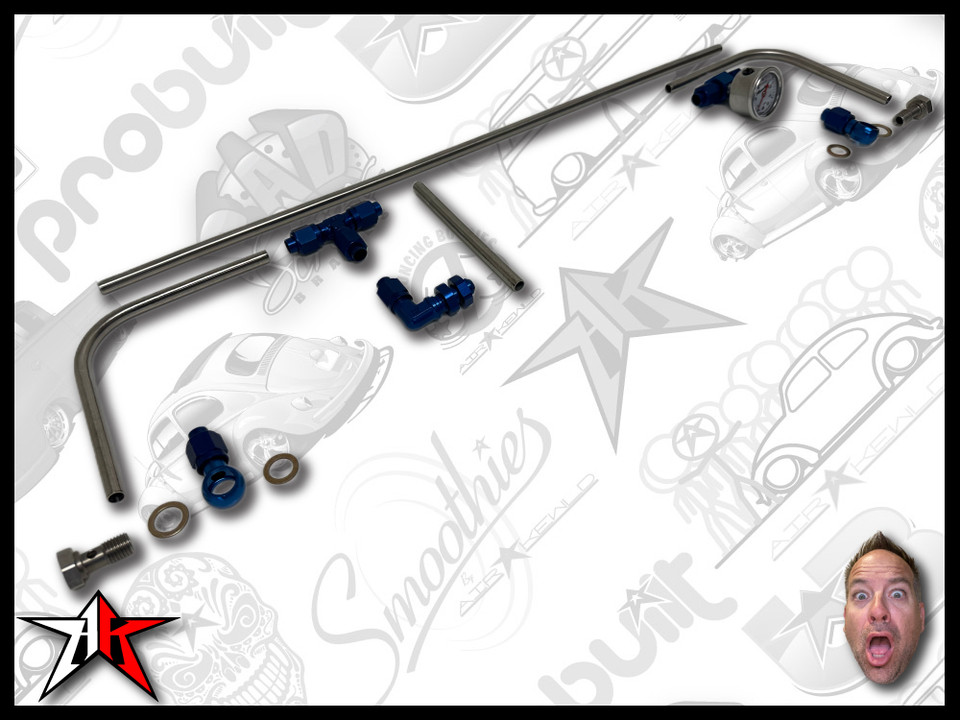
For 12mm Dellorto
Covers the 12mm DRLA range.
Shop Black 711 100 000 → Shop Blue 711 100 001 →The Whole Install · Filming Soon
We're filming a complete walkthrough — mock-up, flares, bulkhead pass-through, and the leak check at the end. Drops on YouTube as soon as it's edited.
Subscribe to Airkewld on YouTube for the alert when it goes live.
For the record — you might have experience installing a product similar to this one, but you don't have experience installing this one. Read the guide. Understand the guide. Five minutes of reading saves a wrong cut on a pre-cut tube.
The Top 5 Install Mistakes — And How to Avoid Them
Cutting stainless line is a one-way operation. Pre-cut tubing has limited length. Get these five right up front and the install is a clean 2-hour job.
Sealant on AN Flare Fittings
AN fittings seat on the 37° flare — the seal IS the flare meeting the cone. Sealant on AN threads cruds the seat and CAUSES leaks. Sealant goes ONLY on the gauge port (NPT) and bulkhead fitting — never on any AN connection.
Wrong Flare Angle (45° instead of 37°)
This kit uses 37° SAE/AN flares. A 45° automotive tool will create a flare that won't seat into AN cones. Verify the flaring tool you grab is 37° BEFORE you cut — re-flaring after a wrong cut means losing length you might not have.
Forgetting B-nut + Sleeve Before Flaring
Order is: slide B-nut FIRST → tube sleeve SECOND → flare LAST. Once the flare is made you can't add either piece — only fix is cut and re-flare. Burn the order into muscle memory.
Lines Not Level
Every line gets installed DEAD level — use the level in the tools list. Crooked lines stress the flares, create vibration cracks over time, and look amateur. Eyeballing it is how leaks start.
Cutting Before Mocking Up
With a doghouse shroud the gap between fan shroud and carb is tiny. Mock up the fitting + 90° tube + B-nut BEFORE cutting to confirm clearance against the shroud and tin. Measure twice — you only get to cut each pre-cut tube once.
Tools Required · Shop the Build
The 37° flaring tool ships from us — everything else is bench-standard. Affiliate links support the channel; same price to you.

Vise Grips
Pinch the soft line coming out of the gas tank during removal so you don't drain the system on the floor.
Shop on Amazon
Tubing Cutter
Clean square cuts every time. A good flare starts with a square cut — saw blades and angle grinders ruin the end.
Shop on Amazon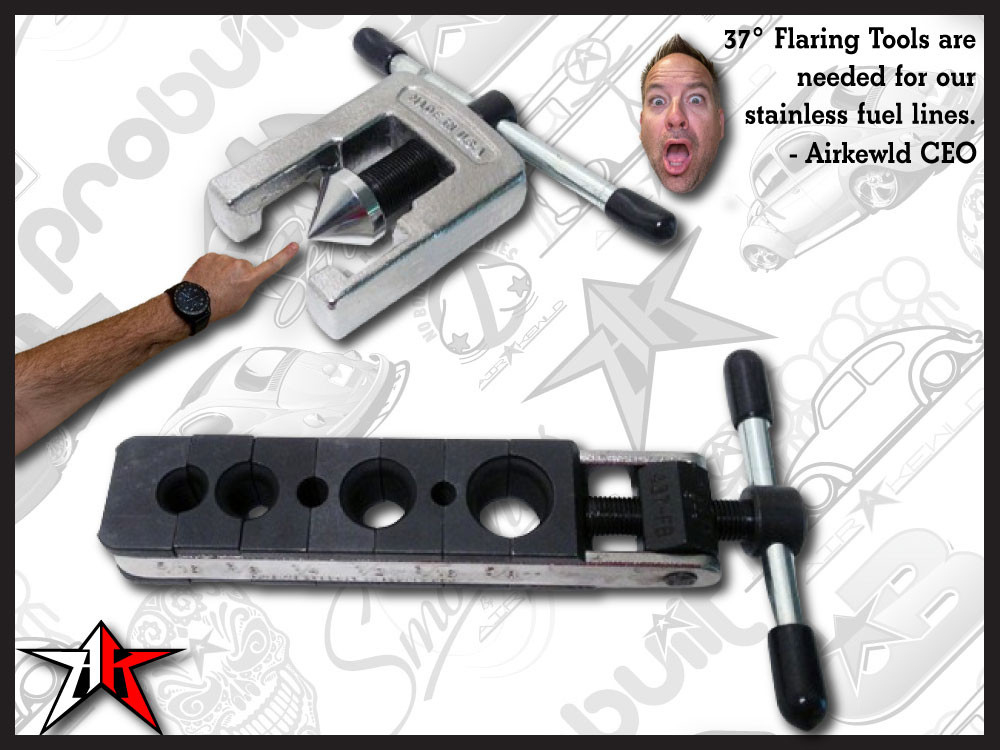
37° Flaring Tool
Not 45°. AN fittings seat on a 37° cone — the wrong tool ruins the kit.
Shop at Airkewld
Uni-Bit / Deburr Tool
For opening up the OEM front-tin gas-entry hole so the bulkhead fitting passes through clean.
Shop on Amazon
Grease Crayon / Sharpie
For marking cut lines on the stainless tubing. Grease crayon shows on polished stainless better than ink.
Shop on Amazon
mm / Inch Ruler
A ruler with both scales saves the conversion math when you're transferring measurements between fittings and tube.
Shop on Amazon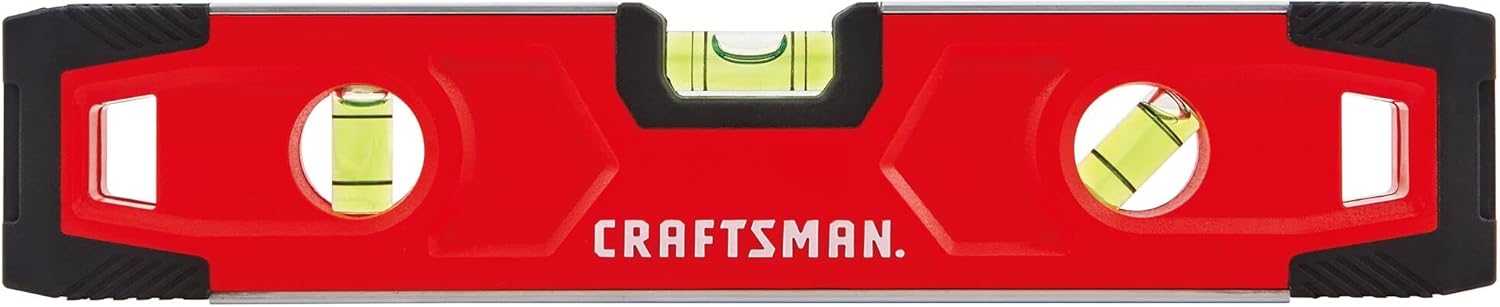
Level
Every line gets installed DEAD level. Small torpedo level fits in the engine bay; phone-app level works in a pinch.
Shop on Amazon
Teflon / White Sealant
GAUGE + BULKHEAD ONLY. Never on AN flare fittings. Teflon tape is the standard pick for this kit.
Shop on AmazonAirkewld is a participant in the Amazon Services LLC Associates Program. As an Amazon Associate, we earn from qualifying purchases — at no additional cost to you.
Step by Step · The Way We'd Plumb It
Read each phase. Match each photo. Don't skip the Pro Tips — this is a one-way operation on pre-cut tubing.
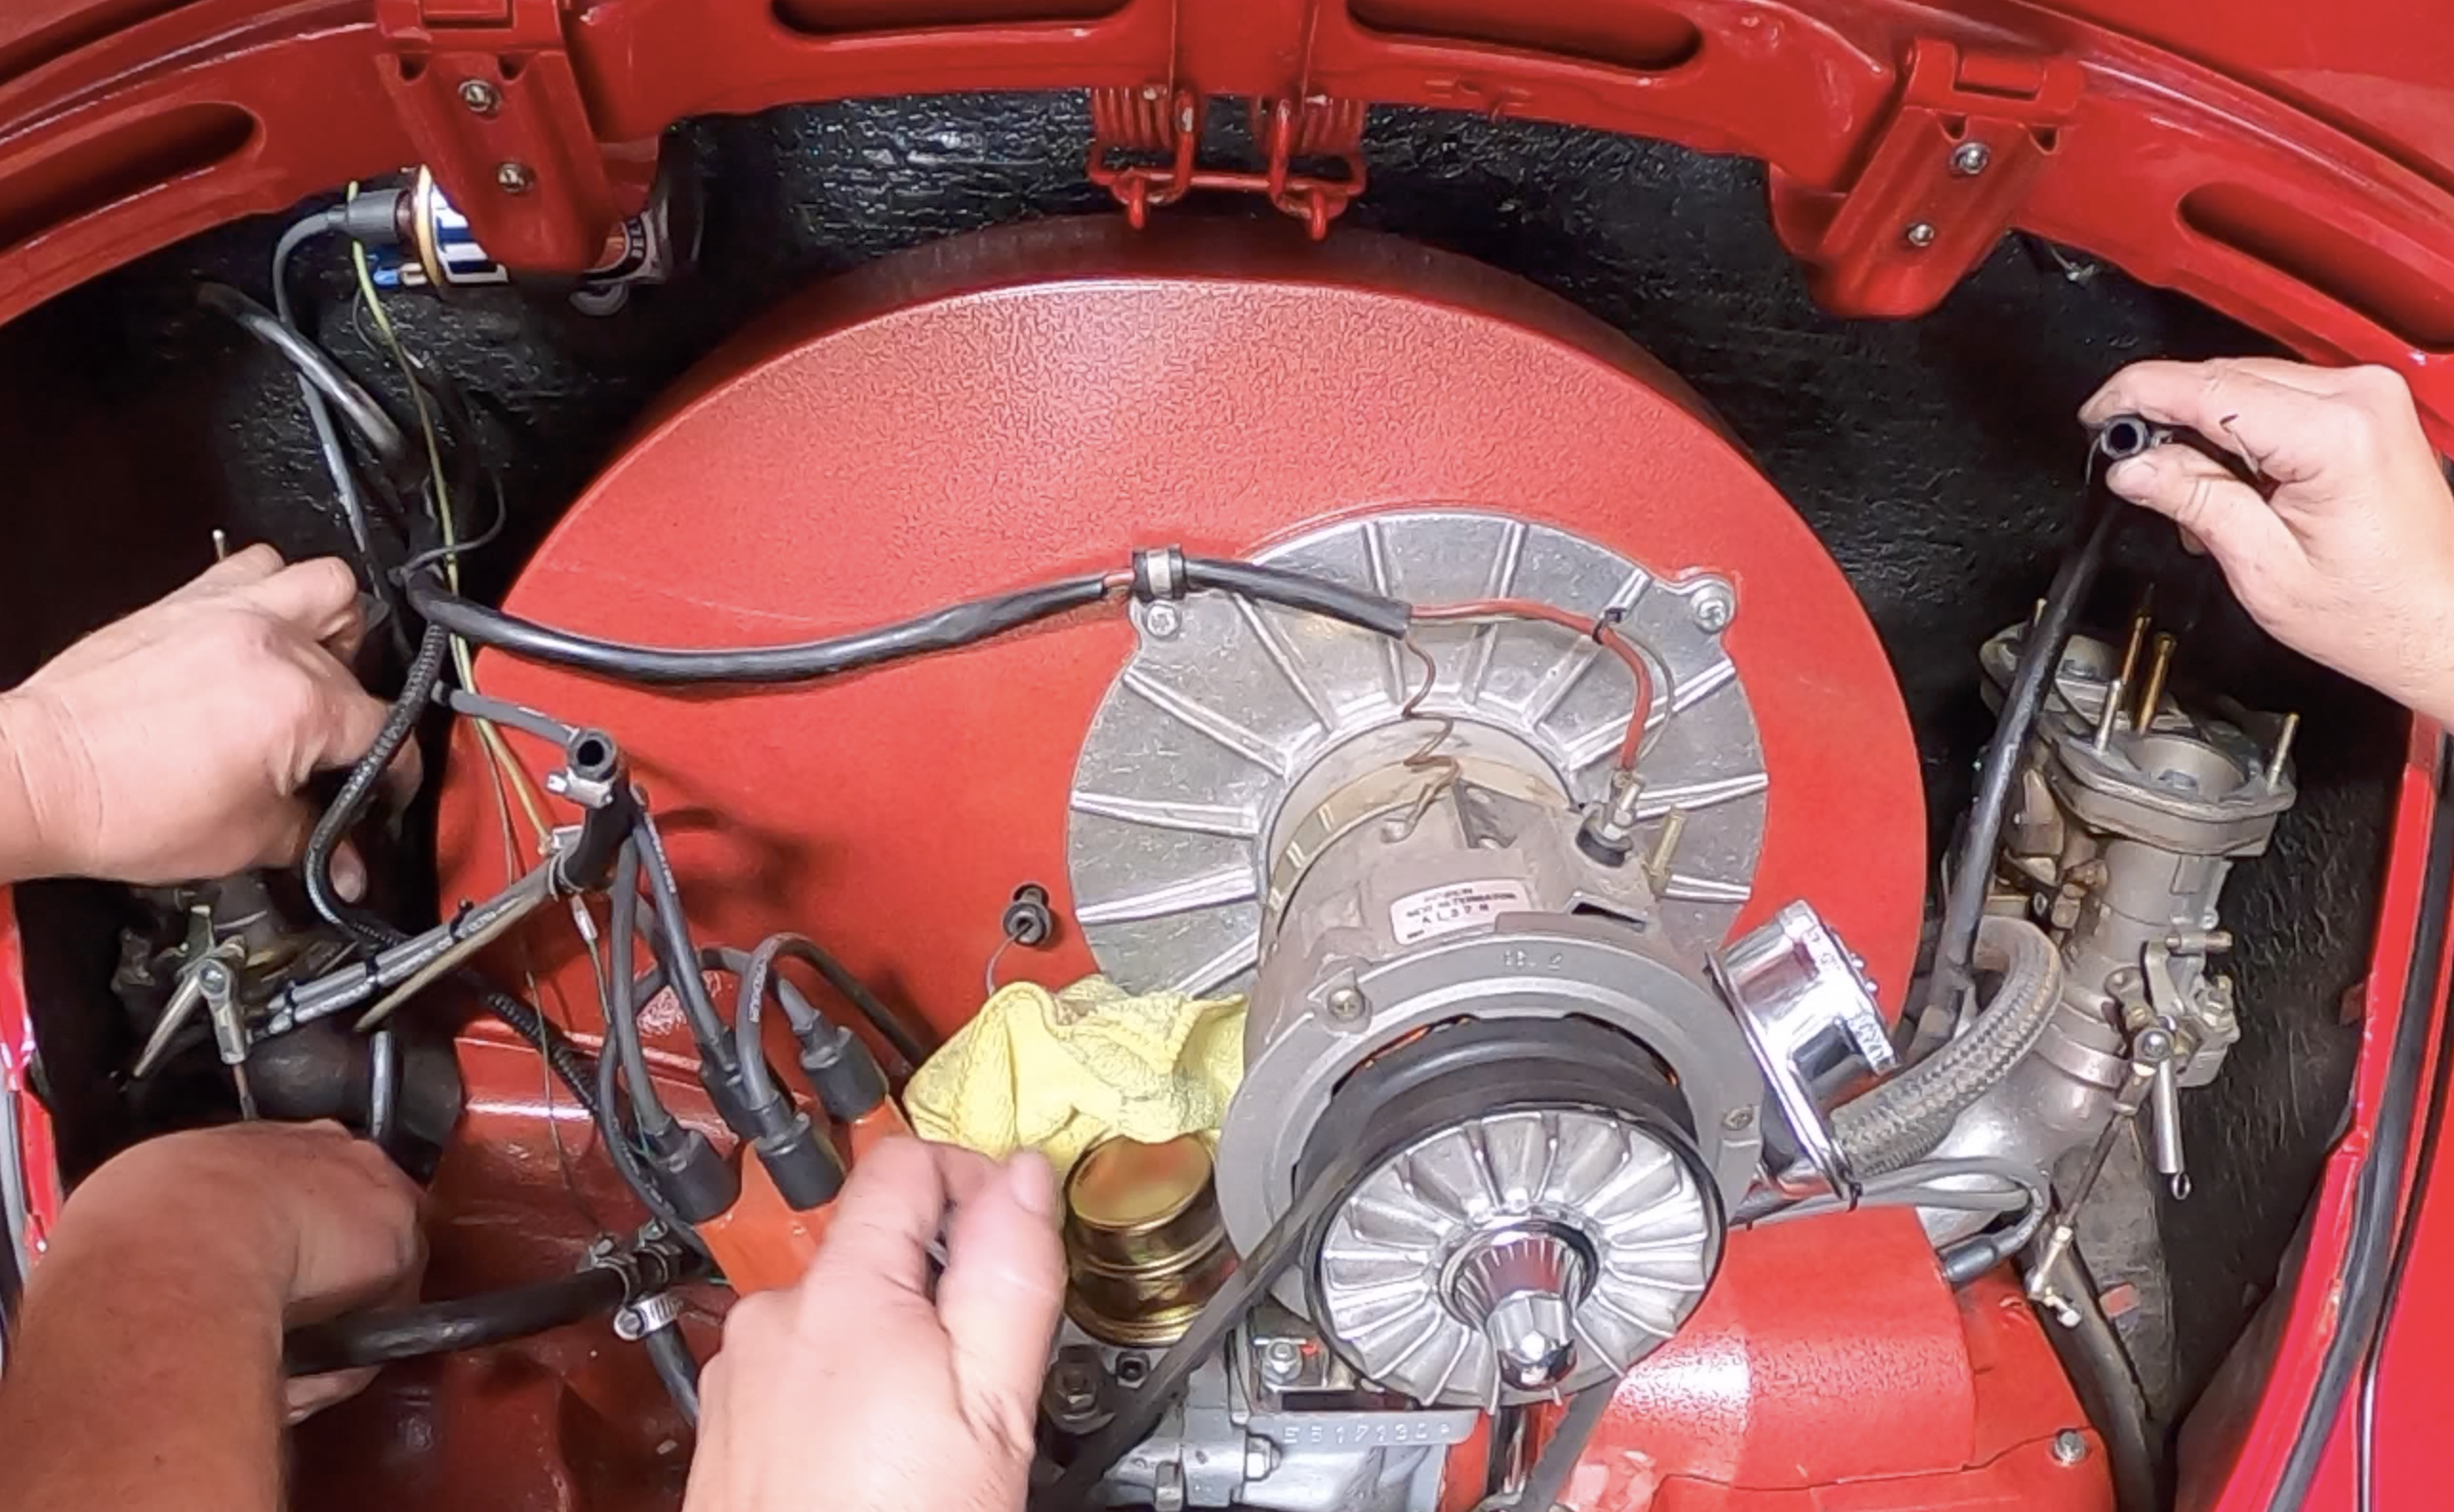
Remove Old Lines
- Pinch the line coming out of the gas tank with vise grips (clamp at the chassis).
- Remove the air cleaners.
- Remove the clamps holding the old lines onto the carbs.
- Pull the entire old gas-line configuration out of the engine bay.
- Remove OEM gas eyelets / banjos from the carbs (early Dellorto + IDA banjos come off too).
- 7mm Dellorto: SAVE the banjo bolts — they're reused with the new fittings.
Burn this in: B-nut FIRST → tube sleeve SECOND → flare LAST. Slide the B-nut onto the tube. Slide the tube sleeve on. THEN flare. If you flare before adding either piece, the only fix is to cut the flare off and re-flare — and pre-cut tubing only has so much length to give.
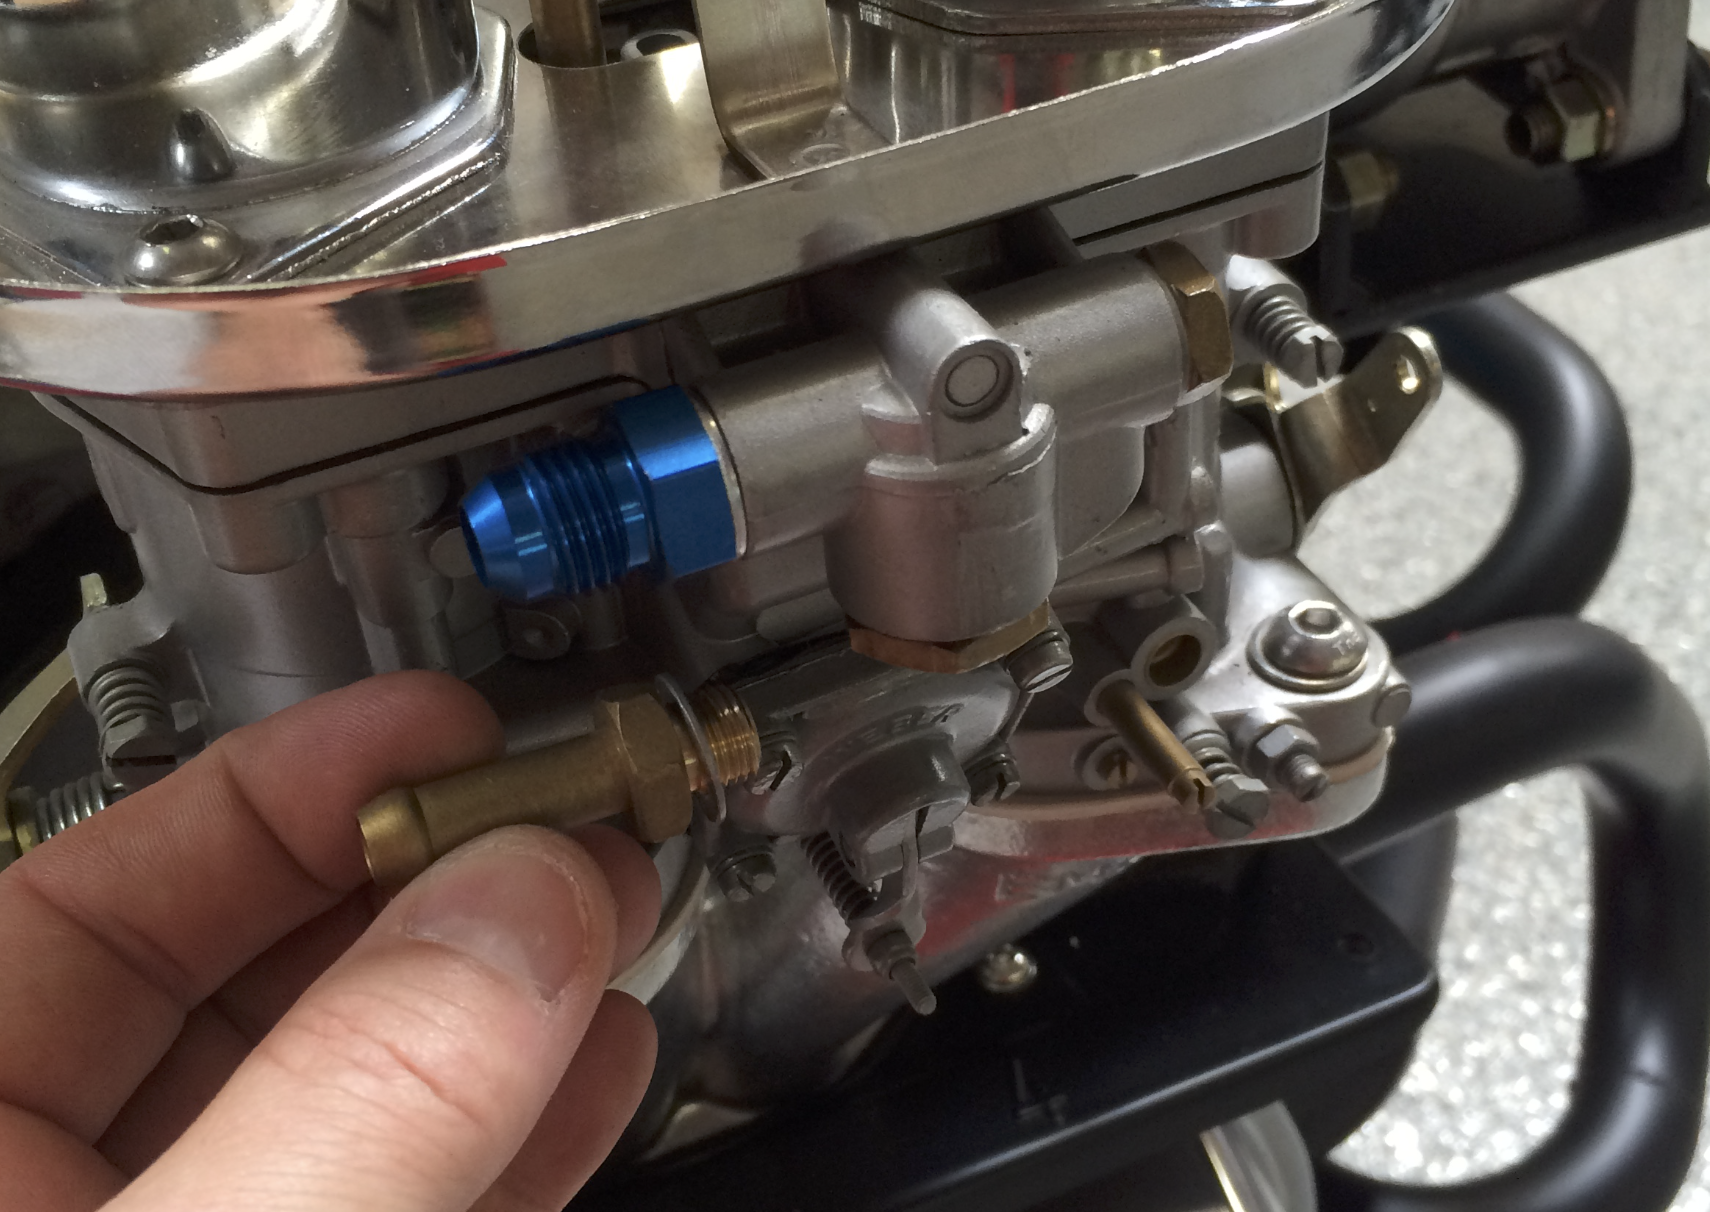
AN Fittings on Carbs
- Install new AN fittings into the carb fuel inlets — DRY threads, NO sealant (the AN flare is the seal).
- 7mm Dellorto: reuse the OEM banjo bolts with the new AN-style fittings supplied.
- Snug only at this stage — final-tighten after the lines are flared and seated.
- Repeat on both carbs before any tubing work.
Carb-Side Tubing (Driver + Passenger)
- MOCK UP first: B-nut + tube sleeve onto the carb fitting, place a 90° pre-bent tube on top to judge firewall clearance.
- Doghouse shroud users: the gap is tiny — verify clearance to fan shroud BEFORE cutting.
- Grease-crayon mark the cut line where it meets the carb fitting.
- Tubing cutter: clean square cut. Slide B-nut, then tube sleeve, then flare with the 37° tool (1/8″ protruding).
- Slide tube sleeve to flare — taper should sit clean. Install onto carb, level the line, snug B-nut.
- Repeat on the opposite carb.
Most automotive flaring tools are 45° SAE. AN fittings (every connection in this kit) are 37° aerospace. Verify the flaring tool you grab is the 37° tool BEFORE you cut. A 45° flare will not seat in an AN cone — fuel weeps no matter how tight you make the B-nut. Tools usually have the angle stamped on the body or yoke.
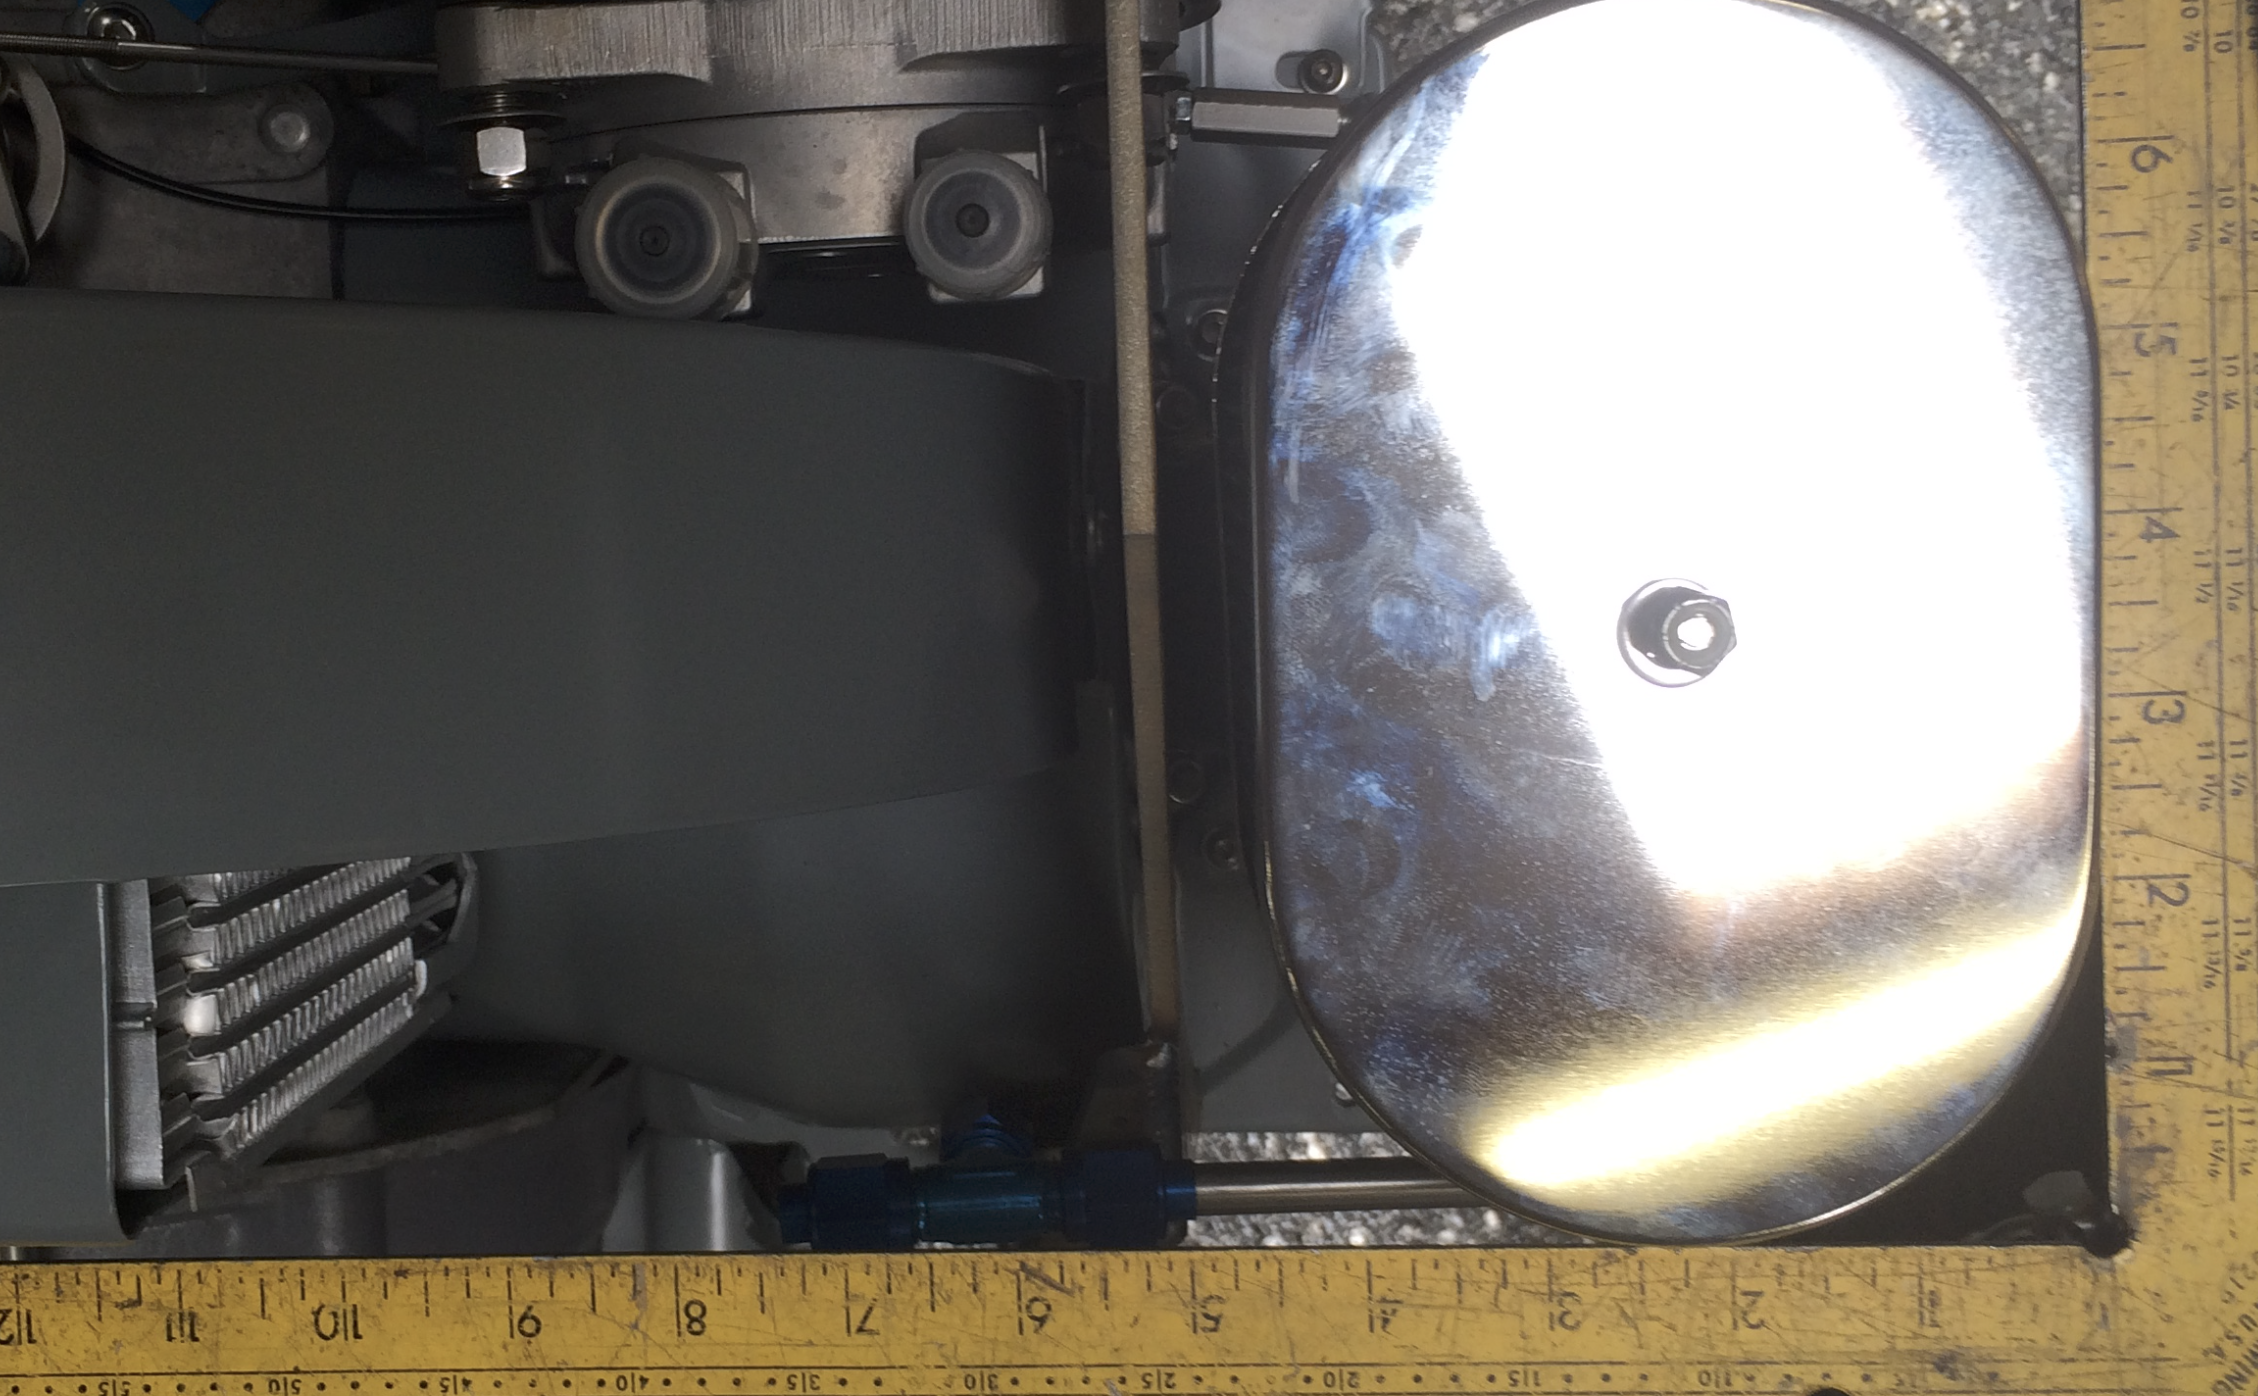
Bulkhead + Vertical Drop
- Use the original front-tin gas-entry hole. Uni-bit (or deburr tool) the hole slightly larger so the bulkhead fitting passes through.
- Install the bulkhead fitting; secure with the supplied AN nut on the inside.
- Confirm the 90° elbow points STRAIGHT UP. Verify with the level.
- Take the supplied 5″ straight stainless tube — flare ONE end (B-nut + tube sleeve in the order from Pro Tip 1).
- Install onto the bulkhead 90° fitting. Snug. Confirm vertical with the level — must be plumb.
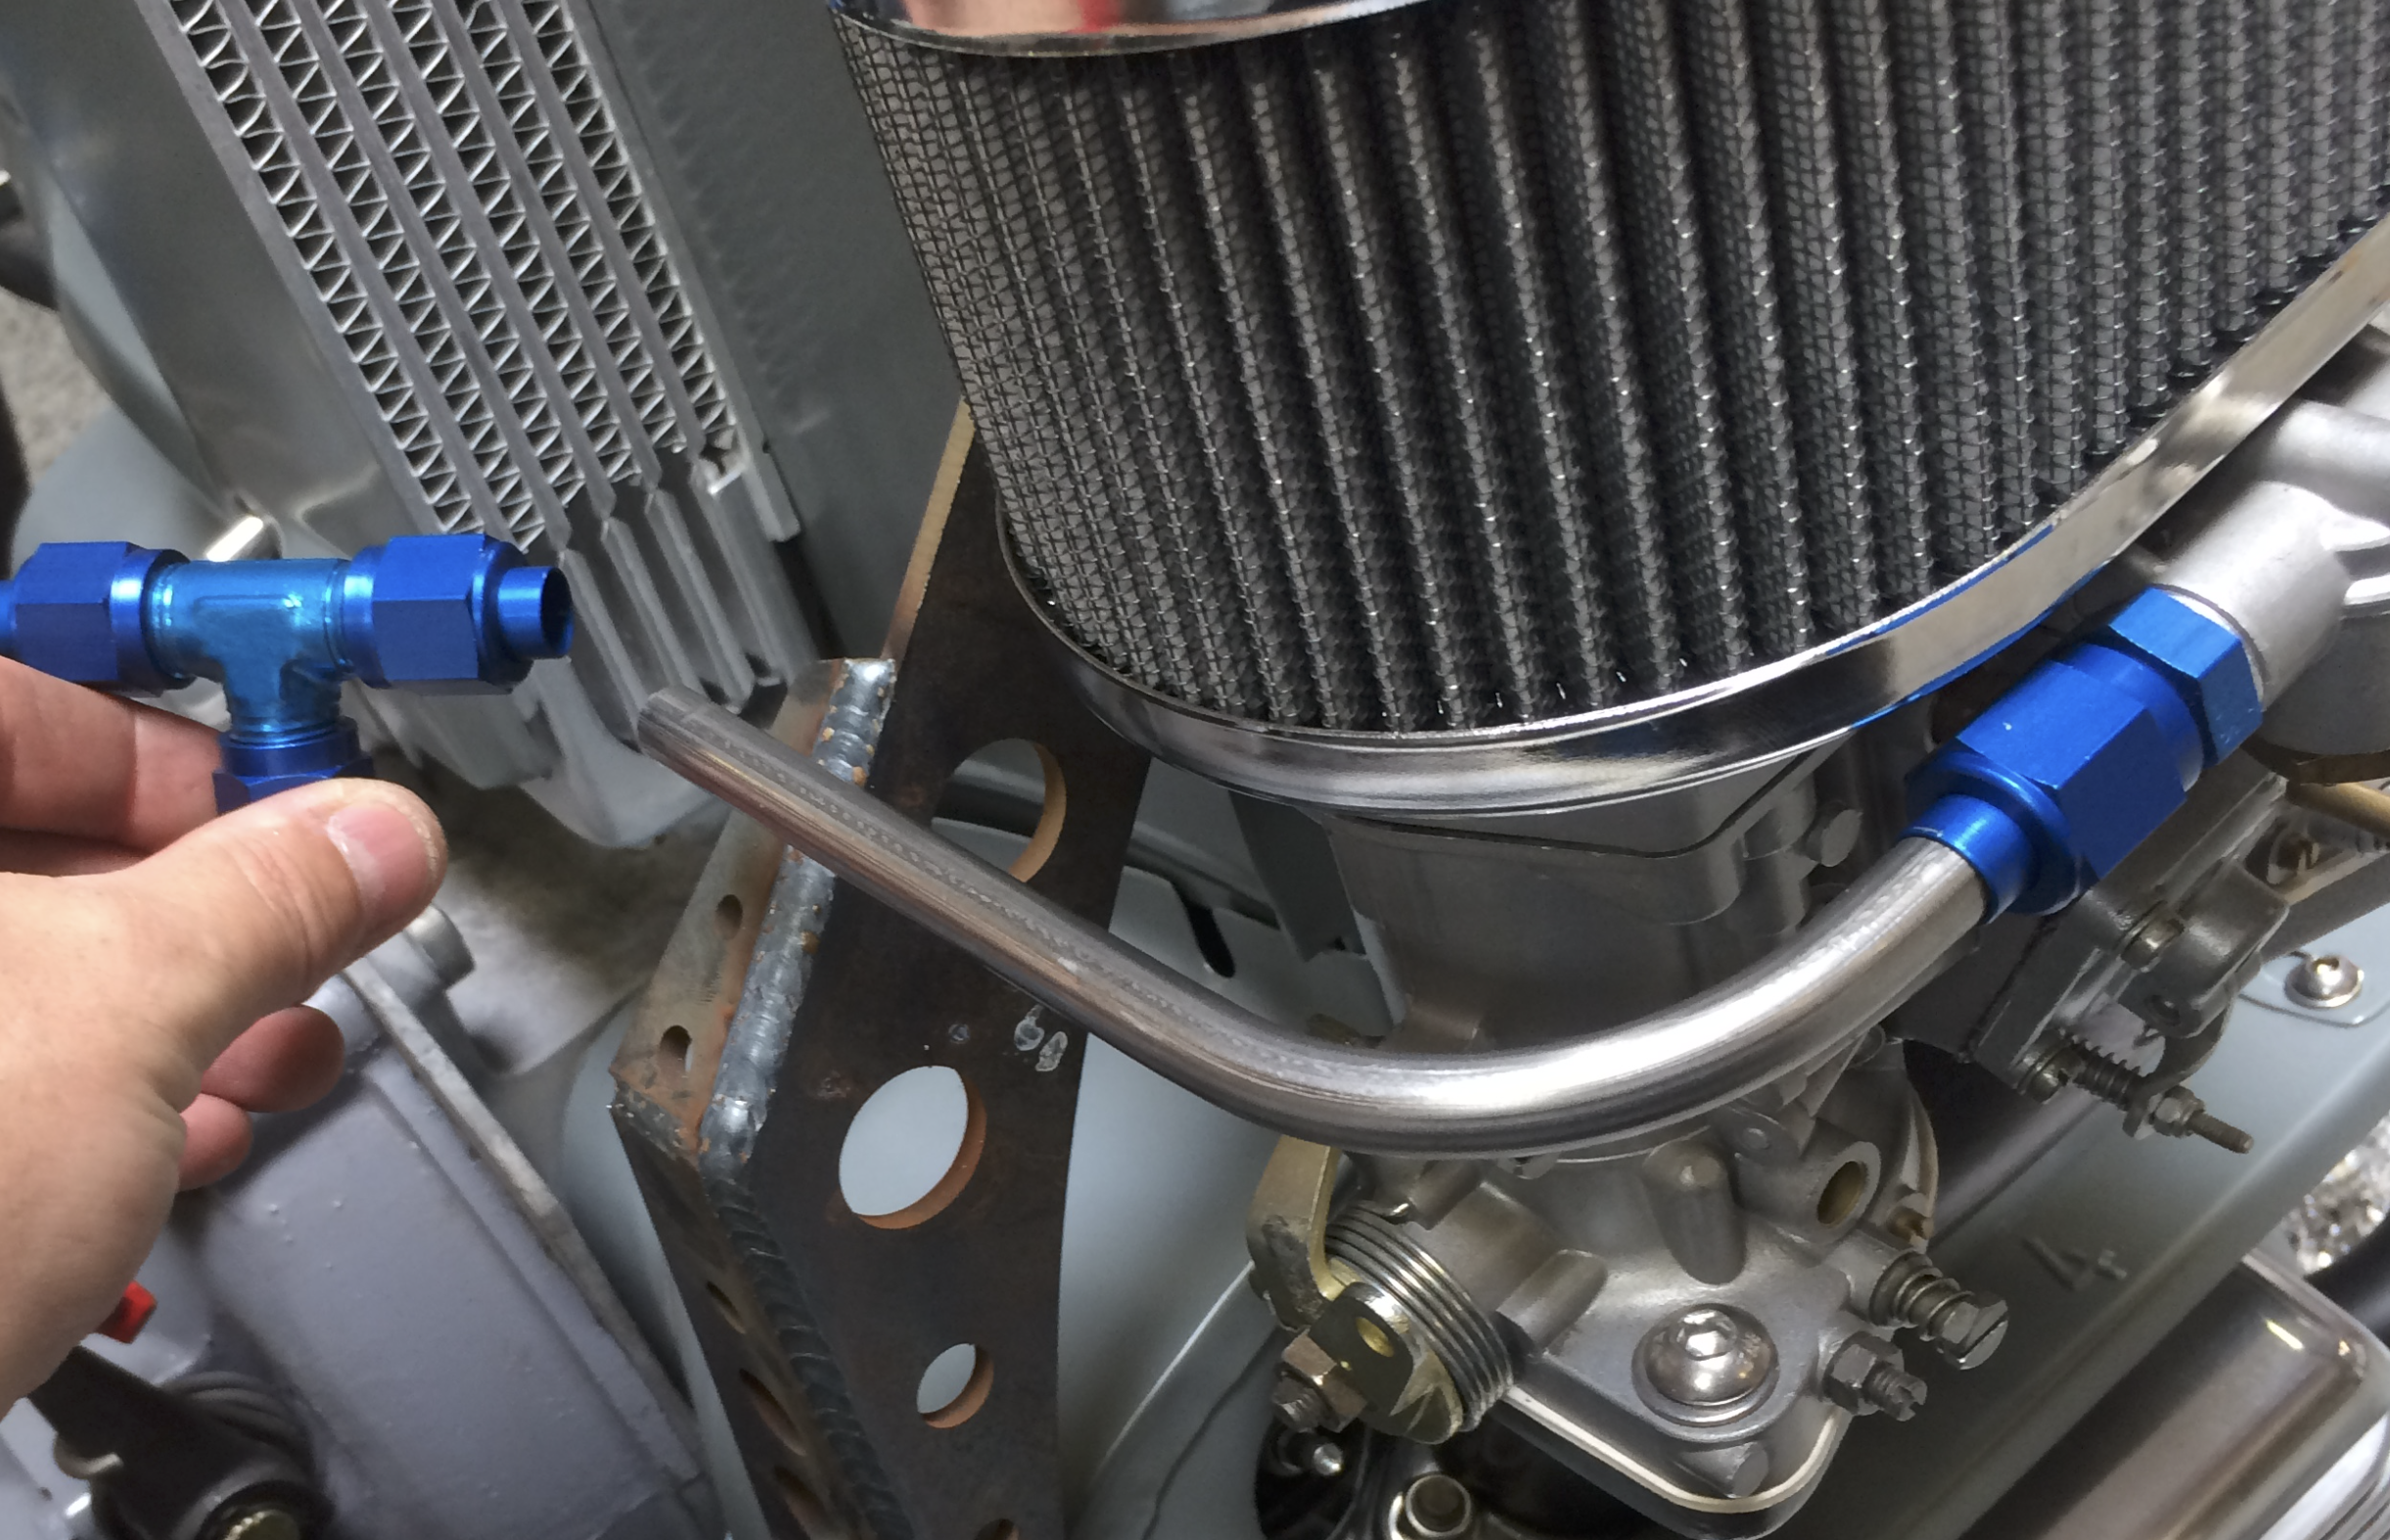
Tee · Gauge · Cross Line
- Position the AN tee at the intersection of the bulkhead vertical and the carb-side line. Mark BOTH lines at the END of the flared edge (where flare turns into thread).
- Remove both lines, cut at marks, slide B-nut + sleeve, flare, connect to tee — snug only.
- Repeat the carb-side path to the passenger side (Phase 3 procedure).
- Gauge: Teflon on the male NPT threads only; thread gauge into adapter. Place in gap between fan shroud and carb (best viewing).
- Mark carb line at flare edge, cut + flare, install gauge adapter onto carb line, snug, level.
- Long SS cross line: flare one end, install at driver tee, run across back of fan shroud to gauge adapter, mark, cut + flare, install.
Every connection in this kit is hydraulic — the 37° flare seat IS the seal. Sealant on AN threads doesn't help; it cruds up the seat and CAUSES leaks. Two exceptions: the gauge male threads (NPT — Teflon required) and the bulkhead fitting locknut (Teflon optional). Everywhere else: dry threads, seat the flare, snug + firm — not Popeye.
Flex Line & Leak Check
- Verify every fitting fits clean dry. Final-tighten all snug + firm — no over-torque (B-nut + flare = leak).
- Add a flex line from the bulkhead fitting to the chassis (connects to AK-FL-001 Chassis Fuel Line Kit). Available as a kit option.
- Electric pump (711 000 932 / 933): key ON without starting — pump runs. Carbureted no-pump: prime by adding fuel.
- LEAK CHECK: run a finger UNDER each fitting. Wet finger = leak. Re-snug or re-flare. Then start the engine and re-check warm.
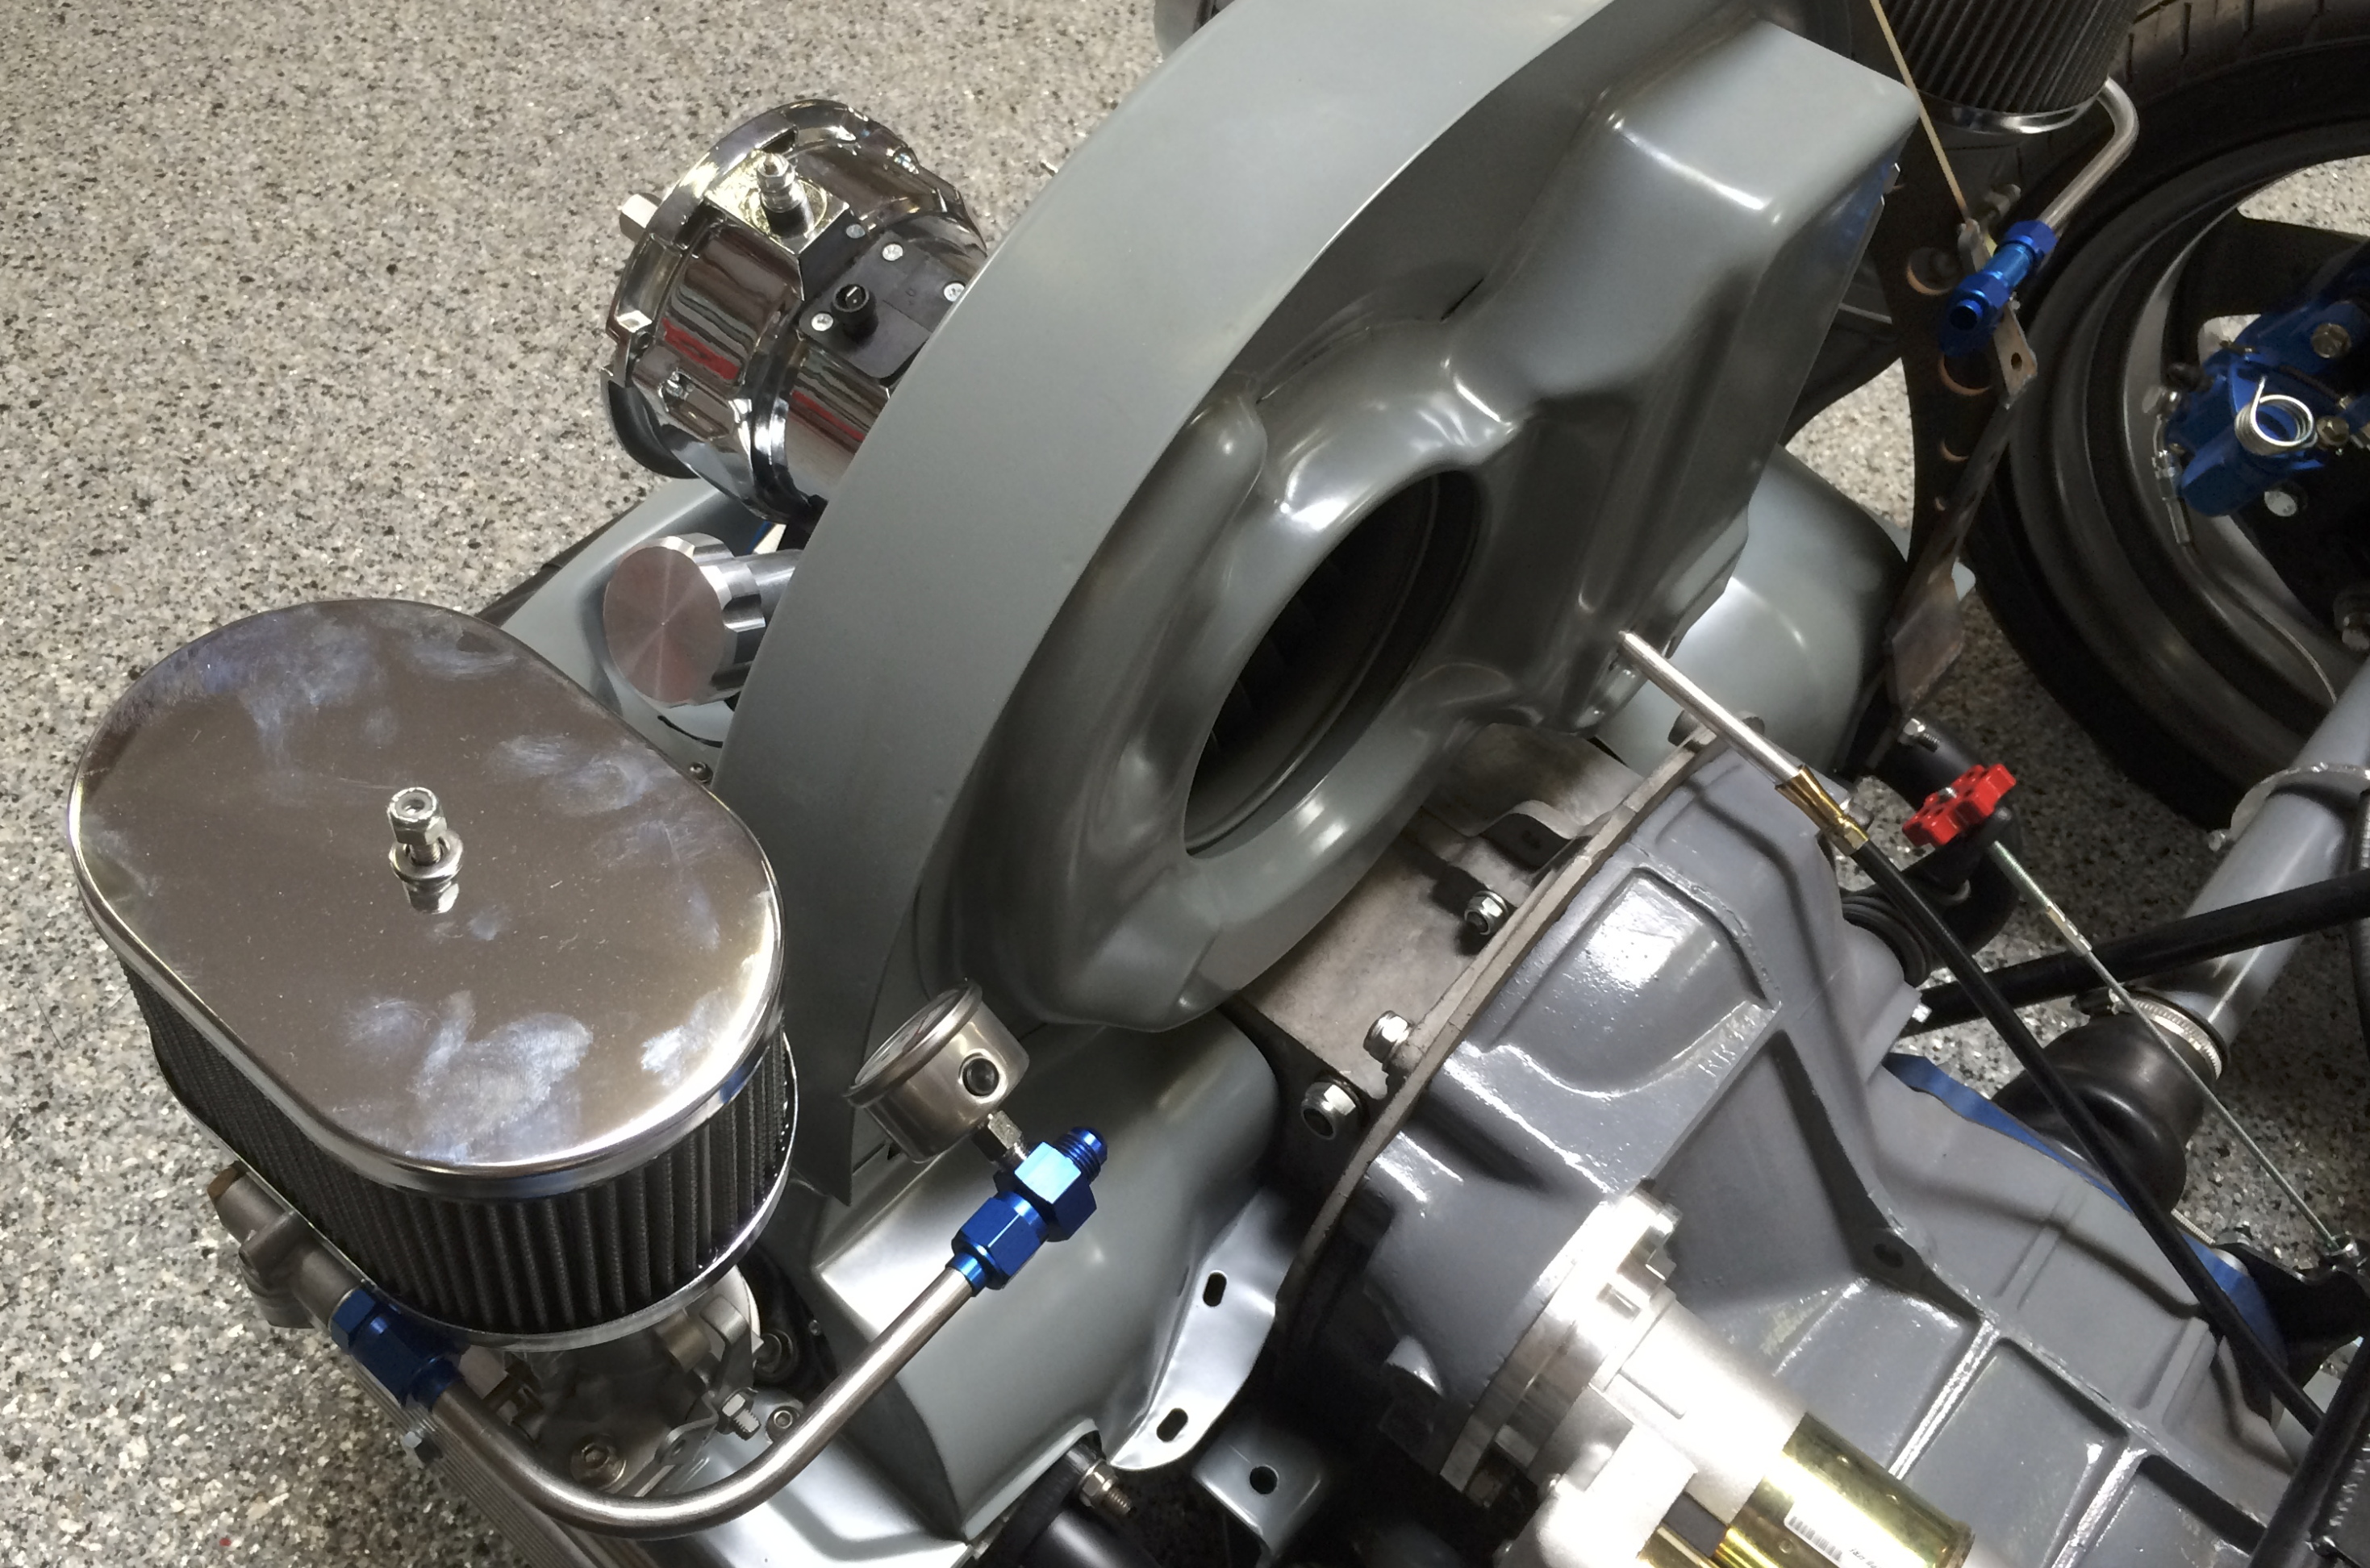
Pair With Our Chassis Fuel Line Kit
This engine-bay kit eliminates the rubber from the carbs back to the chassis bulkhead. Pair it with our Chassis Fuel Line Kit to extend the same vapor-free, AN-throughout system from the front gas tank all the way to the engine. Front to back. Fume-free. Fire-proof for life.
"this kit is the best on the market with out a doubt and I'm super pleased with it."
— Posted by craig schulz"This kit turned out really nice and is way better than the stock hoses we had before. They were are also very helpful. Not just on these fuel lines, they have always answered our questions about which products to buy for our different cars and applications. Fuel lines, brakes, wheels, etc.. If you prefer the best, I recommend buying from here."
— Posted by Jason P"This is the BEST FUEL system you can buy. There is just so much room in the engine compartment. When a pair of IDF's are added there is even less. Rubber Fuel lines and clamps work, sort of. Stainless braided lines are bulkier and work, again sort of. This KIT is the one. Give your self a break from trying one or both of the other types, it will save you in the end. This kit has every thing you need, except a flaring tool and a tube cutter. No clamps, the fuel lines and fuel pressure gauge are self supporting. It's a very clean installation. The fuel lines when assembled become a fuel manifold, no leaks nothing flopping around and plenty of room for throttle linkages, spark plug wires, and whatever you want to add."
— Posted by HootThe Questions We Get Most
Why is the 37° flaring tool so important? Can't I just use my 45° one?
No. AN fittings (every connection in this kit) seat on a 37° cone. A 45° flare will not seat into a 37° cone — you'll get fuel weeping no matter how tight you crank the B-nut. The two angles look almost identical at a glance, but the seal mates only when the angles match. Verify the angle stamp on your tool before you cut. We sell the right tool because the wrong tool ruins the kit.
Why no sealant on the AN fittings? Doesn't every threaded fitting need sealant?
Two different sealing methods. NPT (pipe thread) seals on the threads themselves — that's where Teflon goes. AN flare seals on the 37° cone meeting the flare — the threads are just clamping force. Sealant on AN threads doesn't add seal — it gets squeezed out, cruds the cone seat, and CAUSES leaks. The only sealant in this whole kit goes on the gauge's male NPT threads and (optionally) the bulkhead locknut.
Why hardline at all? Rubber works — right?
Rubber works for a while. Then it cracks, hardens, weeps fuel vapor, and at some point under heat-soak, it ignites. Modern ethanol-blend gas is harder on rubber than the 1960s fuel it was speced for. Stainless hardline never weeps, never ages out, never needs replacing. One install, lifetime peace of mind. The other reason is fire prevention — classic VW engine fires almost always start at a rubber connection or a cheap fuel filter mounted in the wrong place.
How do I pick between the six kits?
Two questions. (1) Which carbs? 48 IDA → IDA Weber kit. 40 or 44 IDF → IDF Weber kit. DRLA or 7mm Dellorto with banjo bolt → Dellorto kit. (2) Which color? Black blends with most engine bays. Blue stands out for show cars. Functionally identical — just pick what looks right with your build.
I have early 7mm Dellortos with banjo bolts — will this still work?
Yes — the Dellorto kit (711 100 000 / 711 100 001) is designed for both DRLA and 7mm Dellorto setups. SAVE your OEM banjo bolts when you remove the old fuel system. The new AN-style fittings supplied in the kit are designed to thread onto those original banjo bolts. The kit handles both configurations cleanly.
Does this work with the chassis fuel line kit (AK-FL-001)?
Yes — that's the design intent. This engine-bay hardline kit terminates at the front-tin bulkhead fitting. The chassis fuel line kit picks up there with a flex line and runs all the way to the gas tank in the front trunk. Front to back, no rubber, no clamps, no aging connections. A complete fume-free fire-proof fuel system. See the chassis kit install →
Do I need to be running an electric fuel pump?
No. The hardline kit works with mechanical pumps, electric pumps, or no pump at all (gravity feed on some setups). For leak-checking with an electric pump, just key the ignition ON without starting — the pump primes and you can finger-check every fitting. With a mechanical-only setup, prime by adding a small amount of fuel to the tank and check for weeps before starting.
Can I install with the engine in the car?
Yes. The whole install is done in the engine bay with the engine in place. You'll need clear access to both carbs (which means air cleaners off) and the front tin (for the bulkhead fitting). Body-off chassis is easier but rare — most kits get installed in completed cars during routine fuel-system maintenance.
How long does this last? When do I have to redo it?
It doesn't — that's the whole point. Stainless tubing and AN fittings don't age out the way rubber does. With normal fuel-system maintenance (filter changes, fuel-quality checks, fitting inspection annually) the hardline portion of your fuel system is a one-and-done install. Rubber-line owners replace every 3–5 years; you do this once.
What's your warranty?
If any component in the kit ever fails from a manufacturing defect, we replace it. Period. Email help@airkewld.com with a photo and your order number.
Real Humans. Real Phones. Real VW People.
Wrong-angle flares, mocked-up clearance issues, doghouse shroud surprises — these come up. Reach out before you make a cut you can't undo. We pick up the phone. We answer the email.