 US Dollars
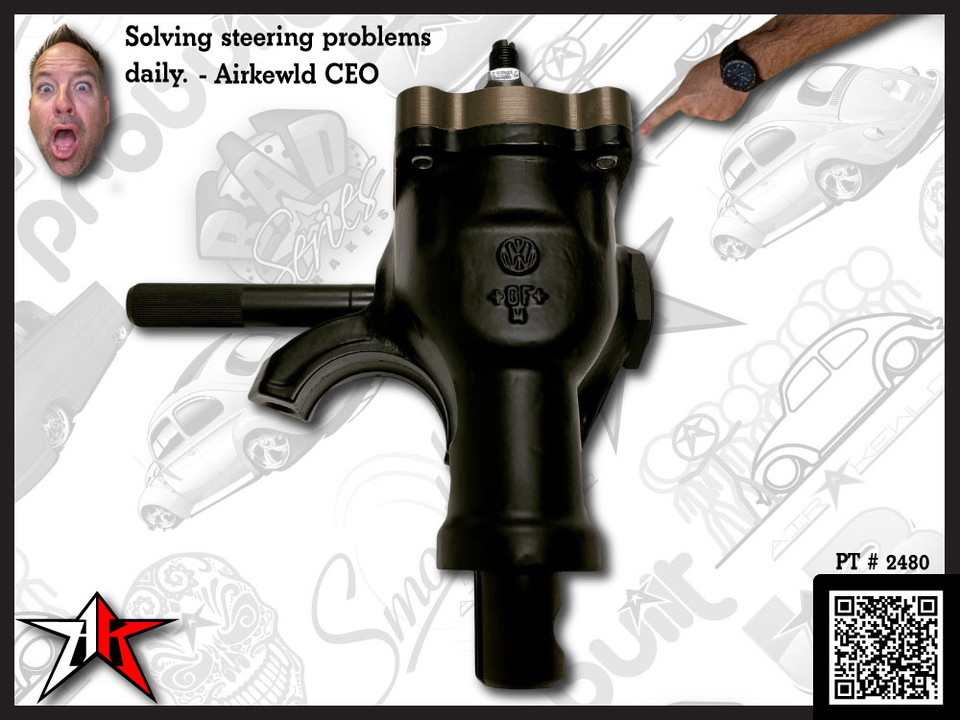
OEM PRObuilt / ECObuilt Steering Box Install
The classic VW steering reset starts here. One box, set perfect by our PROs, dropped into a system you'll re-baseline from the box outward. No adjustments. No guesswork. Just a tight, predictable, modern-feeling driver again.
“I'd been chasing 'play' in my Beetle for two years and kept blaming the box. Pete walked me through their reset checklist, I installed the ProBuilt, and the wheel feels like a new car. No more death wobble. No more correcting. Worth every dollar.”
Start Fresh. Reset The System. Drive Like It's New.
Over the years, quick adjustments get layered onto a classic VW — the alignment shop tweaked the toe, the previous owner tightened the trunk plate to mask play, the steering wheel got re-centered three times. None of it is wrong. All of it stacks up to a vehicle that drives around its problems instead of being properly set.
Our ProBuilt and ECObuilt boxes are set perfect on our bench by Pete and the PROs. The box you receive does not need to be adjusted — period. Your job is to install it, then re-baseline the rest of the system around it: connection points checked, steering wheel re-centered, alignment scheduled. That's the reset.
If you're new to classic VW steering, read this page once before you turn a wrench. You may have installed a box on something similar — but this is a complete steering reset, not a parts swap.
Every box ships filled with Corn Head Grease, sealed, set, and ready — nothing to adjust before install.
ProBuilt or ECObuilt?
Same internals. Same precision rebuild. Same Corn Head Grease. Different finish — powder coated or raw — and a different price.
Want the whole steering system in one shot? Pair the box with our ProBuilt Complete Steering System or ECObuilt Complete Steering System.
Set Once. Drive For Decades.
Will It Fit My Bug?
'62–'77 Type 1
If your Beetle or Ghia is a 1962 or later model, this is a direct one-to-one swap to the original steering box. Same mount, same shaft spline, same pitman fit. No adapter required.
'61 and Earlier
Pre-1962 cars used a different pitman arm spline. You'll need to source a '62–'68 VW pitman arm alongside the box. Everything else on the install is the same.
Both Work
The steering box is the same for link-pin and ball-joint front ends — but the connection points you'll re-baseline are different. The Reset Checklist breaks both out side by side.
What You Get
- One OEM PRObuilt or ECObuilt Steering Box — bench-set, sealed, filled with Corn Head Grease
- Factory ring pre-installed on the input shaft with split aligned to casting mark
- Easy-access grease zerks for 50K-mile maintenance
- Shipping carton doubles as your core return box (label provided)
Optional Install Kit
Stainless replacement hardware for the clamp bolts, tee bolt, and pitman bolt — so you're not reusing 60-year-old fasteners on a brand new box.
Heads up: stainless threads need anti-seize before assembly. Galling is real.

Send Your Old Box Back. Get $25.
We rebuild yours next. Cores keep classic VWs on the road instead of in landfills.
✓'62 and later VW-stamped steering boxes
✓TRW boxes with VW / Audi logos intact
✕Pre-'62 steering boxes
✕TRW boxes with logos ground off
Snap a photo of your box and text it to 1-623-518-3537. We confirm by sight before you ship.
Place your old core in the same box your order arrived in, tape it up, we email a label, drop it at any UPS Store. We audit on receipt.
PayPal · Store Credit
Don't Pre-Align The New Box To The Old Position.
The supplied steering box does not need to be adjusted. It is set perfect on our bench. If you try to line up the new box's internals to match your old steering wheel position or your existing alignment specs, you can rotate the input past the box's tight center and push the system into a looser spot. That's how a brand-new box ends up feeling sloppy on the first drive.
What you do instead: install the box square to the beam. Center the steering shaft to the box's natural center. Bolt it up. Then go re-center the steering wheel and get a new alignment. The box leads. Everything else follows.
Think of it as a reset, not a swap. The whole point of buying a PRObuilt / ECObuilt is that the box is right — so anchor the rest of the system to it, not the other way around.
- Re-center the steering wheel
- Schedule a 4-wheel alignment
- Walk the Reset Checklist top to bottom
- Re-torque after first 100 mi
Filming In Progress
Subscribe to @AirkewldVWs on YouTube — we'll drop the full ProBuilt / ECObuilt install video here when it's live.
What People Get Wrong
Decades of warranty calls compressed into five mistakes to avoid.
Pre-Aligning To The Old Position
Trying to match the new box to your old wheel position pushes the input past tight center. Install the box square — align the wheel and the car after.
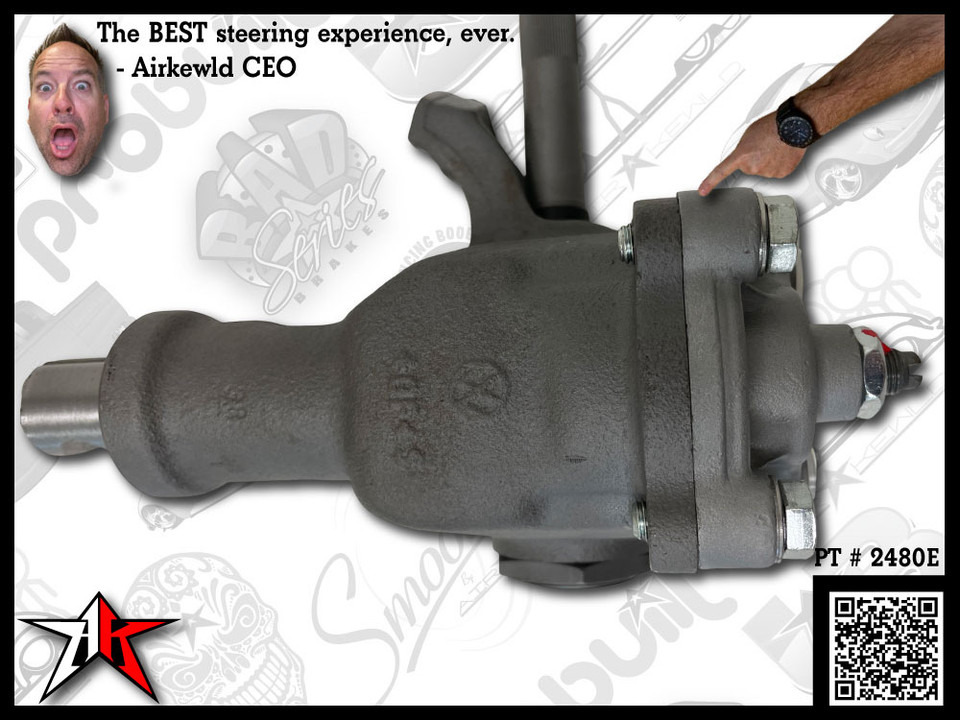
Ring Split Off The Casting Mark
The factory ring on the shaft has a split. It must align with the casting mark at the top. Off-center = slop in the box that isn't actually in the box.
Blaming The Box For System Play
If you still feel play after install, it's not the box. Walk the connection-points checklist. New parts don't mean tight joints.
Over-Adjusting The Trunk Plate
The trunk plate is “touch and stop” only. Crank it in to mask play and you'll burn the box up. Diagnose the system first, every time.
Shipping A Bad Core
Pre-'62 boxes and TRWs with logos ground off are NOT accepted. Text a photo first to confirm core credit — before you ship freight you'll pay for either way.
Tools Required · Shop The Build
Everything in this list is what we keep on our own benches. Affiliate links support the channel — same price to you.


Airkewld is a participant in the Amazon Services LLC Associates Program. As an Amazon Associate, we earn from qualifying purchases — at no additional cost to you.
Bring a friend. You'll want a second pair of hands on the steering wheel during the connection-point check.
Six Phases. Two To Three Hours. Done Right.
Prep The Car
Get the front off the ground safely and isolate electrical before you touch a wrench.
- Loosen the front lug nuts 1/4 turn with the car still on the ground.
- Jack the front of the vehicle up and place stands under the chassis.
- Remove the front wheels. Slide the wheels under the chassis as a fail-safe in case a stand fails.
- Disconnect the battery.

Remove The Old Box
Keep the pitman bolt and tee bolt — you're reusing both.
- Remove the pitman arm bolt — set aside, you'll reuse it.
- Pry the pitman arm down to free it from the box.
- Find the female steering column tee. It has a bolt that slides left to right — remove that bolt, set aside, you'll reuse it.
- Slide the tee toward the back of the vehicle until it's off the steering box shaft.
- Remove the two nuts/bolts through the steering box clamp.
- Pull the old box out of the vehicle.

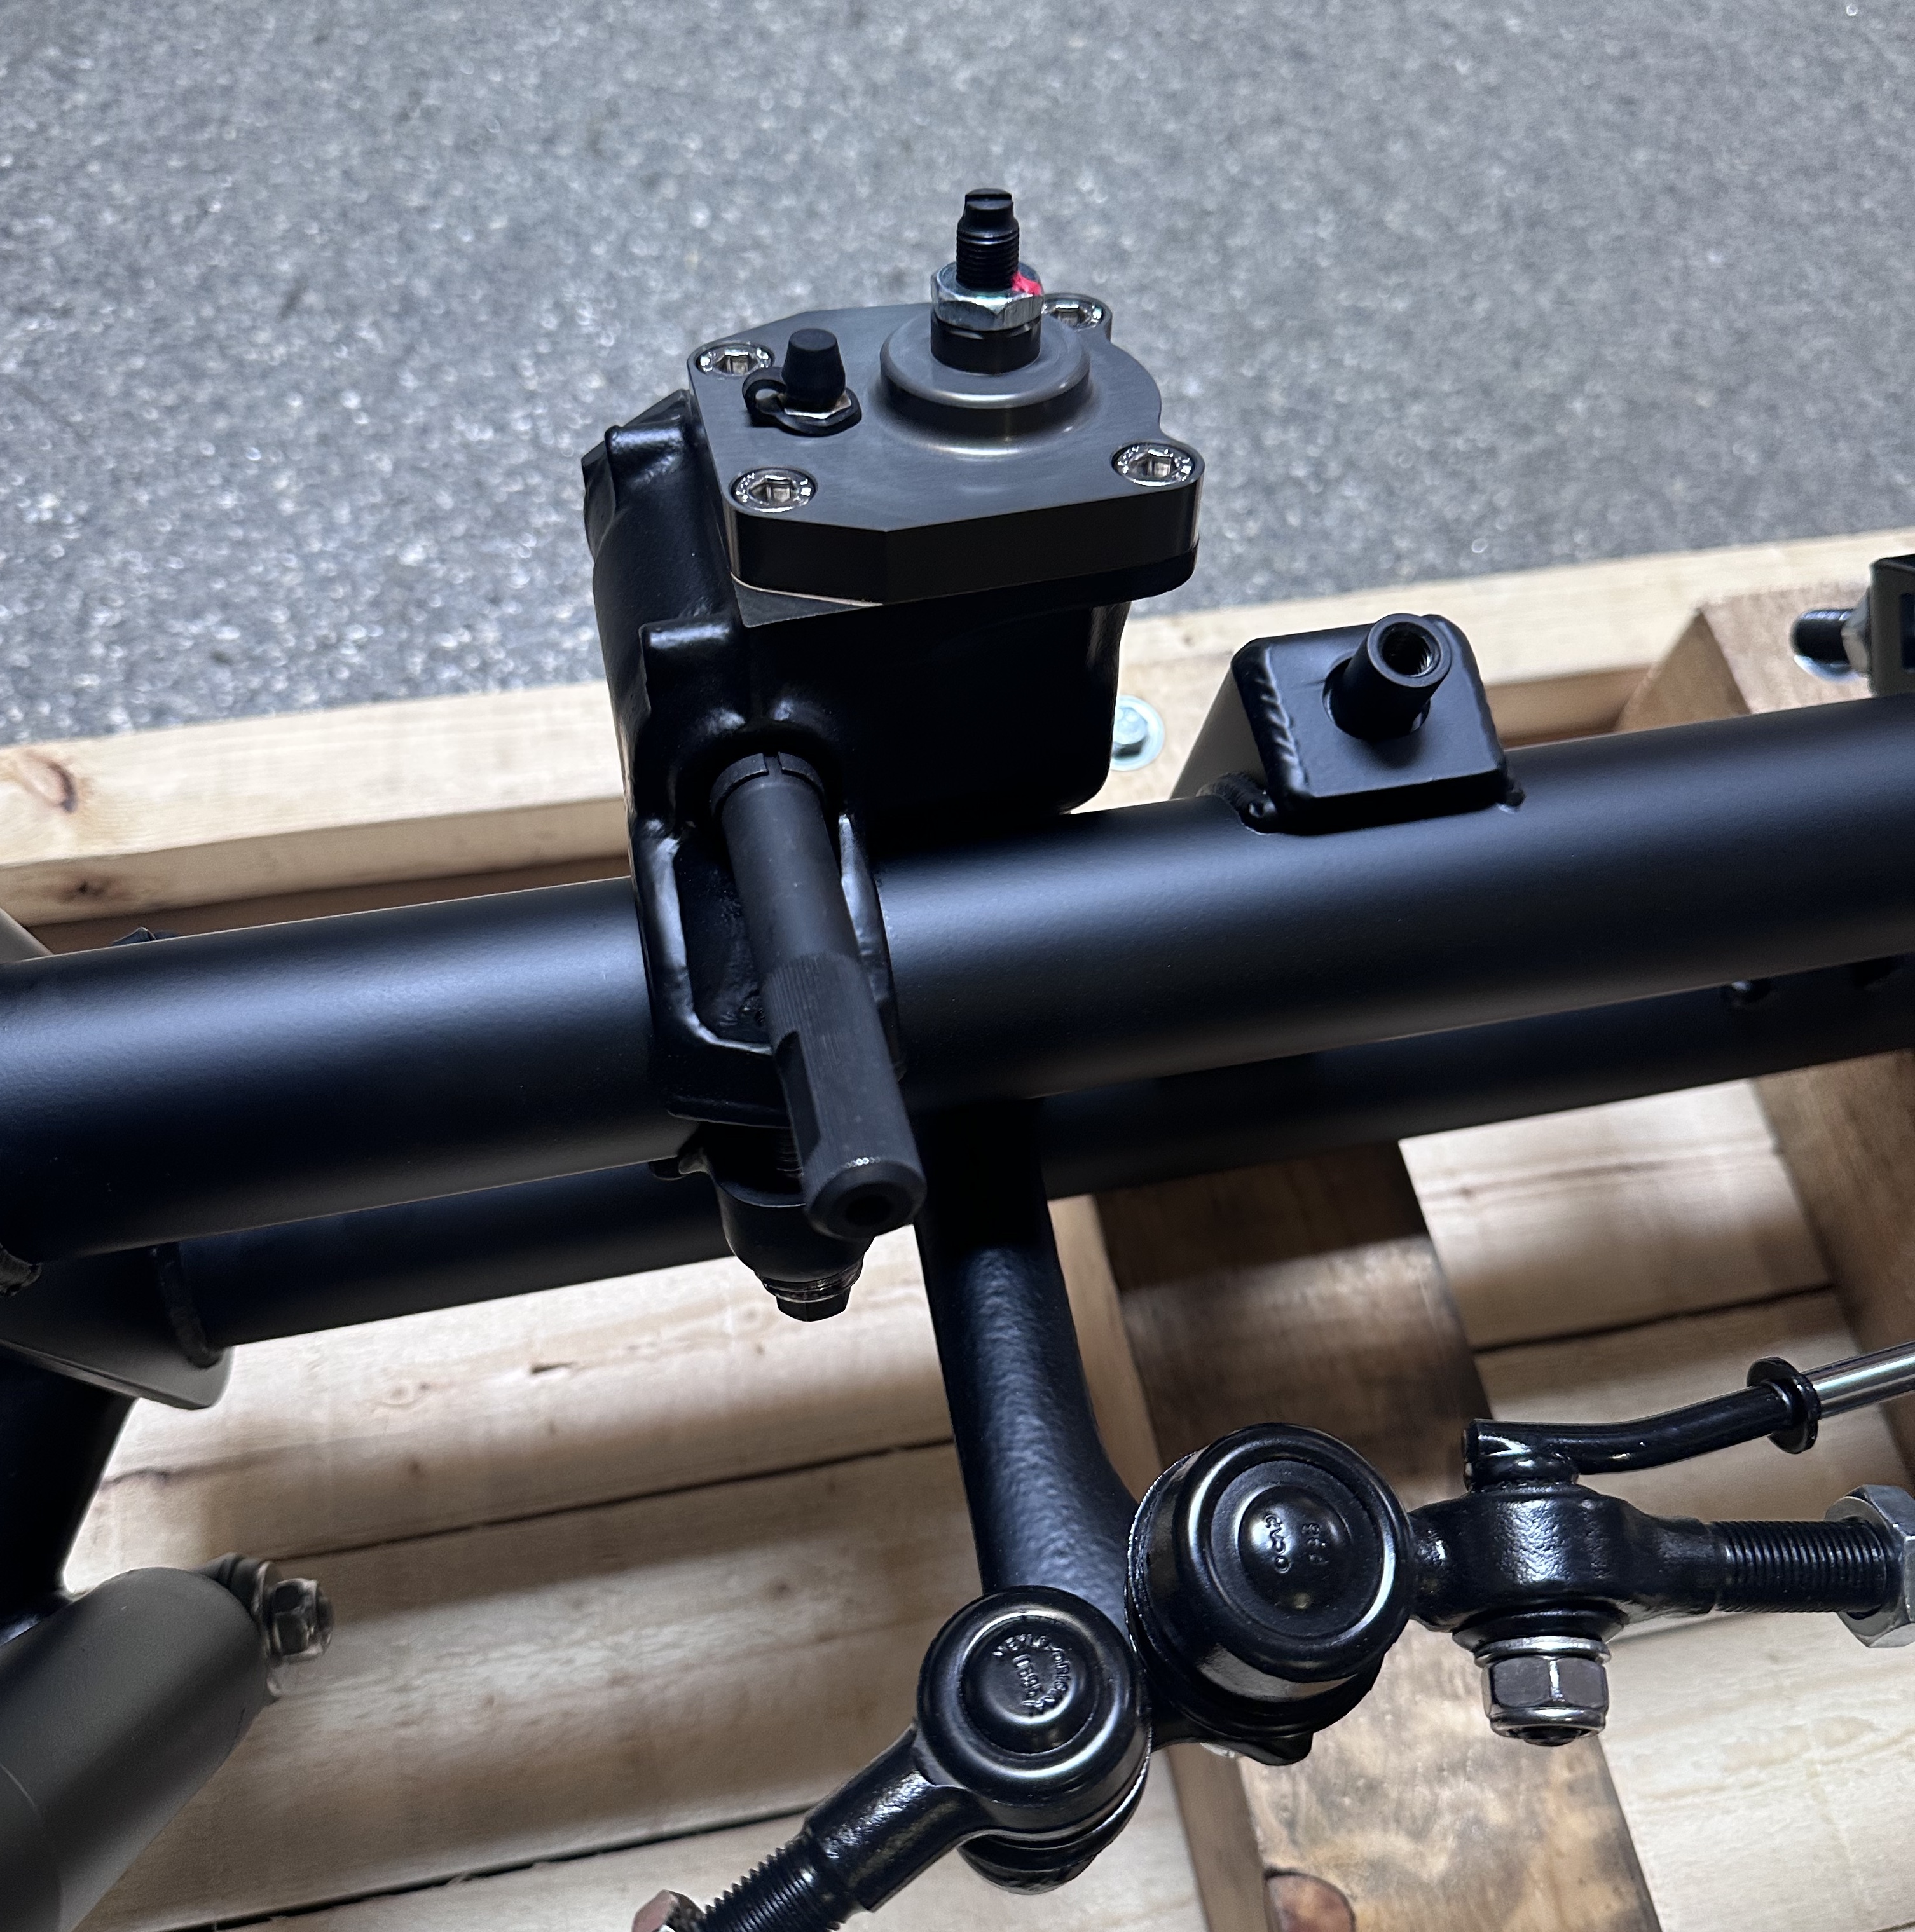
Install The New Box (Reverse Order)
Clean threads. Lube ends. Don't touch the box adjustment.
- Verify the factory ring split aligns with the casting mark at the top of the input shaft. This is non-negotiable.
- Clean and lube all bolts and ends so assembly goes smoothly.
- If using the install kit, apply anti-seize to stainless threads.
- Mount the new box in the clamp. Torque the two clamp bolts to 22 ft-lbs.
- Slide the female tee back onto the box shaft. Install the slide bolt — torque to 18 ft-lbs.
- Install the pitman arm. Torque the pitman bolt to 51 ft-lbs.

Verify Every Connection Point
This is where the “new box still has play” calls get prevented.
- Have a friend rock the steering wheel left-to-right slowly.
- Watch (and feel for) play at every joint from the steering wheel to the spindle.
- Mark anything you find — then fix it before the test drive.
- Use the full Reset Checklist — link below. Don't shortcut this step.

Button It Up
Wheels back on, lugs torqued, battery hot.
- Install the front wheels.
- Torque lug nuts to spec for your wheel / hub combination.
- Lower the vehicle to the ground.
- Reconnect the battery.

Test Drive & Reset
Short drive first — then re-center, align, and re-torque.
- Short shake-down drive at low speed.
- Re-center the steering wheel on the shaft — expect to.
- Schedule a 4-wheel alignment.
- Re-torque all the fasteners you set after the first 100 miles.
- If something feels off, call us before you adjust the box.

Stack the wheels under the chassis. Even with rated stands, a wheel under the rocker is cheap insurance you'll never regret carrying.
Verify the ring split before you bolt up. Once the clamp is torqued, you can feel slop and assume it's the box — but it's the ring.
Don't adjust the box — adjust the system. If you still feel play after the install, the answer is almost always at a tie-rod, kingpin, or ball joint upstream.
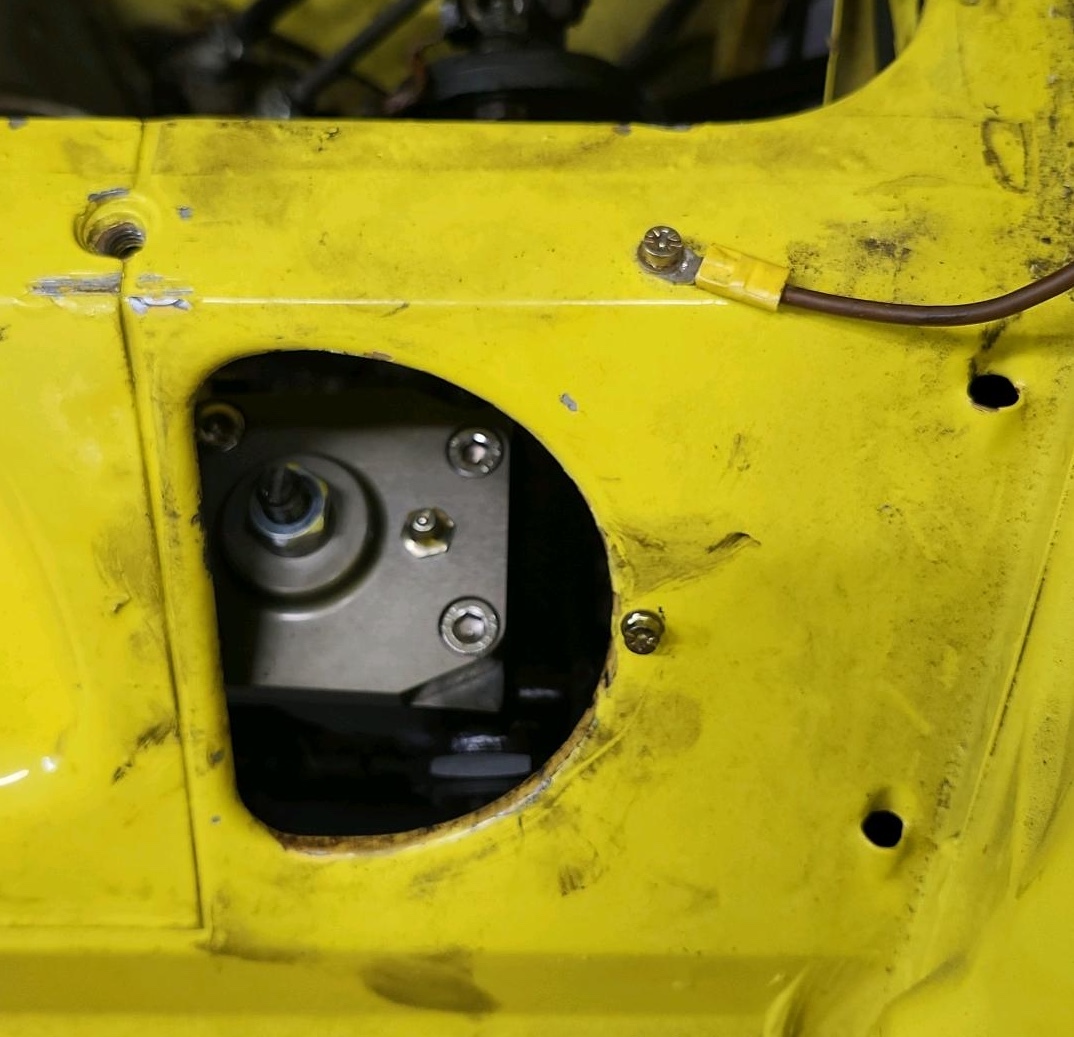
If You Have To Adjust The Box, Touch and Stop.
Your driver-side trunk has an inspection plate that exposes the steering box's center-feel adjuster. Ideally, you never touch this — we set the box on the bench before it ships.
If you have to adjust, you're only turning it in until it just touches internally. No more, no less. Cranking it in to mask play upstream will eat the box.
If you still have play after that touch — the play isn't in the box. It's somewhere else in the system.
Driver-side trunk inspection plate — access only if you have to.
The Six Joints People Miss Most.
There are more than 20 connection points between your steering wheel and the road. These six are the ones we see misdiagnosed as “a bad box” most often. The full system reset checklist covers every one.
- 1.
Rag Joint (Rubber Doughnut)
Cracked or compressed rags read as box play. Inspect, replace if torn, torque properly on both flanges.
- 2.
Tie Rod Ends (4x)
New doesn't mean tight. QC varies brand to brand — check each for creep and deflection before you blame anything else.
- 3.
Pitman To Inner Tie Rod (Bent Side)
The left inner tie rod needs to be bent to clear — deflection at this joint is common and gets mistaken for box slop.
- 4.
Kingpins or Ball Joints
Link-pin: kingpins need proper reamed fit and thrust. Ball-joint: each joint needs break-in for correct thrust. Skip = wander.
- 5.
Control Arm To Beam
Bearing or bushing creep at any of the four arm-to-beam pivots adds to wheel-rim slop. Check all four; replace any pair that's loose.
- 6.
Lugs & Tire Pressure
Wrong lugs, under-torqued lugs, or low tire pressure all show up as “steering feel” problems. Less pressure = more sway. More pressure = less sway.
The Full 22-Point Reset Checklist
Every connection point from the steering wheel to the spindle. Link Pin and Ball Joint specifics broken out side-by-side. Print it. Tape it to the garage wall.
Use A Torque Wrench. Every Time.
50K Miles. 5 To 6 Pumps. That's It.
Your OEM ProBuilt / ECObuilt steering box is filled with Corn Head Grease at the factory. After 50,000 miles, top it off — not before.
Hook a grease gun with a Corn Head Grease cartridge to one of the easily accessible grease zerks. Pump 5 to 6 pumps. Wipe the excess. That's the whole service. Nothing else.
| Grease | Corn Head |
| Interval | 50,000 mi |
| Pumps | 5–6 only |
| Access | Frame-side zerks |
Read These Next
ProBuilt vs ECObuilt
Which finish for which build — price, durability, and the case for each.
Read Guide → System GuideImproving Your Steering Experience
Beyond the box — how to diagnose and fix the rest of the classic VW steering system.
Read Guide → Reset Checklist22-Point System Reset Order
The full installation-order checklist. Print it. Use it on the floor.
Open Checklist → Product CategoryAll Steering Box Components
Boxes, couplers, tie rods, dampeners, complete systems — one stop.
Shop Steering →From The Owners Who Did The Reset
“Box went in in an afternoon. The harder part was the alignment and the wheel re-center after. Drives like a different car.”
“Pete talked me out of a third tie-rod set. Turned out my kingpins were the issue. Installed his box on top, tightened the joints he flagged — perfect.”
“Powder coat looks amazing in the trunk. But the real win is the system reset they walked me through. No more death wobble at 55.”
The Questions We Get Most
Will this box fit my 1961 or earlier VW?
Yes — with one extra part. Pre-'62 cars used a different pitman arm spline. Source a '62–'68 VW pitman arm and the rest of the install is identical.
I installed the box and I still feel play. Did you ship me a bad one?
Almost never the box. Our boxes are bench-set before they ship. Walk the Reset Checklist top to bottom — tie rod ends, rag joint, kingpins or ball joints, control-arm bushings, lugs. Call us before you touch the trunk adjuster.
Why shouldn't I align the new box to my old steering wheel position?
Because your old wheel position was the result of decades of quick-adjustments stacked on top of each other — the alignment shop, the previous owner, the last steering box adjustment. Anchoring to that history pushes the new box's input past its tight center. Install the box square. Re-center the wheel. Get a fresh alignment. That's the reset.
What's the difference between ProBuilt and ECObuilt?
Same internals. Same precision rebuild. Same Corn Head Grease. Finish only — ProBuilt gets a show-quality powder coat, ECObuilt ships raw so you can paint or run it as-is. Full breakdown in the Buyer Guide.
How much is the core credit and what cores do you accept?
$25 for cores that pass inspection. Accepted: '62-and-later VW-stamped boxes, TRW boxes with VW/Audi logos intact. Not accepted: pre-'62 boxes and TRW boxes with the logos ground off. Snap a photo first and text it to 1-623-518-3537 so we can confirm before you ship.
When and how do I service the box?
Every 50,000 miles. Grease gun with a Corn Head Grease cartridge, attach to one of the easily-accessible zerks, 5 to 6 pumps only. Wipe excess. That's it — no over-greasing, no other intervals.
Do I need an alignment after install?
Yes. Plan on a 4-wheel alignment after the install. You'll also re-center the steering wheel on the shaft. Treat the install + alignment + checklist walk as one job — that's how you get the “feels like a new car” result.
Should I install the box and the tie rod ends at the same time?
Many builders do, and we offer a ProBuilt Complete System and ECObuilt Complete System for exactly this reason. If your tie-rod ends are tired or unknown-brand, replacing them with the box is the cleanest path — one alignment instead of two.
What's your warranty?
If the box fails from a manufacturing defect, we replace it. Period. Email help@airkewld.com with your order number and a short description of what you're feeling.
Real Humans. Real Phones. Real VW People.
We've talked thousands of owners through this install. Before you crack the trunk plate or call the box bad, call us. We pick up.