
null Skip to main content
Learn / Lowering & Alignment / Lowering Series  ·  AK-LW-002 · Rev 2.0
Lowering Series · Part 2 · Swing Axle Rear

Lower the Classic VW Rear the Right Way

Measure in degrees, re-index the torsion bars, finish with the right shocks. Process — not parts — determines ride quality.
Lowering Series · Classic VW Beetle, Ghia & Type 2 Bus
Part 1
Beetle & Ghia front, parts & track width
Part 2 · You are here
Lower the rear
Swing axle rear, set in degrees
Part 3
Rear axle identification by year
Part 4
Daily driver, slammed or air
Part 5
Install guide & shim chart
How to lower the rear of a classic VW
01 · Quick answer

Set it in degrees, not inches

Quick answer
On a swing axle VW, lower the rear by re-indexing the spring plates on the torsion bars, and measure it in degrees, not inches. For most lowered cars that lands around 6.5–7″ between the top of the tire and the fender; about 2″ of tire gap left is roughly 0° camber. Finish with correctly valved lowered shocks and a 4-wheel alignment.
This guide covers swing axle cars (1949–1968 Beetle & Ghia). Not sure what you have? Part 3: Know your axle → Want to adjust height from the cab instead? See the swing axle air ride install.
02 · Why degrees

A swing axle moves in an arc

The wheel on a swing axle doesn't travel straight up and down. It swings in an arc, so a tape-measure ride height changes with tire size and offset. Camber angle doesn't. Measure it at the axle tube, the brake drum or the wheel; they're all connected, so any of them works.

Zero to about +2° of camber is considered stock ride height. Here's what the travel looks like on a 1960s swing axle car with stock spring plates and the torsion bar removed:

Point in the travel Camber Shock length
Fully extended 8° down 16.5″
Rubber bump stop starts working 5° up —
Spring plate hits the hard stop 9° up 10.5″
03 · The PRO position

Why we skip drop plates

Drop spring plates are the quick way to lower the rear, and the one we tell clients to skip. The transaxle has an internal pivot point as well as the outer one. Drop plates only change the outer point. The inner joint still runs out of travel, and it hammers the transmission components every time it does.

With 1.2″ drop plates Camber Shock length
Fully extended 6° 14″
Fully compressed 11° 9.75″
Around 11° up, the transaxle's internal joint runs out of travel. Push past it and the engine starts twisting in its mounts. That's with mild 1.2″ plates; 3″ and 4″ plates are worse. Drop plates also cause problems with e-brake cables, drum brake setups and shock fitment. Just because someone makes them doesn't mean they won't hurt something else.
04 · How it works

The inner and outer spline trick

The torsion bar has 40 splines on its inner end and 44 on its outer end. VW did that on purpose. One inner spline moves the spring plate more than one outer spline, so moving one of each in opposite directions gives you a fine adjustment.

Move Change in spring plate angle
One inner spline (360° ÷ 40) 9.0°
One outer spline (360° ÷ 44) 8.2°
One inner + one outer, opposite directions ≈ 0.8°

That's roughly a 1/4″ change in ride height at a time. The factory service manual lists the install angle for stock bars (8.5° for 26 mm bars, for example). For other bar sizes, print the Sway-A-Way torsion chart.

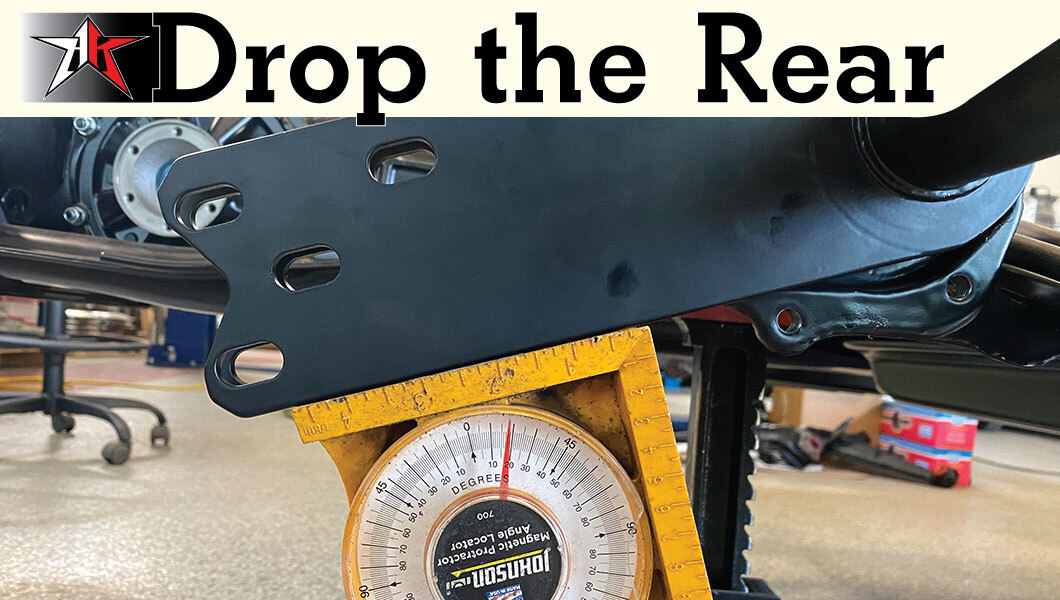
Use an angle finder, not a tape measure. A spring plate that isn't fully seated wobbles, so tape-measure readings are close to useless here.
05 · PRO tip

Measure under load

Setting the spring plate angle on the bar is perfect for a new car with no wear. Real cars have relaxed torsion bars, and rarely evenly. Put a jack under the spring plate and take your degree reading just as it starts to lift the car.

Why it matters: a 500 lb mail carrier who drives his '64 Beetle 100 miles a day wears that side far more than a 100 lb driver doing 10 miles a day. Static readings look identical. Under load they can be very different.

Account for rake. The book angle assumes a level car. Either level it, or measure the frame tunnel as the car sits on stands and work it in.

Example Angle
Target (relative to the car) 6°
Frame tunnel rake on stands 3.5°
Spring plate reading to aim for 2.5° down
06 · Procedure

Re-index the spring plates

1
Raise the car level and support it
Stands under the front and rear torsion tubes, four if you have them. Pull the rear wheels.
2
Take your baseline
Measure the frame tunnel angle and each spring plate under load. Write both sides down.
3
Mark the spring plate to the axle
The elongated holes set rear toe. Mark them so it goes back exactly where it was.
4
Unbolt the axle from the spring plate
Three large bolts per side; use box-end wrenches so you don't round them. Note how the bump stop mounts, and any anti-sway linkage. Swing the axle back; loosen the e-brake cable balance bar inside the car if you need slack.
5
Remove the cover plate
Four bolts. Under it is the rubber bushing and the splined end of the torsion bar.
6
Ease the spring plate off the stop
It's under load. Jack under the plate just enough to lift it off the stop, lever it out past the stop, then lower the jack slowly. Never let it drop.
7
Re-index to your target angle
Pull the plate and bar out until free, and use the inner/outer spline combination to reach your number. Confirm the bar slides in by hand; if it doesn't, this job gets miserable.
8
Lube and fit the bushings
Four different bushings, one of each: thick side up, two hole sizes for inner and outer. Use silicone oil, never grease or engine oil on the rubber.
9
Seat it and close it up
Start the cover plate bolts first, then jack the plate up over the stop. Push it the rest of the way home (a 2x4 and a sledge works; safety glasses on), and tighten the cover evenly.
10
Match the other side
Get the sides close, or the car will sit lower on one corner.
11
Reattach the axle
Line up your toe marks. Refit the bump stop. Start the bolt where the plate and axle are closest first; the plate twists as you snug it.
12
Finish and settle
Reconnect and adjust the e-brake (3–4 clicks). Wheels on, set it down, roll it back and forth to settle, then re-check.
Professional 4-wheel alignment is required after lowering. It keeps the rear wheels square to the front and helps stop highway wander.
Safety: a spring plate under load can break an arm or leg. Use a spring plate tool and keep clear of its path.
07 · Finish it right

The parts that make it perfect

You can lower the rear with nothing but labor. To make it ride right, finish with these:

Must-have
Lowered Rear Shocks
Lowering changes the shock's travel. The right shock means no more bottoming out.
MyFit
Lowered Adjustable Rear Shocks
Your idea of soft isn't mine. With an adjustable shock, your fit is a twist of a knob away.
Hardware
Stainless Spring Plate Cap Kit
Fresh, correct fasteners for the cover plates you just had off.
Go further
Swing Axle Rear Air Ride
Set ride height from the driver's seat, no re-indexing.
08 · FAQ

Rear lowering questions

How low can I go before it hurts the transmission?

Around 11° of up travel, the transaxle's internal joint runs out. That's the hard limit no part changes.

Should I use drop plates?

We don't recommend them. They only move the outer pivot, so the inner joint still runs out of travel and hammers the transmission. Re-index the torsion bars instead.

Do I need new shocks after lowering?

Yes. Lowering changes the shock's travel. Lowered shocks stop it bottoming out; adjustable ones let you tune the ride.

Do I need an alignment?

Yes, a 4-wheel alignment. It squares the rear wheels to the front and helps with wander. See Classic VW Beetle Alignment.

Does this work on IRS cars?

This guide is written for swing axle cars. Ask a PRO about your IRS car before you start.
Process — Not Parts — Determines Performance
Review Your Cart Close Close
Your cart is empty

Recently viewed

Social

Recently Viewed Recently Viewed
Social Media Social Media
Top Top