 US Dollars
Chassis Fuel Line Kit Install
Stock 6mm hardline retired. 3/8″ -6AN braided soft line in. NHRA-approved 4-layer hose, Viton inner bore, ethanol-safe, fume-free for life. More fuel to your carbs — no more starvation diagnoses that turned out to be the line.
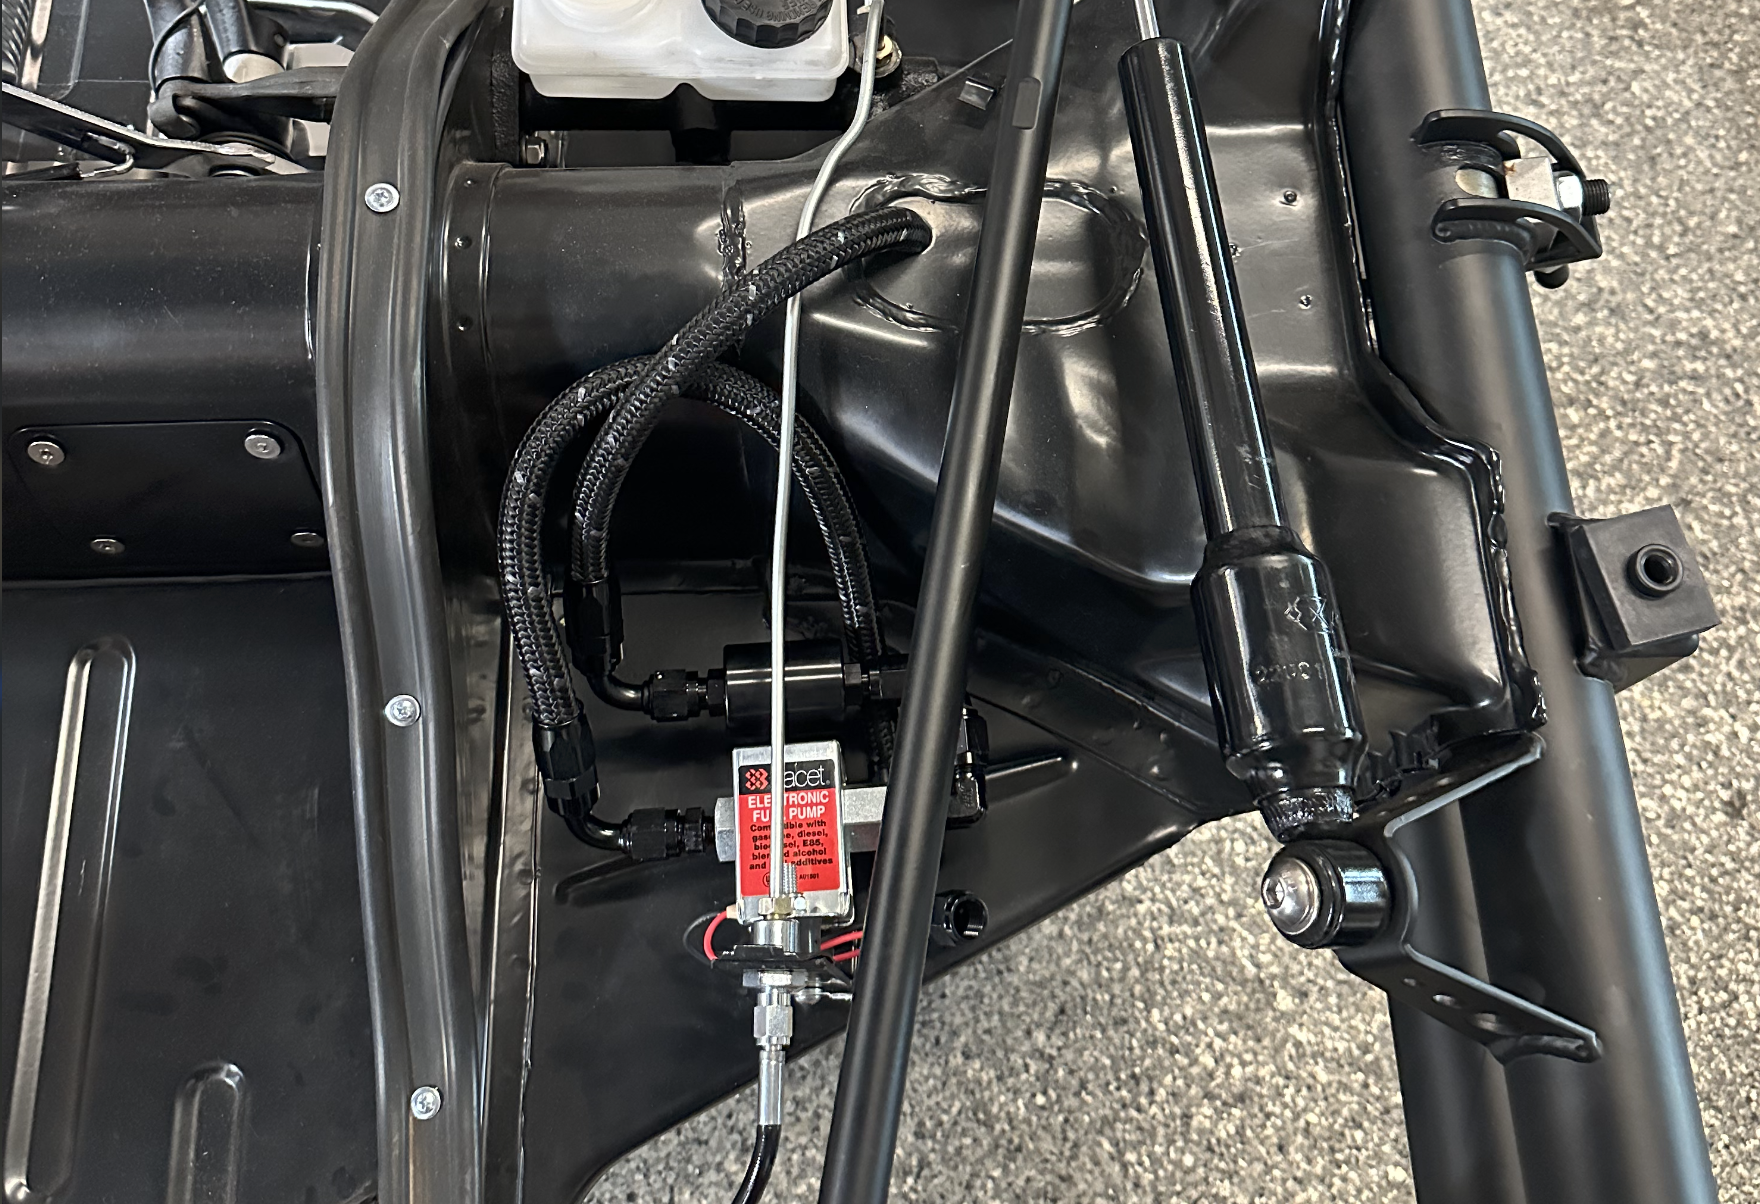
From 6mm Stock to 3/8″ -6AN. The Carb Wasn't the Problem.
Modern carbs — Webers, Dell'Ortos, the IDF/IDA family — flow more fuel than the 6mm stock line was ever spec'd for. Add ethanol-blend pump gas (which the original rubber lines were never designed for) and you've got a stack of small problems that show up as carb symptoms: stumble at WOT, lean cruise, hot-soak vapor lock, smell of fuel under the hood. People rebuild carbs. Replace jets. Curse Webers. The carb wasn't the problem.
3/8″ -6AN is the upgrade. More fuel to the carbs. NHRA-approved Viton inner bore that doesn't permeate (no more fuel smell). Stainless braid for vacuum and pressure handling. Nylon outer for chafe. Once it's in, it's in for life.
Install once. Fume-free fuel delivery for life. Letter rip tater chip.
Four kits, one install pattern. Pick the one that matches your build below.
The Numbers You Need Before You Order
Kits
4 TiersBasic · Filter · Pump · Deluxe
Hose
-6AN Braided4-layer · NHRA approved
Pump
Facet 40177NStocked at every parts store
Filter
40 MicronService yearly
Four Layers · 33% Lighter Than Stainless Braided
A racing hose engineered for the way modern fuels actually behave. NHRA approved. SAE J30 R9 rated. Compatible with everything from pump gas to E85 to methanol.
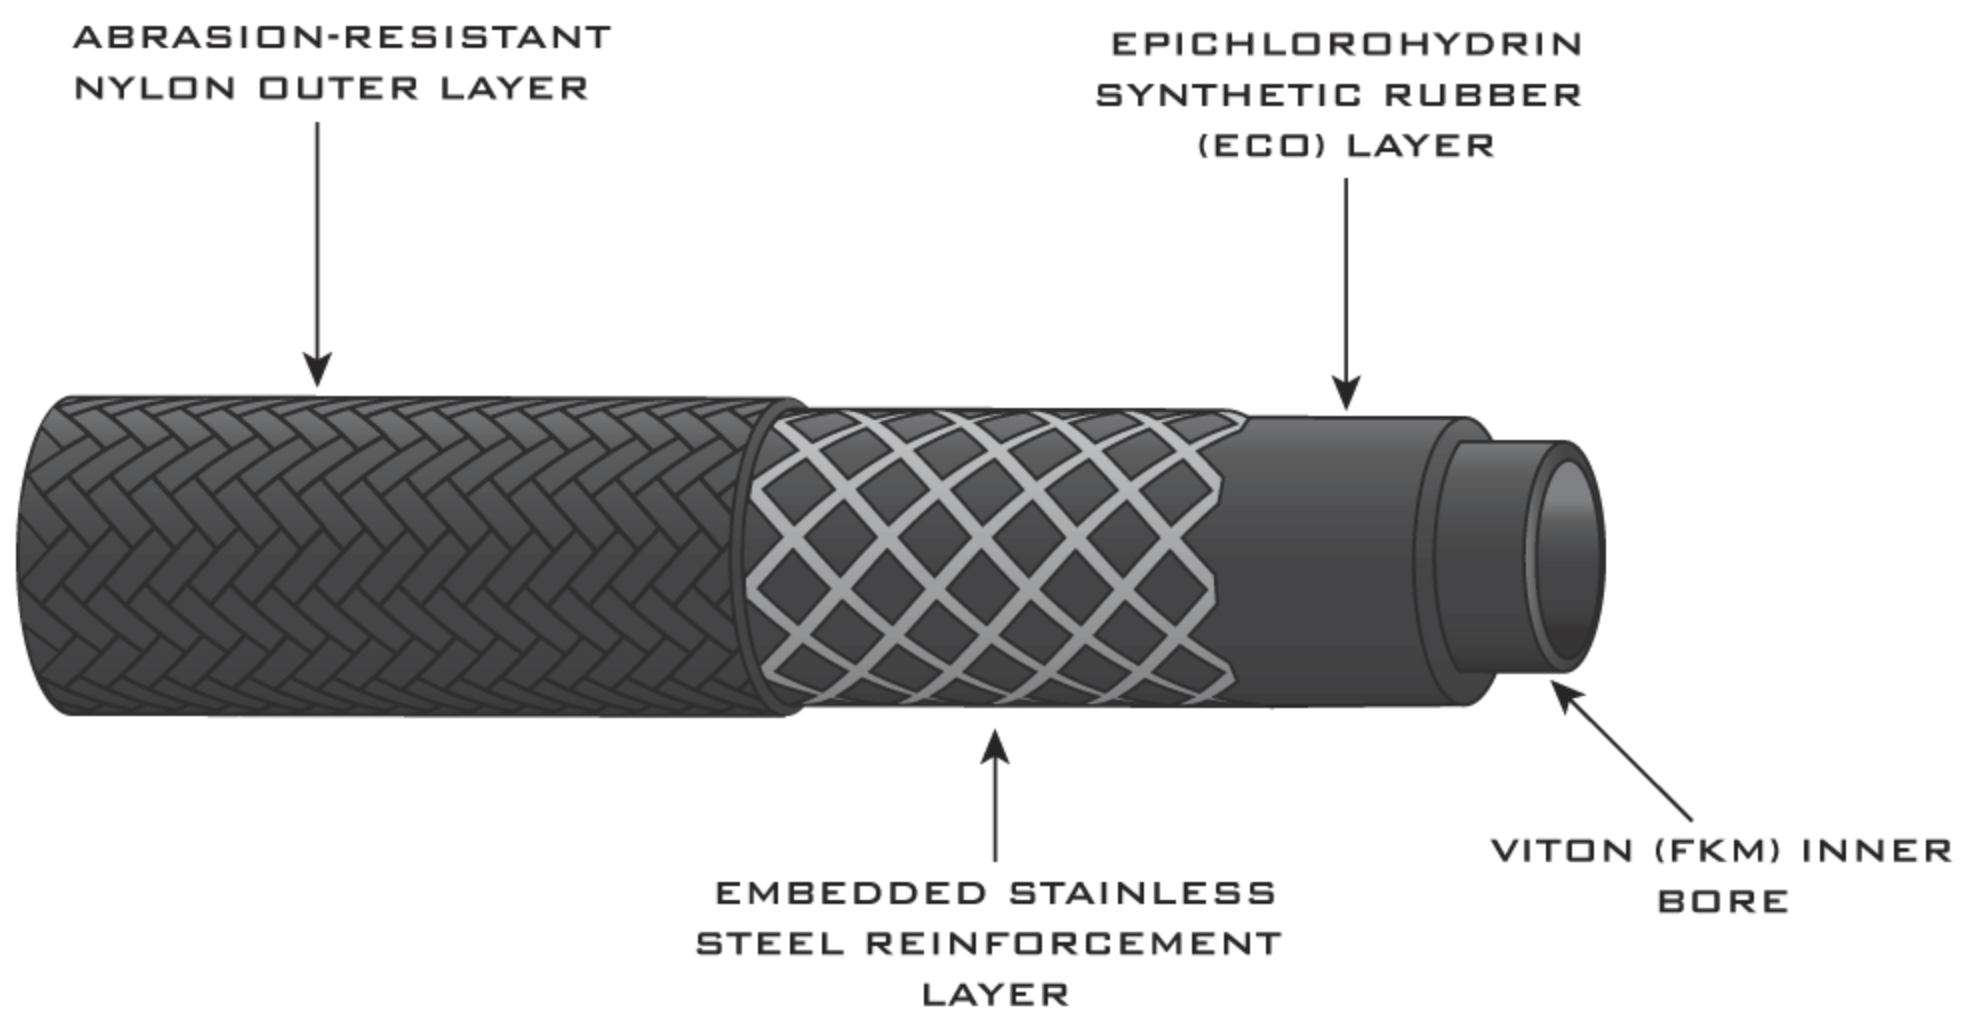
Abrasion-Resistant Nylon
Lightweight outer cover that protects against chassis chafe and tunnel debris. Black with gray stripes — visible braid pattern.
Stainless Steel Reinforcement
Embedded inner braid handles vacuum and pressure load — rated to 1,000 PSI burst. The strength of stainless without the weight penalty.
Epichlorohydrin (ECO) Rubber
Synthetic rubber insulator between the steel braid and the fuel-bearing inner bore. Holds shape, resists pressure cycling.
Viton® (FKM)
Smooth-bore fluoroelastomer with high fluorine content. Will not deteriorate, dry, harden, or permeate (emit fuel vapor) — even with E85.
Hose Specifications
Fluid Compatibility
Certified for: gasoline, racing fuels, ethanol-based fuels (E85+), diesels & bio-diesels, methanol, ethanol/gasoline mixtures, engine oil, gear oil, transmission fluid, coolants, water, air, vacuum.
Use ONLY with: traditional reusable AN fittings. NOT for use with push-on style barbed fittings.
Do NOT submerge in fuel or use inside fuel tanks.
Four Kits · One Install Pattern
Pick the kit that matches what's already on your car. The hose, fittings, and routing are identical across all four — the upgrade tiers just add a filter, a pump, and a ready-to-bolt-in mounting solution.

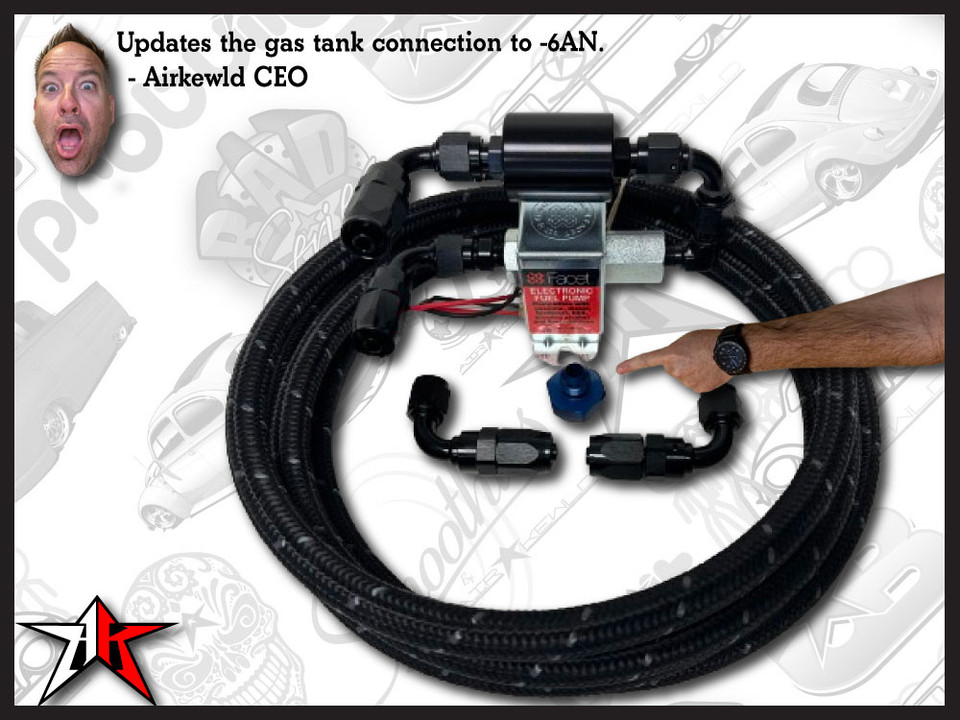
Soft Lines + Tank Fitting
- Tank outlet fitting (factory thread → -6AN)
- Pre-cut -6AN braided line
- (2) -6AN 90° fittings
+ Inline Filter
- Everything in 711 000 930
- 40-micron serviceable inline filter
- (2) more -6AN 90° fittings
+ Electric Facet Pump
- Everything in 711 000 931
- Facet 40177N electric pump
- All required pump fittings
- You supply: wiring + mounting
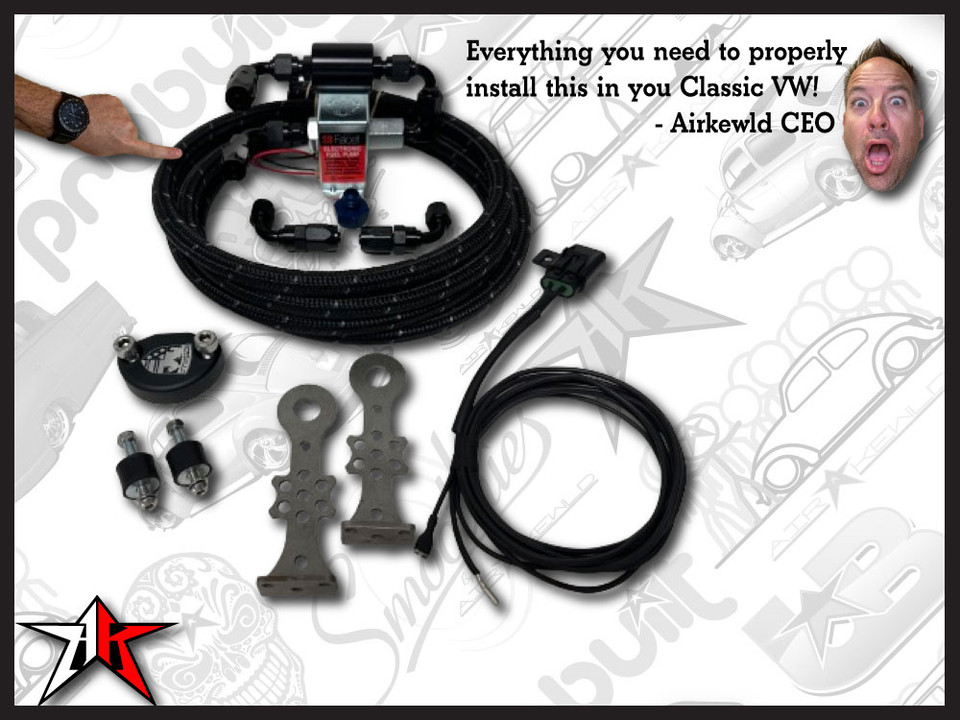
Drop-In, Done
- Everything in 711 000 932
- Replacement brake-line stands w/ pump mount
- Rubber pump isolators (quieter)
- Mil-spec wiring harness + inline fuse
- Stainless hardware
- Fuel-pump block-off plate
The Whole Install · Filming in Progress
We've recorded this kit's install end-to-end — the edit drops soon. In the meantime, every step is in this guide and our team picks up the phone if you get stuck.
Subscribe to Airkewld on YouTube for the alert when it goes live.
The Top 5 Install Mistakes — And How to Avoid Them
These five turn into months of phantom carb problems if you skip them. Get them right up front and the kit installs once and lasts.
Hardline Exits Not Clear
The factory hardline runs INSIDE the chassis tunnel — it MUST be removed (or trimmed and pushed inside the exits) before the new braided line can route through. Free, clear front + rear exits are non-negotiable.
Routing Against Shift & Cables
Inside the tunnel the new line runs near the clutch cable, accelerator cable, and shift linkage. Route AWAY — vibration over miles will rub through the braided sleeve and weep fuel.
Skipping the Line Blow-Out
Tape the leading end while fishing (debris guard) AND blow the line out with compressed air before any final connection. A grain of chassis grit kills a 40-micron filter inside a week.
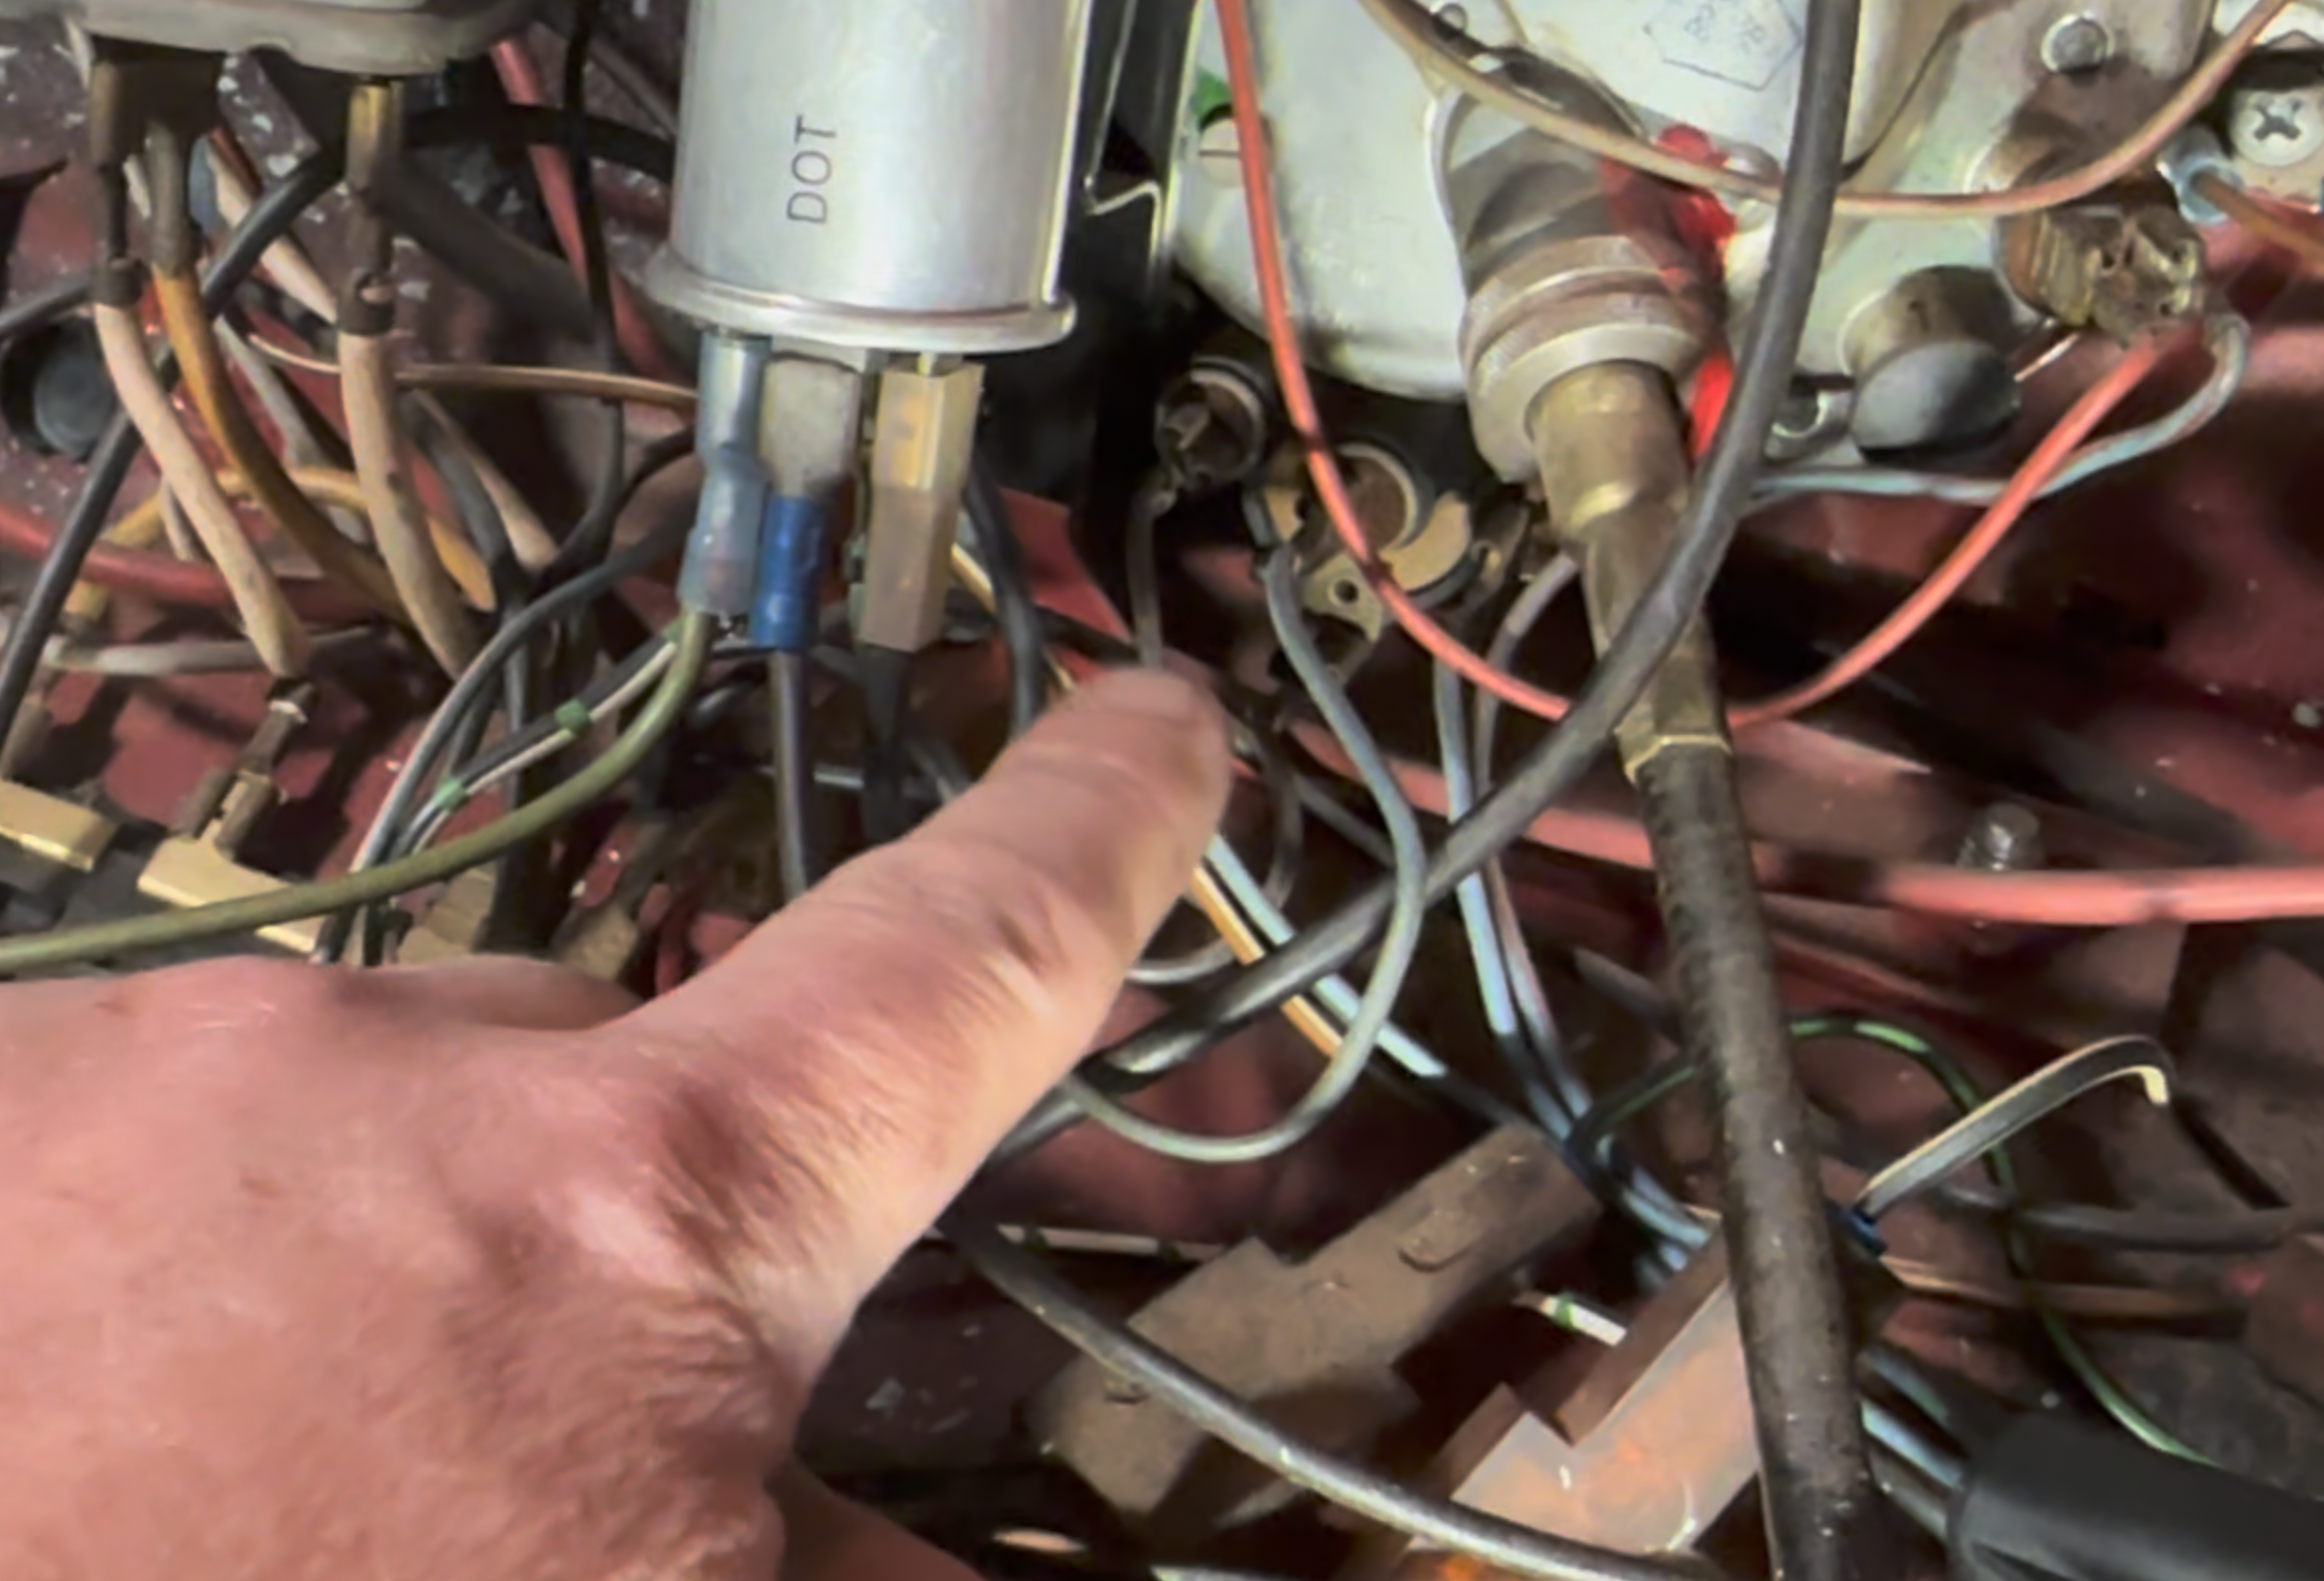
Filter Installed Backwards
Every filter has a flow-direction arrow. Tank → pump → filter → carb. Backwards = restriction = fuel-starvation symptoms that mimic carb problems for months before you find it.
Sealing the Wrong Fittings
Thread sealant goes ONLY on the connections going INTO and OUT OF the fuel pump. Every other fitting is hydraulic -6AN — sealant on those crud up the seat and CAUSE leaks. Snug + firm — no need to go all Popeye on it.
Tools Required · Shop the Build
Every tool below is what we keep on our own benches. Affiliate links support the channel — same price to you.

Jack & Jack Stand
Rear of the car comes up for the soft-line disconnect. Driver-side wheel under the chassis as a failsafe.
Shop on Amazon
Socket Set
For tank fasteners, hose-clamp screws, brake-line stand bolts (711 000 933), and pedal/shifter access if needed.
Shop on Amazon
AN Hose Cutters
Square cuts every time. A clean cut is what makes the AN fitting seal — angled or frayed = leaks.
Shop on Amazon
Tape (Debris Guard)
Wrap the leading end of the hose during the fish — keeps tunnel grit out of the inside of your line.
Shop on Amazon
Drill Motor (711 000 932 / 711 000 933)
For pump mounting holes (711 000 932) or for drilling out factory spot welds when swapping the brake-line stands (711 000 933).
Shop on Amazon
Thread Sealant
PUMP PORTS ONLY. Never on -6AN fittings — those are hydraulic and sealant on them causes leaks.
Shop on Amazon
Compressed Air
Blow the line out before EVERY final connection. Skip this and a 40-micron filter clogs in a week.
Shop on Amazon
Permanent Marker
For marking cut lengths on the hose and pump-mount drill points. Silver Sharpie shows on braided sleeve.
Shop on AmazonAirkewld is a participant in the Amazon Services LLC Associates Program. As an Amazon Associate, we earn from qualifying purchases — at no additional cost to you.
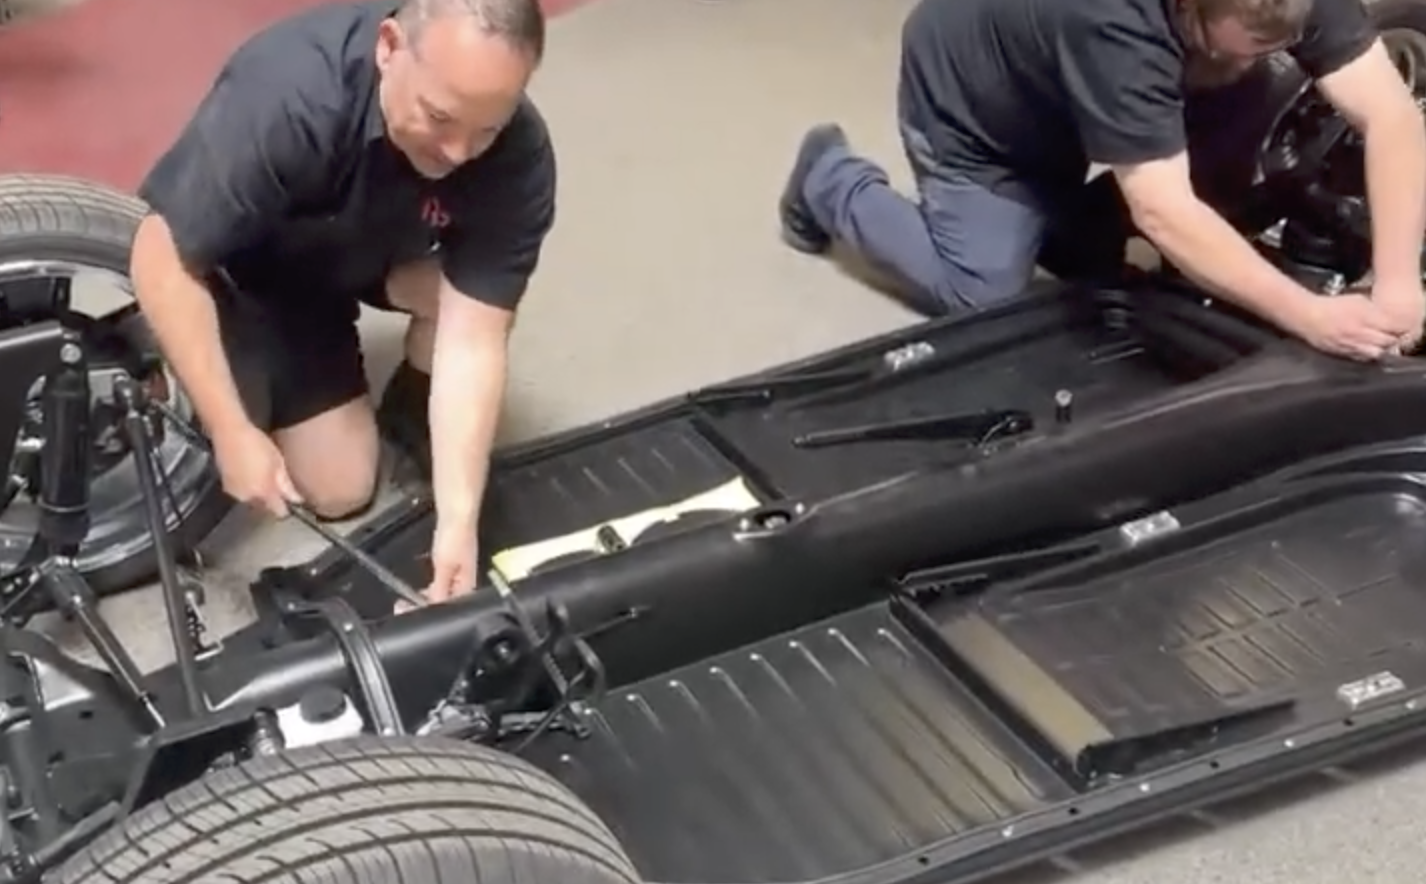
Step by Step · The Way We'd Run It
For this guide we assume the vehicle is complete (carpet, pedals, tank in). If you're working on a body-off chassis, the routing phase gets 100× easier — same flow, less furniture.
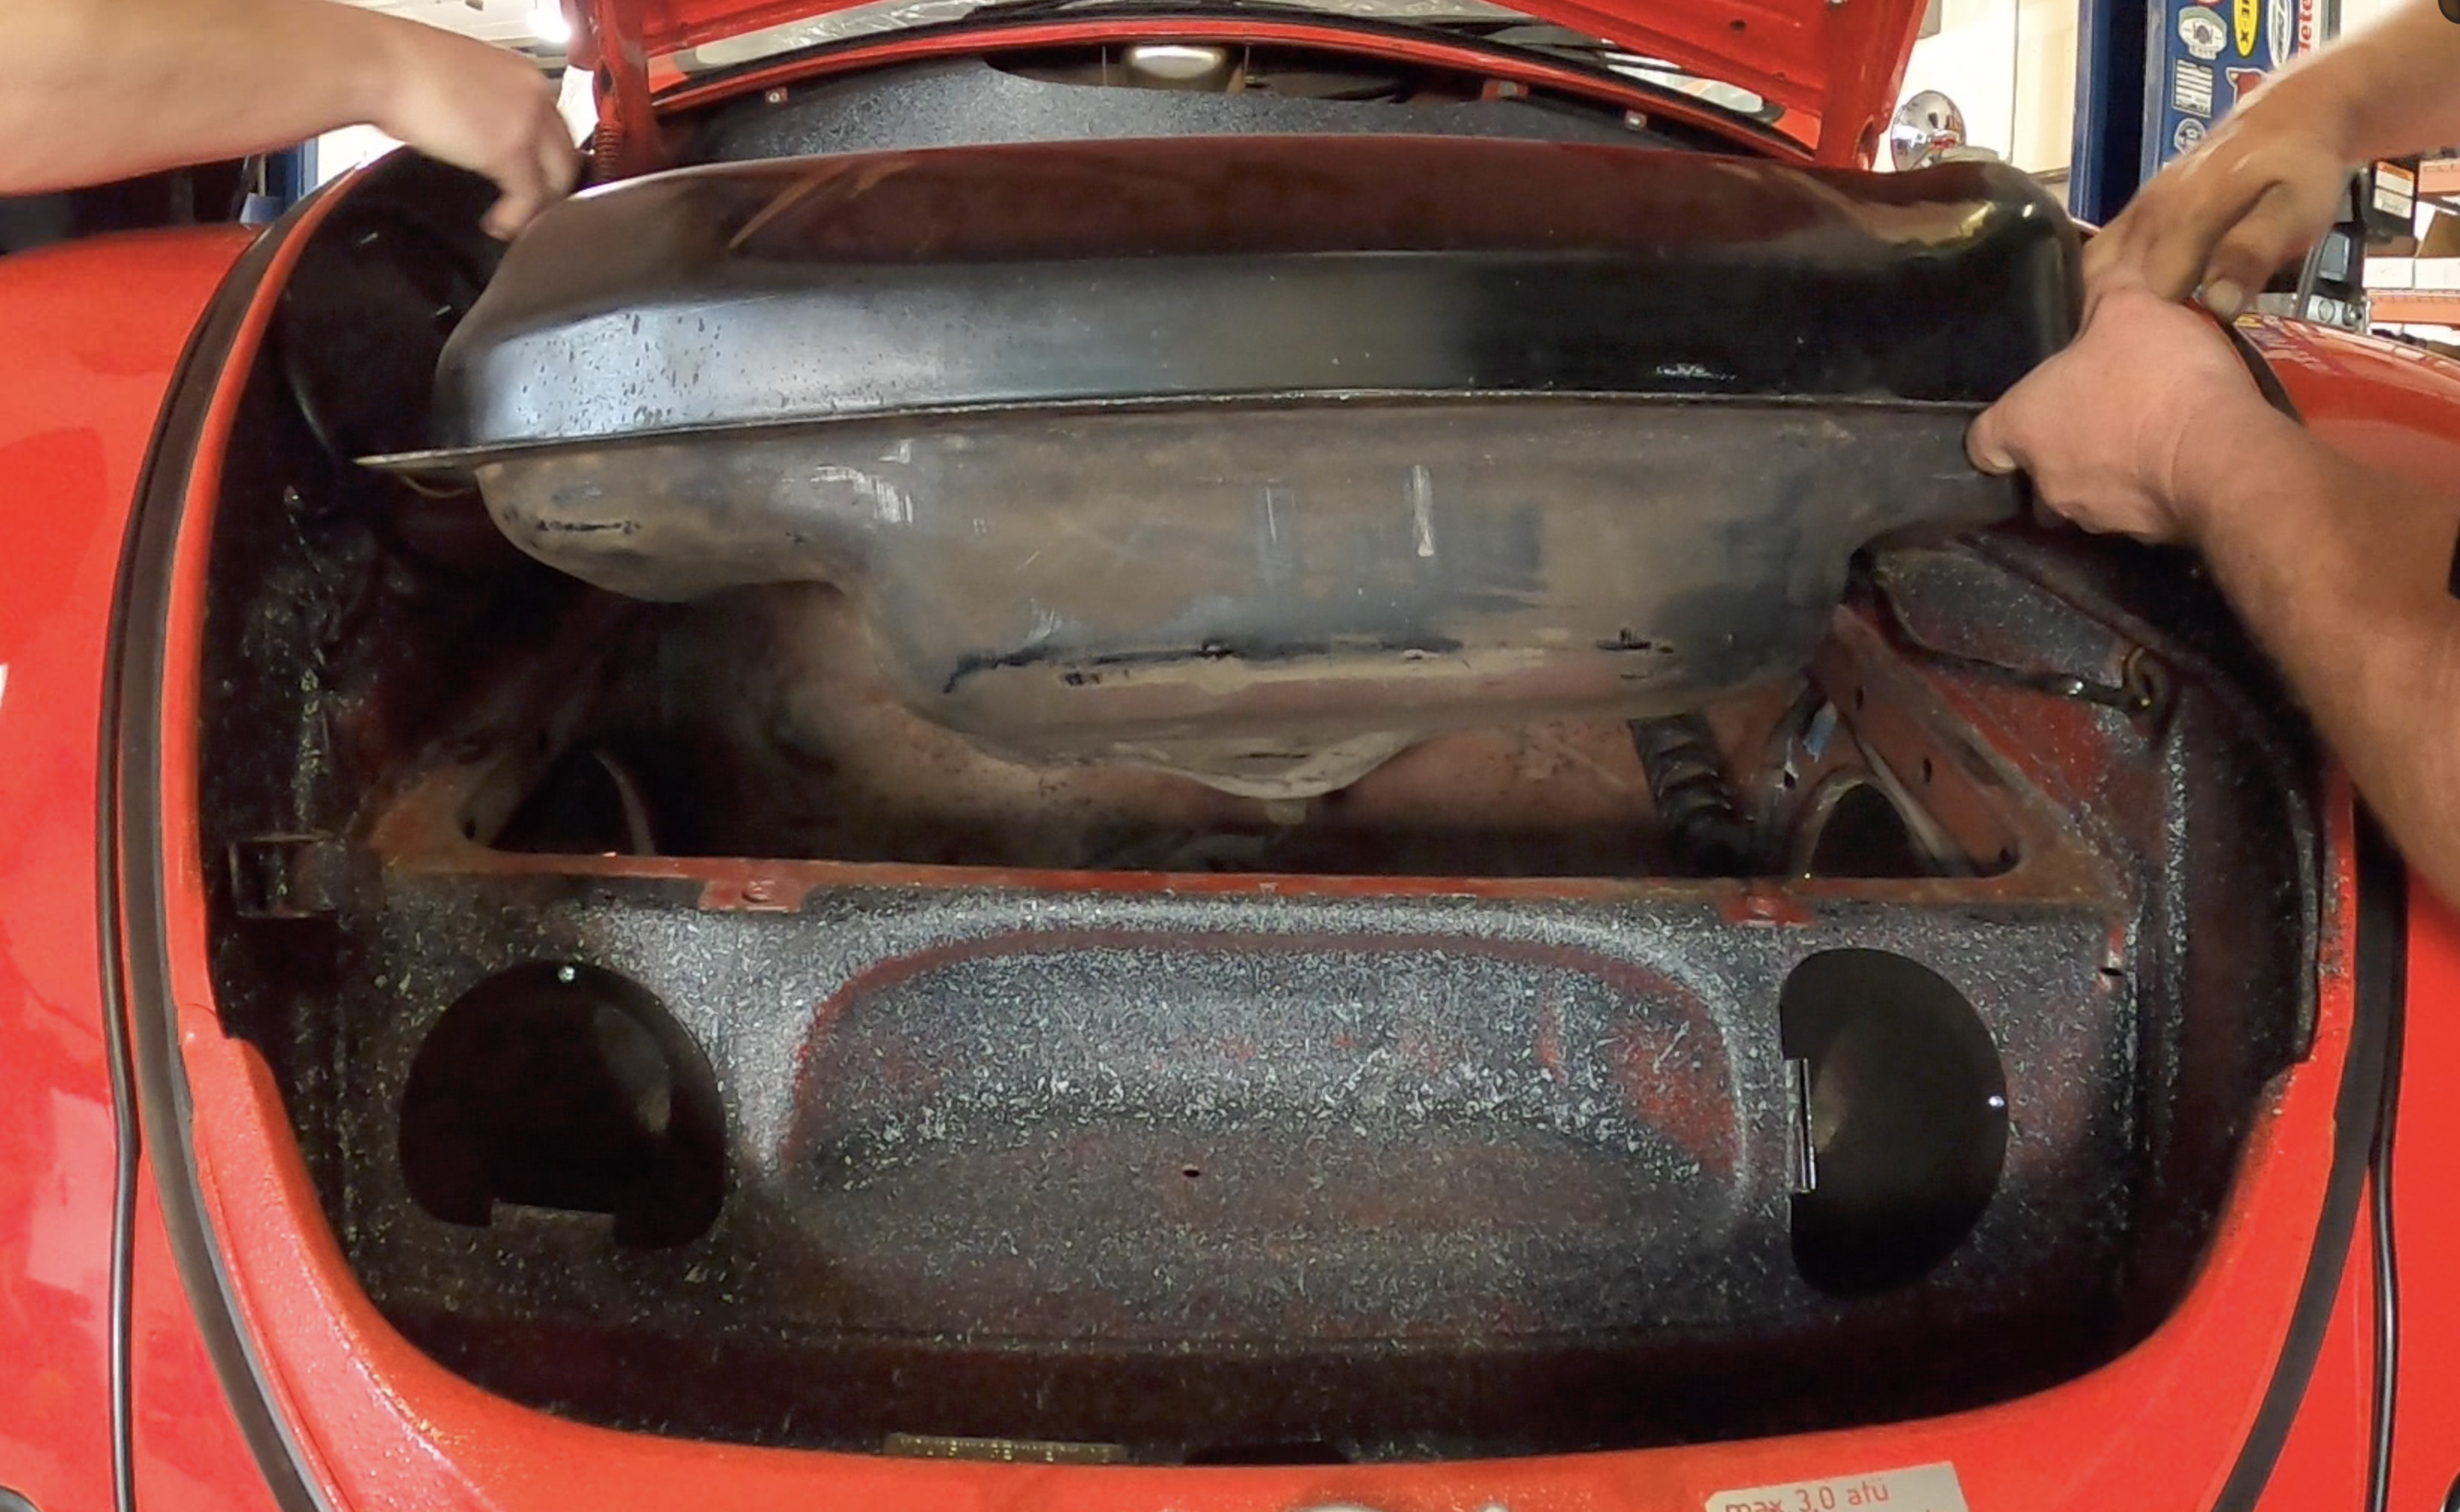
Tank Out
- Disconnect the battery.
- Pop the front hood. Remove tank sender wires, vent lines, and gauge cables.
- Pitch the tank forward, clamp the outlet line, and undo the hose clamp at the chassis hardline.
- Lift the tank out. Drain it. Inspect the interior for rust or debris.
- Lubricate the supplied O-ring; install the new outlet fitting on the tank — snug fit only.
Rear Access & Soft Line Out
- Jack the rear of the vehicle, place stands; wheel under chassis as failsafe.
- Remove the driver-side rear wheel.
- Disengage the soft-line-to-hardline connection near the transaxle.
- Pull the soft line out through the engine bay.

Clear the Hardline Exits
- Inside the tunnel, the chassis hardline is clamped to brackets. Either remove fully (body-off rebuild) or trim flush.
- If trimming: push the cut ends inside the exits so they're hidden but no longer in the way.
- Goal: front + rear exits FREE and CLEAR for the new braided line.
- Inspect both exits — burrs filed off so the new line can't chafe.
If you've installed AK-CH-001 (Chassis Inspection Plate), you've got an access hole halfway down the tunnel — fish the hose in and out without pulling the pedal assembly. No inspection plate? Pop the shift-linkage inspection plate behind the front beam for tunnel access. The pedal-assembly route works but doubles the labor.
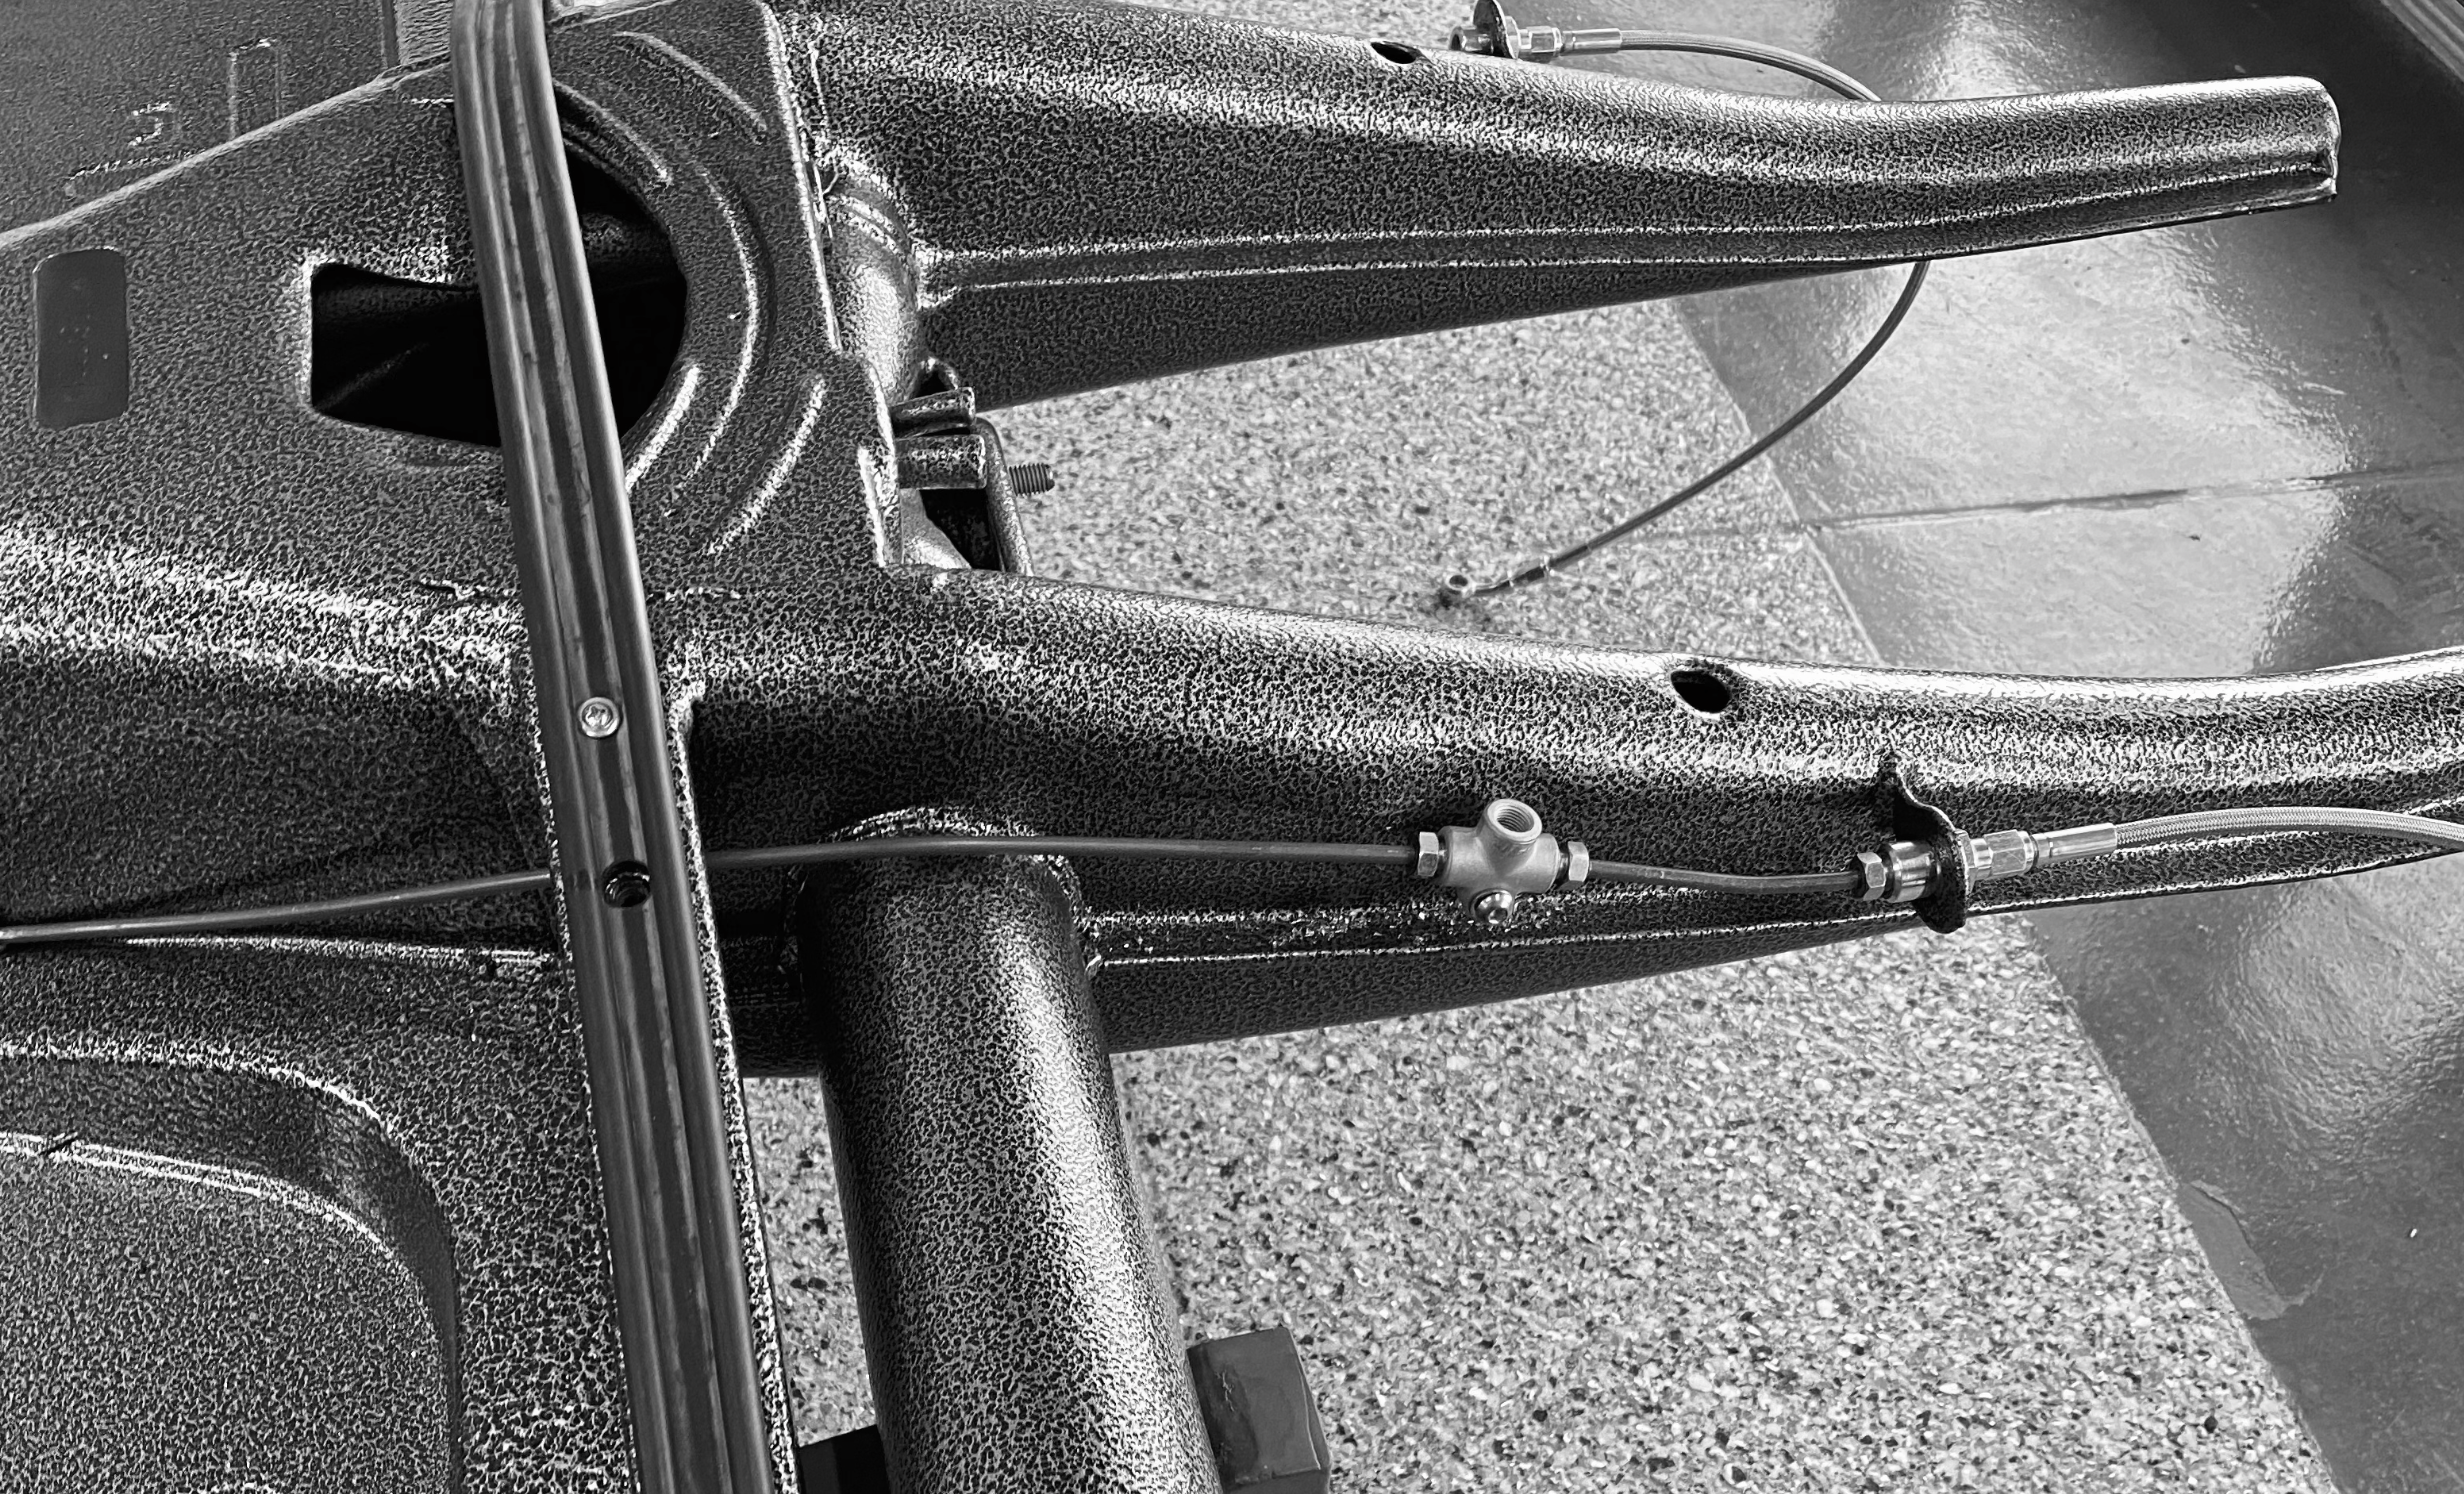
Route the Braided Line
- Confirm hose is sun-softened and the leading end is taped.
- Pull pedals / shifter / coupler if needed for tunnel access — OR use the inspection-plate hole (see Pro Tip above).
- Fish from the REAR exit forward through the tunnel. Grab the line near the nose cone of the transaxle and bring most of it into the vehicle.
- Watch the clutch cable, accelerator cable, and shift linkage — route AWAY from all moving cables.
- Equal hose at both exits before you trim or fit. Cut to length later.
Coil-set memory in braided hose makes fishing through the tunnel a fight. Lay the line in DIRECT SUN ~1 hour BEFORE you start — it goes from springy to docile and snakes through cable runs without binding. Tape the leading end the entire fish.
Kit Assembly — Per Variant
Steps below are specific to your kit. Find your part number, follow that block.
711 000 930 · Basic
- Install -6AN 90° fittings on each end of the routed hose.
- Front: route AWAY from the steering linkage.
- Blow out the line, then connect to tank and engine.
711 000 931 · Filter
- Find a SERVICEABLE mounting location — you'll be back here yearly.
- VERIFY flow direction (arrow on filter). Tank → filter → engine.
- Measure, cut, fit. Blow out the line BEFORE final connection.
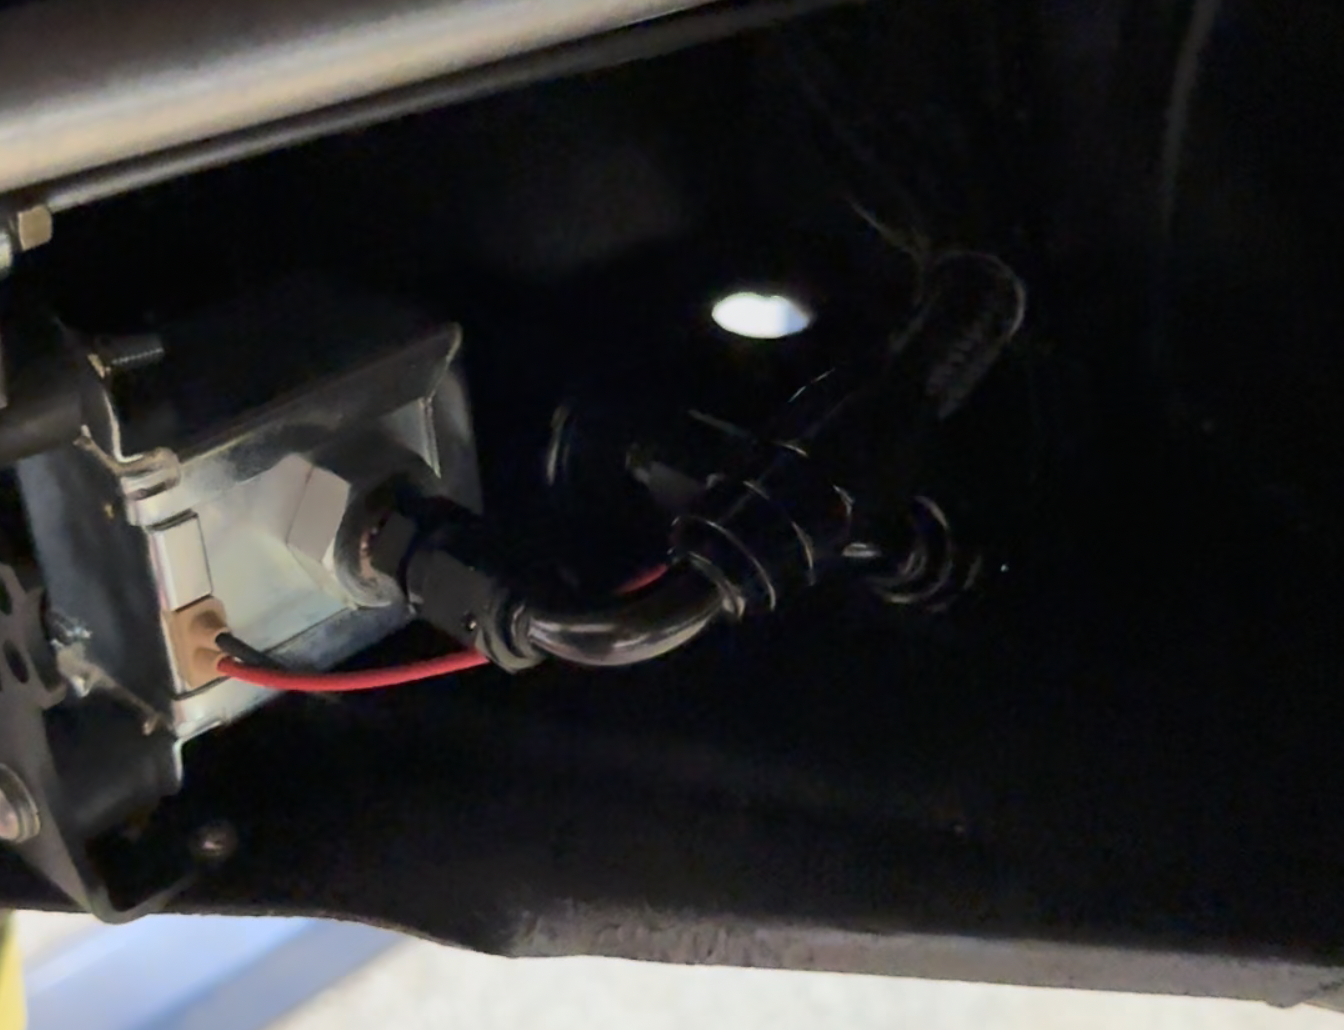
711 000 932 · Pump
- Mount the Facet 40177N on the brake-line stand — pump body 90° to the chassis.
- Drill (2) mounting holes; attach pump + ground wire to that bracket.
- Wire to a KEYED HOT — pump runs only when ignition is on.
- Thread sealant ONLY on the connections going INTO and OUT OF the pump. Everything else is hydraulic -6AN.
711 000 933 · Deluxe (Includes Everything in 711 000 932, Plus:)
- Drill out factory spot welds; remove the original brake-line stands.
- Install new stands (with built-in pump mount + rubber isolators) — bolt or spot-weld in.
- Mil-spec wiring harness with inline fuse — connects to keyed hot.
- Install fuel-pump block-off plate at the factory mechanical-pump location.
Tape protects the leading end during fishing, but chassis dust and tunnel debris still find their way in. Compressed air through the hose BEFORE any final fitting connection. Then again at tank and engine connections. A grain of grit kills a 40-micron filter inside a week — and chases you with carb problems that aren't actually carb problems.
Reassemble · Test · Leak Check
- Reinstall pedals, shifter, coupler, inspection plates.
- Reinstall the tank; reconnect all fittings.
- Battery on. KEY ON only — do NOT start the engine. Verify pump runs (711 000 932 / 711 000 933).
- Connect to engine: hardline kit (forwardmost tin out the factory exit) OR softline -6AN to carbs.
- Add a SMALL amount of fuel to the tank — leak-check every connection.
- No leaks? Fill the tank and "letter rip tater chip."
Once a Year · Five Minutes
Filter
40-micron filter — service or replace yearly. Clean it or swap it out.
Fittings
Annual visual + snug check on every -6AN fitting. Better safe than sorry.
Pump (Replacement)
Facet 40177N — stocked at AutoZone, Kragen, PepBoys, and parts counters worldwide. We picked it on purpose.
Hose Inspection
Eyeball for rubs against cables or shift linkage every season. Reroute if you spot wear.
Related Kits · Built to Work Together
Hardline Kits (Engine Bay)
Match this chassis kit with our engine-bay hardline kit — clean run from the forwardmost factory tin to your carbs.
AK-CH-001Chassis Inspection Plate
Cuts the fuel-line install time roughly in half — access the tunnel without pulling the pedal assembly.
AK-FL-001 PDFQuick Reference Guide
Two-page printable PDF you can take to the bench. Page 3 has the variant routing breakdown for all four kits.
"Did the deluxe kit. Lights, harness, everything — took an afternoon. No more fuel smell, finally."
— Posted by John D."Spent 6 months chasing a Weber stumble. Was the 6mm line all along. New kit and the car runs how it always should have."
— Posted by Mario Rivera"Fishing the line through the tunnel was the fight. Sun-soften tip saved me hours. Great instructions."
— Posted by Tom RiversThe Questions We Get Most
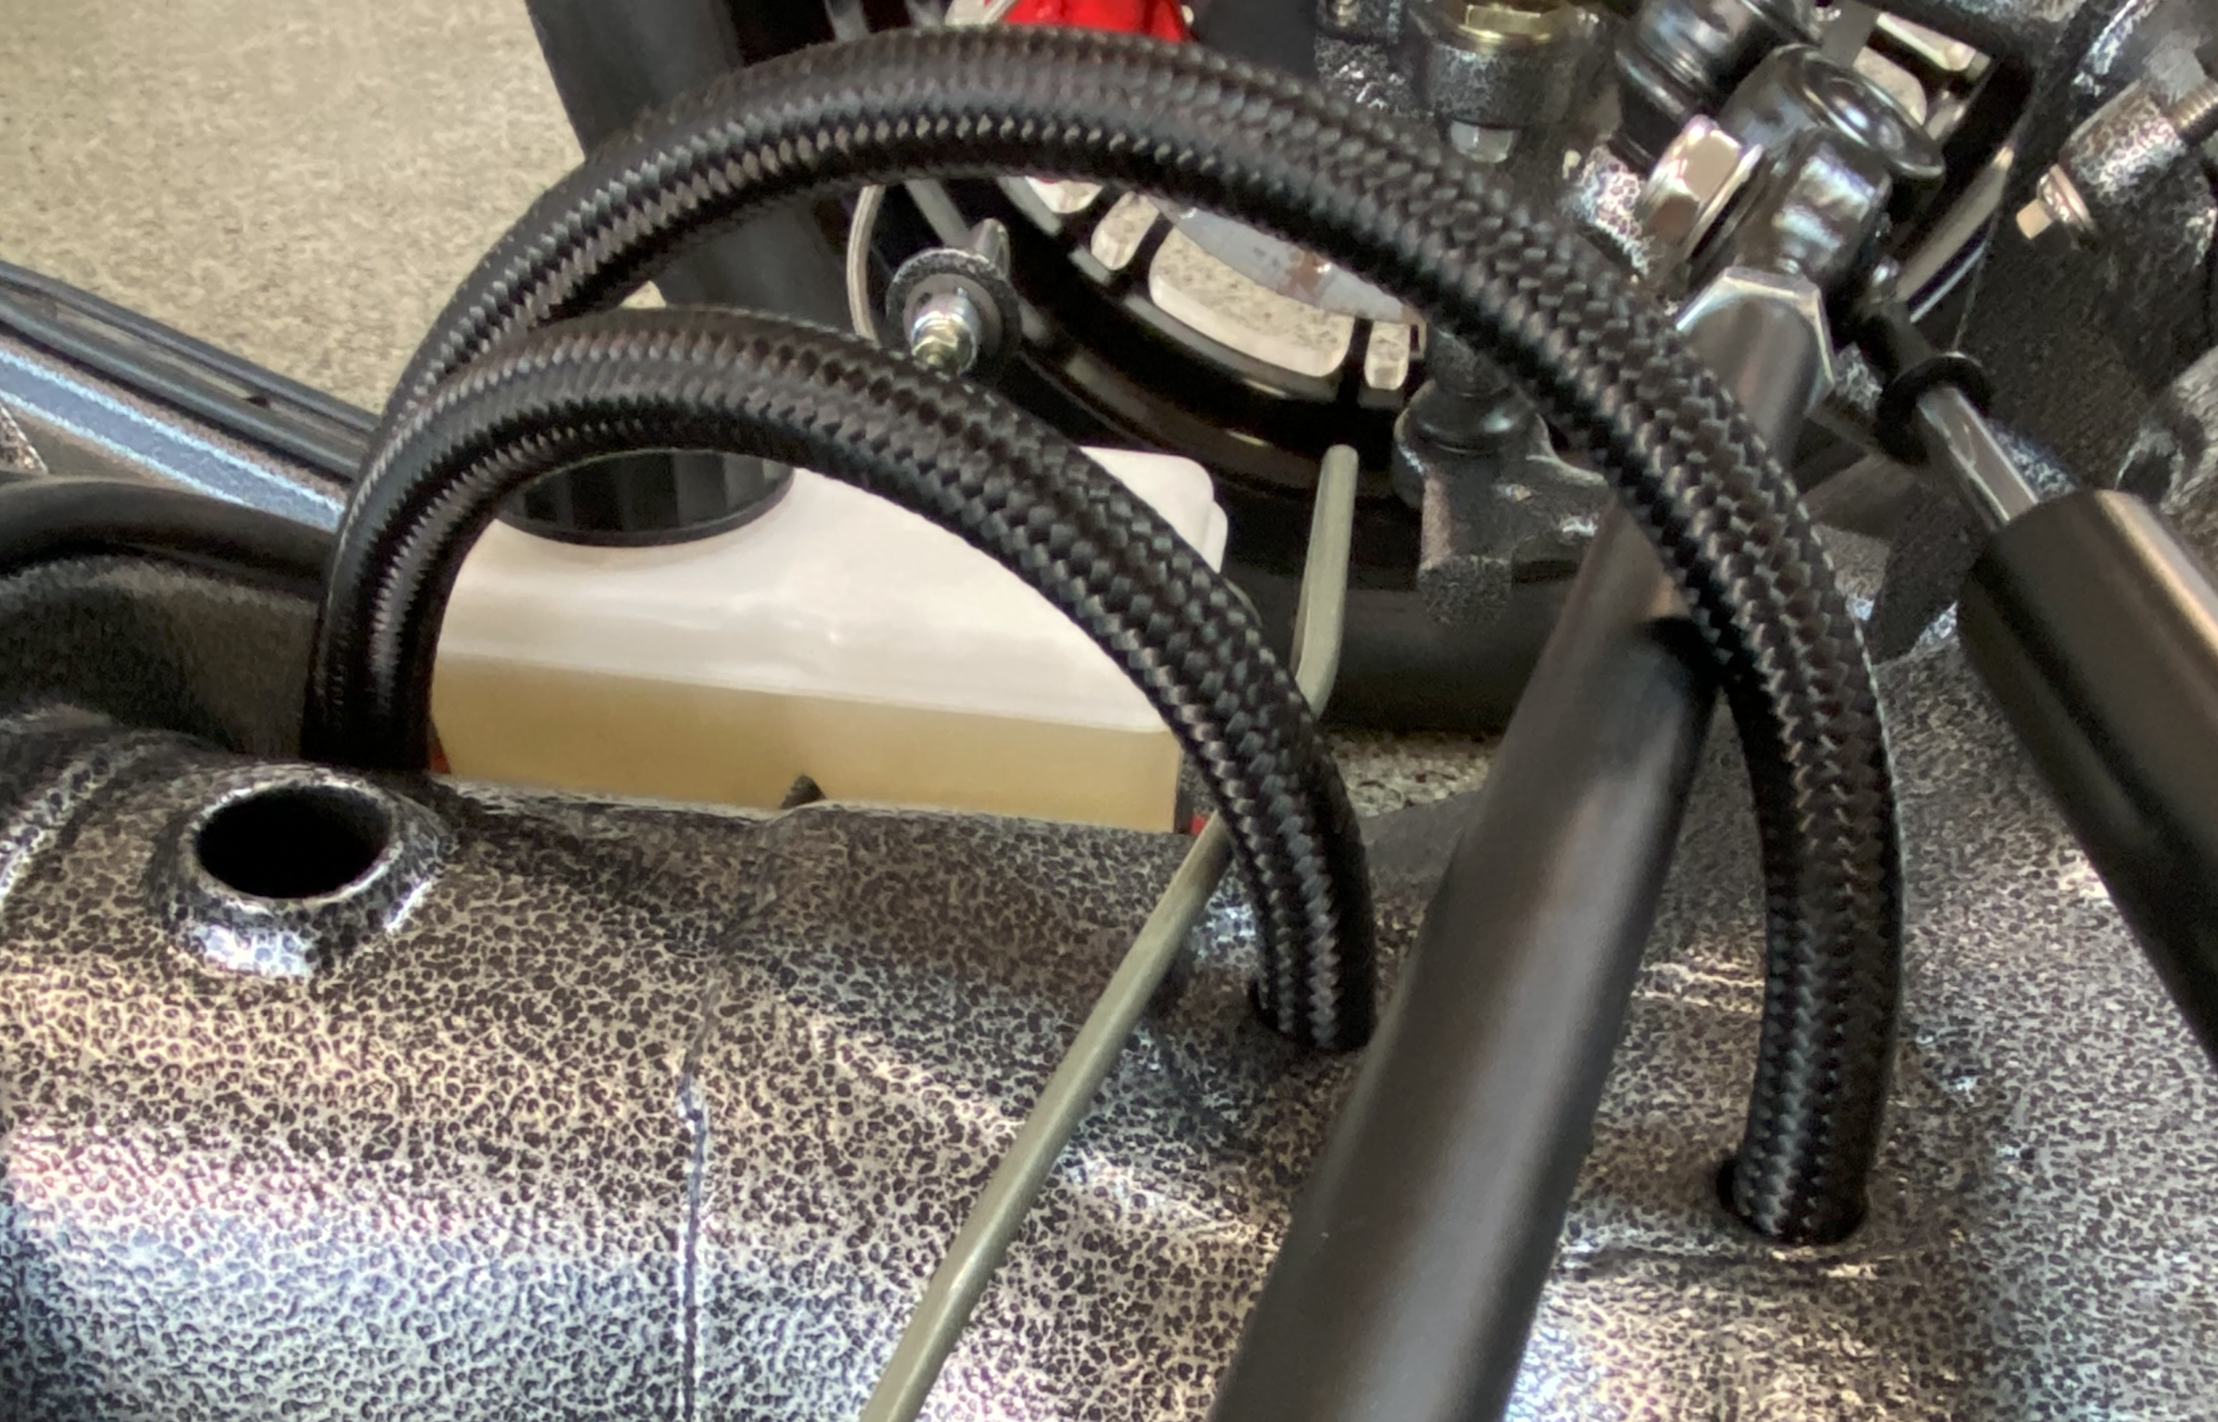
Does the hose need to be attached to brackets inside the tunnel?
No. Most-asked question we get. The hose is a German-style cloth-braided -6AN with a stainless steel reinforcement layer inside — it doesn't make noise against the tunnel and it won't rub anything internally to cause problems. As long as you routed it AWAY from moving cables and shift linkage, it doesn't need anything holding it down inside the tunnel itself.
Why upgrade from 6mm stock to -6AN? What's the actual difference?
The new line has a 0.35″ inner diameter vs. roughly 0.236″ for stock 6mm — that's over 2× the cross-sectional flow area. Modern carbs (Webers, Dell'Ortos) flow more fuel than 6mm was ever spec'd for. The upgrade fixes lean cruise, WOT stumble, and hot-soak vapor lock that gets misdiagnosed as carb tuning issues. Plus the Viton inner bore is ethanol-safe and won't permeate fuel vapor — no more gas smell under the hood.
Which kit should I buy — 711 000 930, 711 000 931, 711 000 932, or 711 000 933?
Mechanical pump on a stock-ish setup? 711 000 930 or 711 000 931 (with filter). Going electric pump? 711 000 932 if you have your own wiring/mounting solution; 711 000 933 (Deluxe) if you want it to drop in done — that's why it's our best-seller. The deluxe ships with brake-line stands that have built-in pump mounts, mil-spec wiring with an inline fuse, isolators for noise control, and a fuel-pump block-off plate for the engine.
Where exactly does thread sealant go — and where does it NOT?
Sealant goes ONLY on the connections going INTO and OUT OF the fuel pump. Every other fitting in this kit is a hydraulic -6AN connection — sealing those causes leaks because it cruds up the seat. Snug + firm on AN fittings is enough. No need to go all Popeye on it.
Is this hose ethanol-safe? E85?
Yes — certified for ethanol-based fuels, E85+, methanol, and gasoline/ethanol mixtures. The Viton (FKM) inner bore won't deteriorate, dry, harden, or permeate fuel vapor with ethanol present. It's also rated for diesel and bio-diesel if you're running an unusual setup.
Do I have to remove my pedal assembly to install this?
It depends on what other access you have. If you have the AK-CH-001 Chassis Inspection Plate installed, no — you fish the hose through that access port. If you don't, you have two options: pull the pedals/shifter/coupler for a clean route from the front, or use the shift-linkage inspection plate behind the front beam for partial access. The pedal-assembly route works but adds about an hour of labor.
Can the Facet 40177N be replaced if it ever fails?
Yes — that's why we picked it. Facet 40177N is stocked at AutoZone, Kragen, O'Reilly, PepBoys, NAPA, and parts counters worldwide. If you're touring and the pump dies, you can walk into any auto-parts store on the planet and have a replacement on the same trip. We chose it for parts-availability, not for being exotic.
Can I use this hose with push-on barbed fittings?
No. This hose is built for traditional reusable AN fittings only. Push-on style barbed fittings will not seal correctly against the smooth Viton inner bore and the stainless braid layer below it. AN fittings only — no exceptions.
Can the hose be used inside a fuel tank or submerged in fuel?
No. The hose is rated for fuel passing THROUGH it, not for full submersion. Don't use it inside a fuel cell, fuel tank, or anywhere it would sit submerged in liquid fuel.
What's the operating temperature and pressure rating?
Operating temp: −40°F to 302°F (−40°C to 150°C). Max operating pressure: 300 PSI. Burst pressure: 1,000 PSI. SAE J30 R9 rated, NHRA approved. Way over-spec for any classic VW carbureted setup — that's the point.
What's your warranty?
If any component in the kit ever fails from a manufacturing defect, we replace it. Period. Email help@airkewld.com with a photo and your order number.
Real Humans. Real Phones. Real VW People.
Fishing the line through the tunnel is the part that catches people. If you're stuck mid-install, reach out before you cut a fitting wrong. We pick up the phone. We answer the email.