 US Dollars
Ball Joint Front Air Ride Install
The cleanest way to convert your 1966–1977 ball-joint Type 1 from torsion-sprung to floating air ride. Through rods, Delrin spacers, air sleeve shocks — a 3-hour bolt-in install with no welding and no body removal.
"The slammed VW look you love without the harsh ride. Our Air Ride Kit transforms your Classic VW into a smooth, adjustable machine—style and comfort in one package."
A Better Way to Air Ride a Classic Volkswagen.
The ball-joint front beam VW dropped under the Beetle and Ghia from 1966 onward is a great-handling piece — until you get tired of the harsh, torsion-sprung ride. The fix isn't lower torsion settings or a stiffer shock. The fix is air.
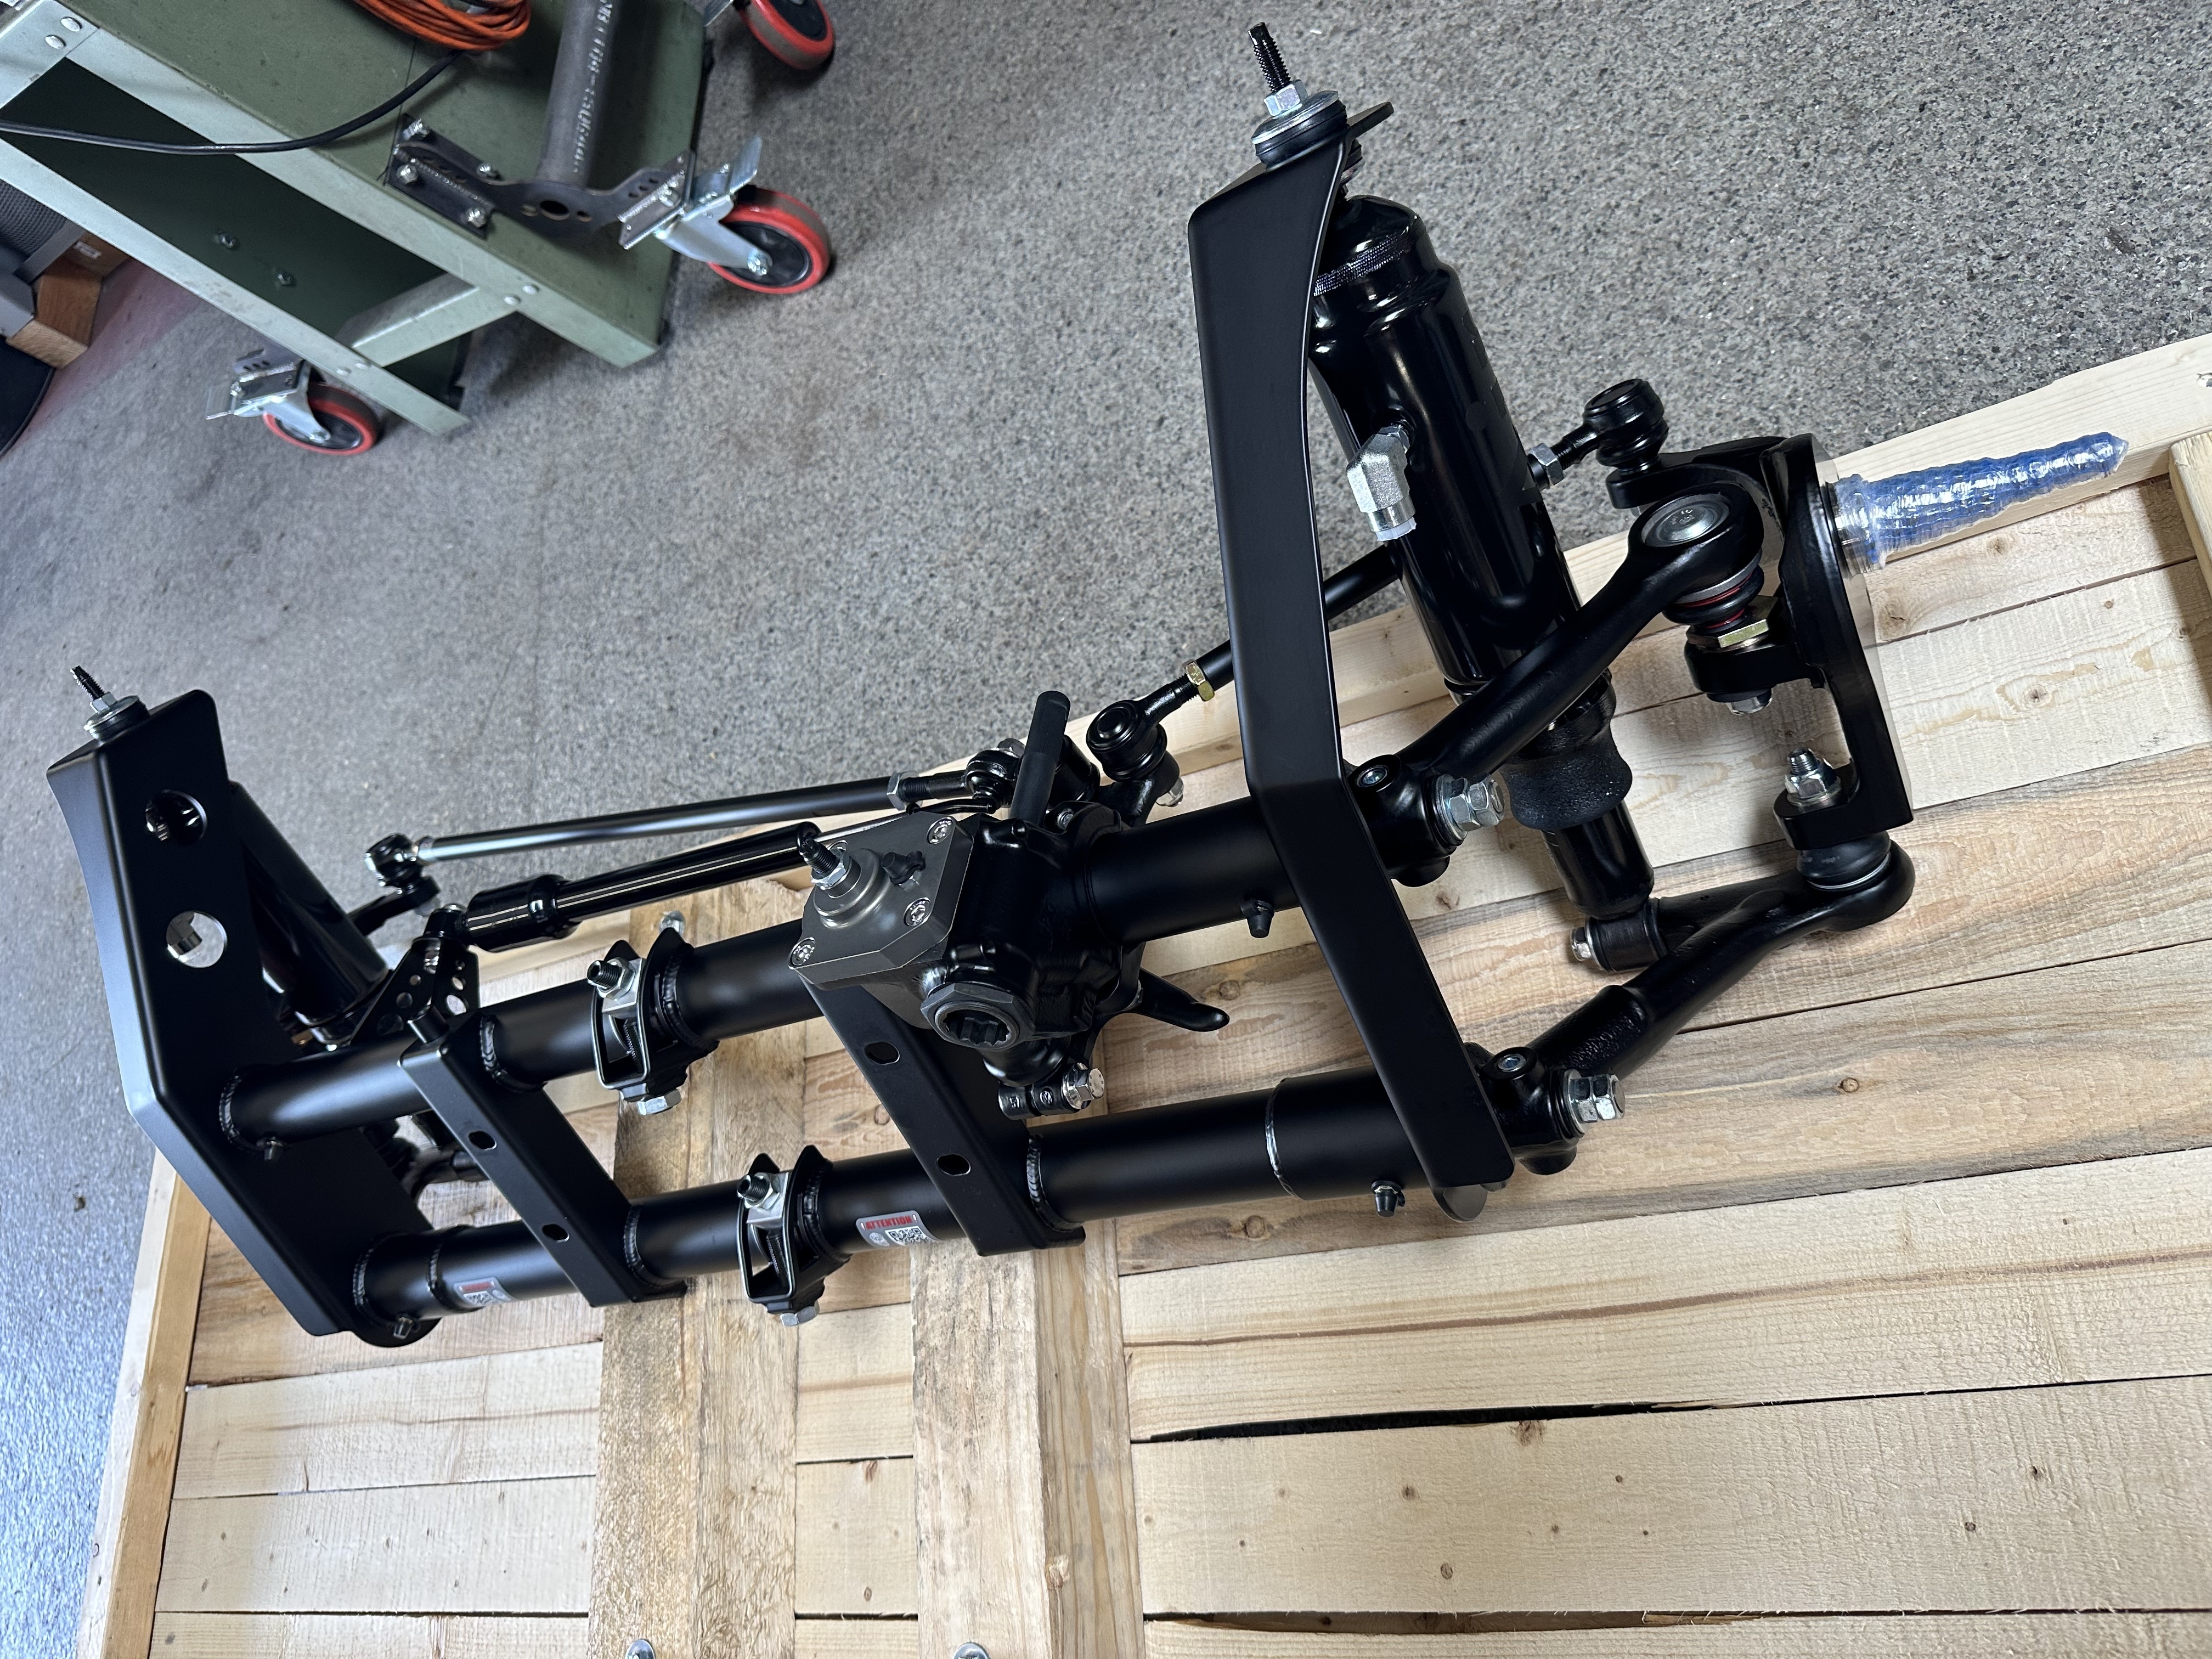
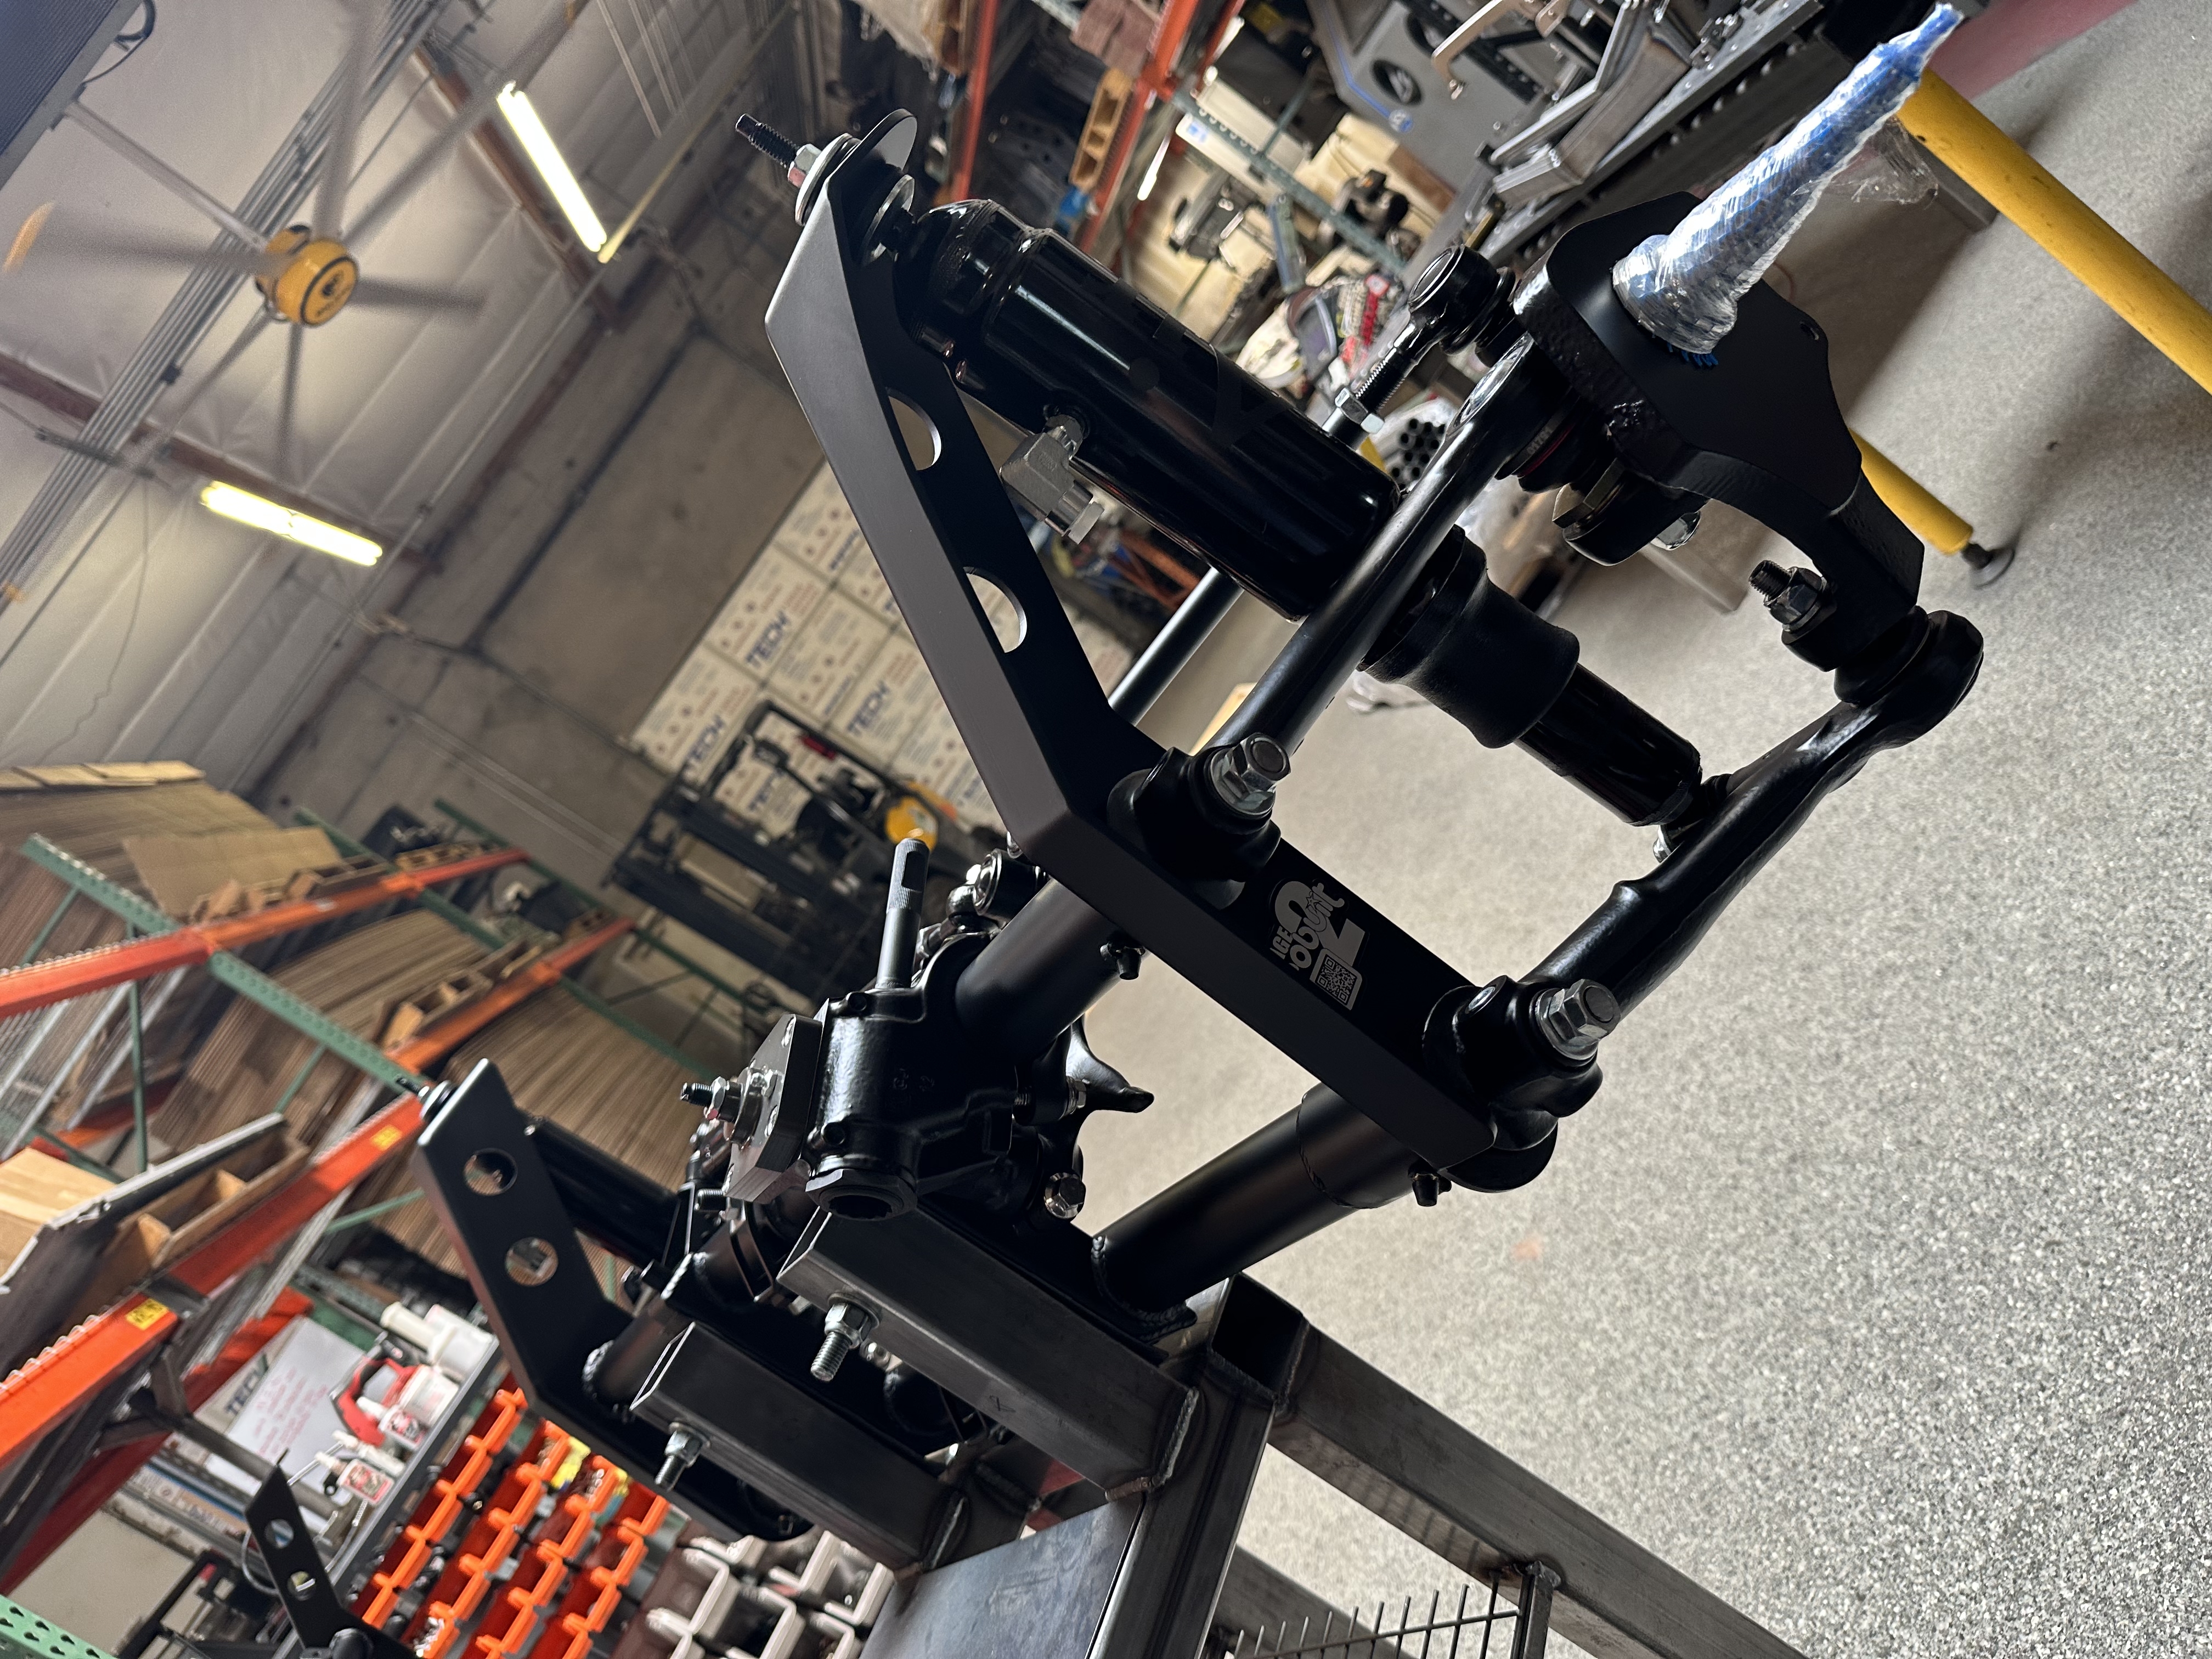
The Airkewld Ball Joint Front Air Ride Kit converts the entire front torsion-sprung suspension to air ride. Through rods replace the factory torsion springs inside the beam, air sleeve shocks bolt to the spindles, and a few precise tweaks at the eccentrics get you the soft ride and instant adjustability.
Soft ride. Lift over driveways. Lay frame at every show. Your Classic VW is instantly cooler.
Fits 1966–1977 ball-joint Beetle and Karmann Ghia on an OEM front beam or an Airkewld Ultimate / ECObuilt beam. No welding. No body off. A 3-hour install for builders who want air without the metalwork.
The Beam Underneath You Decides Everything.
This kit was engineered for an OEM VW front beam (factory towers, factory roller bearings) or an Airkewld Ultimate / ECObuilt beam. Other beams — especially custom-tower aftermarket beams or anything running urethane bushings — will not behave the same. Verify your beam before you order.
- Use OEM or Airkewld beams ONLY. The PROs can't tech-support another vendor's beam combined with our air ride.
- No urethane bushings. Urethane and air ride do not get along, period. If your beam has urethane bushings, swap to OEM-style or pick an Airkewld beam.
- Drop spindles strongly recommended for maximum drop. The kit was designed assuming you're running them.
- EMPI lowered ball joints? They'll let you go lower, but they tend to fall apart quickly. Don't say we didn't warn you.
The Numbers You Need Before You Wrench
Through Rods
Male + FemaleLoctite or weld · cut excess
Lift Pressure
65–120 PSIBelow 50 / above 150 = bind
Eccentrics
90° FirstThen snug ball joint nuts
Grease
4 Zerks · 10–12 PumpsTop off w/ each oil change
Ball Joint Front · 1966 and Newer
✓ Fits
- 1966–1977 Beetle (ball-joint front)
- 1966–1975 Karmann Ghia (ball-joint front)
- 1966–1974 Fridolin (Type 147)
- 1973–1974 Type 181 Thing
- OEM front beam with factory towers + roller bearings
- Airkewld Ultimate / ECObuilt Beam
- Stock-style narrowed beams (factory tower geometry)
✗ Does NOT Fit
- Link-pin front ends (1949–1965)
- Type 2 Bus / Type 3 / Thing — different front architecture
- Custom-tower aftermarket beams
- Beams with urethane bushings — air ride and urethane do not get along
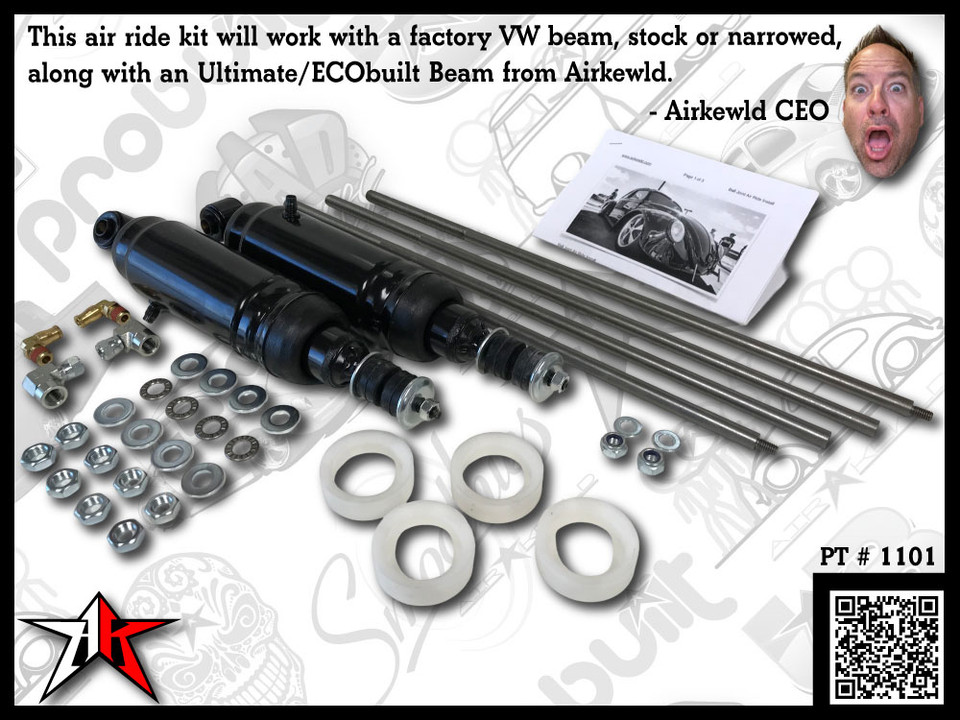
Complete Front Kit Contents
Everything you need to convert the front from torsion-sprung to air ride. Add basic shop tools (next section), grease, and a couple hours of your weekend.
- Through Rod Set — male + female, joins inside the beam to replace factory torsion springs
- Air Sleeve Shocks — one pair, fittings face the front of the vehicle
- Delrin Spacers — for non-Airkewld beams
- Hardware Pack — washers, thrust bearings, jam nuts
- Printed Quick Reference Guide (AK-AR-002, 2 pages) with QR code that scans straight to this page for the full guide, install videos, and troubleshooting
Two Ways to Air Ride Your Front End
Already have an OEM or Airkewld beam? Grab the standalone kit. Want zero compatibility worry? Pick the PRObuilt bundle with an assembled beam.
Ball Joint Front Air Ride Kit
Just the front. For builders who already have an OEM or Airkewld beam, drop spindles, and a rear air-ride solution. Fits 1966–1977 ball-joint Beetle and Ghia. Part #111 000 005.
Shop Front Kit →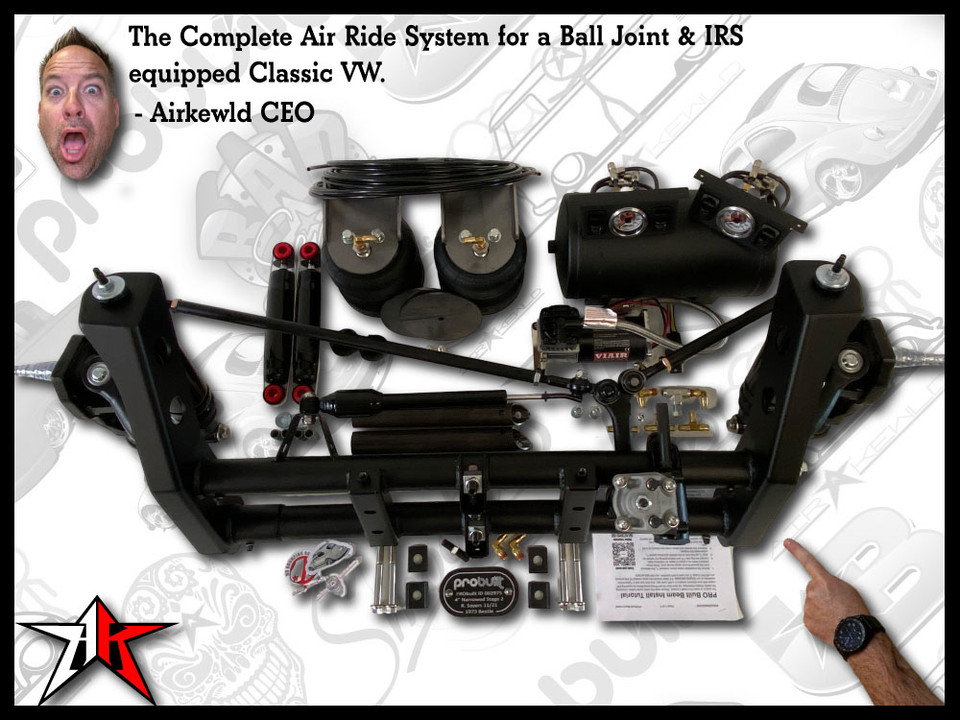
Complete Air Ride Kit w/ Assembled Beam
All-in-one. Air ride kit + Stage 2 PRObuilt assembled beam + drop drum spindles, 4″ narrowed. Zero compatibility worry — everything's matched and ready to bolt under the car.
Shop PRObuilt →Filming the Install Series
We're shooting an end-to-end ball joint front air-ride install on YouTube. Drops as soon as it's edited.
Subscribe to Airkewld on YouTube for the alert when it goes live.
The Top 5 Install Mistakes — And How to Avoid Them
These five are the difference between a front end that floats and a front end that won't lift. Read them. Live them.
Through Rods Too Tight
Tighten the jam nut until the control arm just stops moving, then back off EXACTLY 1/4 turn. Tighter than that and the arms can't pivot — your front end won't lift, no matter how much air you throw at it.
Skipping Polish & Assembly Grease
Worn control arm bearings will bind. Hit them with emory cloth until they're smooth, polish, and lube every contact surface before the arms go on. Five minutes of prep saves hours of "why won't it lift?"
Eccentrics Not Perpendicular
Set the ball joint eccentrics to 90° vs. ground with a level on the spindle face BEFORE final-tightening the ball joint nuts. Skip this and alignment is hopeless — you'll fight camber and toe forever.
Over-Tightening Air Shock Fittings
They split. Teflon tape and snug — do not gorilla. The fitting body is softer than you think and a cracked shock body is a slow leak you can't fix without disassembly.
Air Lines Run Near Moving Parts
Keep tubing well clear of suspension travel and steering linkage. Chafe-through is a slow kill — you won't notice until the line splits and the front falls overnight.
Tools Required · Shop the Build
No welder needed. Standard hand tools, an air hammer (or heavy hammer), and a level for the eccentric step. Affiliate links support the channel — same price to you.

Jack & Jack Stands
Lift the front, set on stands rated for vehicle weight. Slide the wheels under the chassis as a failsafe.
Shop on Amazon
Metric Socket Set
For lugs, spindle nuts, ball joint nuts, backing plates, control arm hardware, and shock mounts.
Shop on Amazon
Air Hammer
For releasing the ball joints from the spindle. A heavy hammer on the spindle boss works in a pinch — air hammer is faster.
Shop on Amazon
Emory Cloth & Grease Gun
Polish the control arm bearing surfaces with emory cloth. Pump 10–12 shots of grease into the four beam zerks before final assembly.
Shop on Amazon
Teflon Tape & Cutting Tool
Teflon tape on every air-line and shock fitting. Cutting tool to trim the through rod excess once the jam nuts are dialed.
Shop on Amazon
Level / Angle Finder
Critical for the eccentric step. Place on the spindle face and rotate eccentrics to 90° perpendicular before snugging the ball joint nuts.
Shop on Airkewld.comAirkewld is a participant in the Amazon Services LLC Associates Program. As an Amazon Associate, we earn from qualifying purchases — at no additional cost to you.
Step by Step · The Way We'd Run It
Read each phase before you start it. Don't skip the Pro Tips. The whole job runs about three hours if your beam is right and your ball joints are healthy.
Disassemble Beam
- Loosen the lugs 1/4 turn before jacking. Raise the front, set on jack stands; slide the wheels under the chassis as a failsafe; disconnect the battery.
- Pull dust caps and spindle nuts; slide the drums off. Driver side: remove the (3) backing-plate bolts. Do NOT break any brake lines.
- Loosen the ball joint nuts but do NOT remove them. Air-hammer (or heavy hammer on the spindle boss) to release the joints.
- Remove the nuts and swing the spindle aside — or pull the tie rod to remove the spindle entirely.
- Remove the control arms (jam nuts + grub screws). Remove the center grub screws and pull the factory torsion springs.
Before you wrench anything else — verify your beam. OEM with factory towers and roller bearings, or an Airkewld Ultimate / ECObuilt beam. No urethane bushings, no custom-tower aftermarket beams. If your beam fails the check, stop here and source one that fits before you go further.
Through Rods
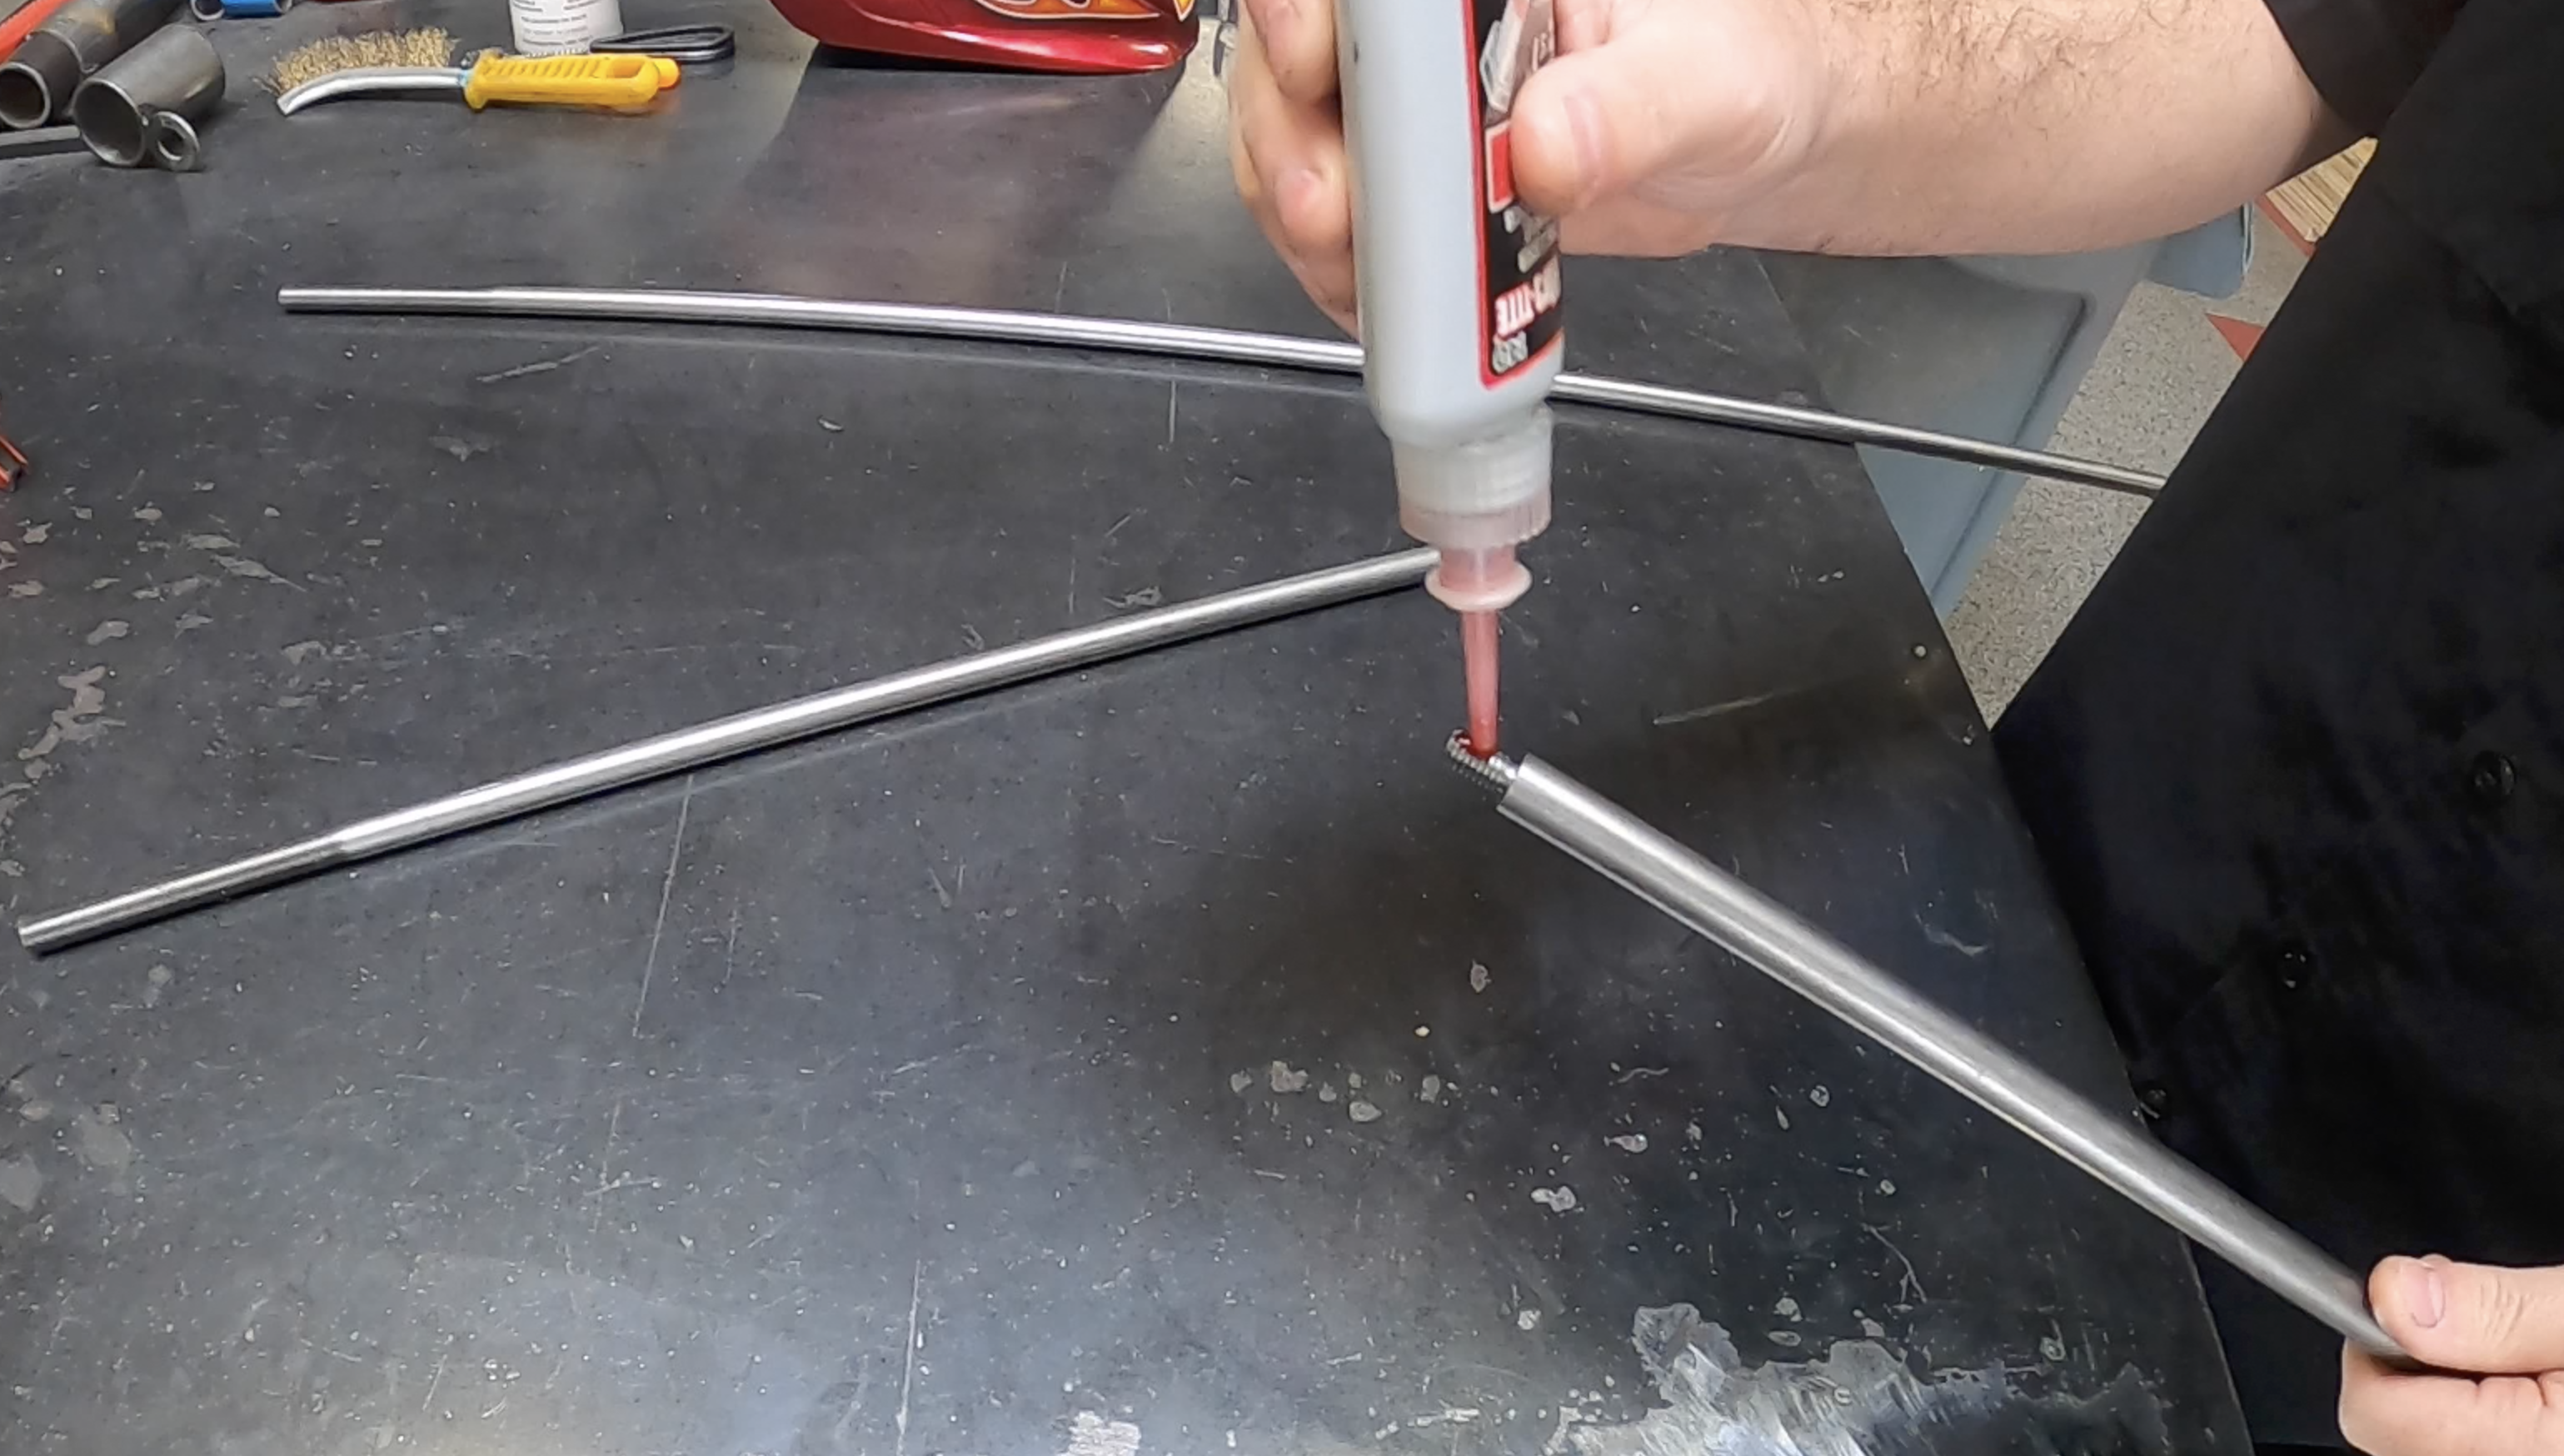
- Thread the male and female through rods together. Add Loctite OR weld the joint to lock the connection.
- Slide the assembled rods into the beam, replacing the factory torsion springs you just pulled.
- Verify the rods are centered side-to-side in the beam.
- Confirm the control arms move freely on a dry-fit. If they don't, polish the bearing surfaces FIRST — don't try to muscle through binding now.
Control Arms
- Pop the dust caps off the control arms (drift + dead-blow).
- Slide the arms onto the through rods. Tight? Polish the bearing surfaces with emory cloth. Apply assembly lube to ALL contact surfaces.
- Non-Airkewld beam? Install the supplied Delrin spacers on the arms.
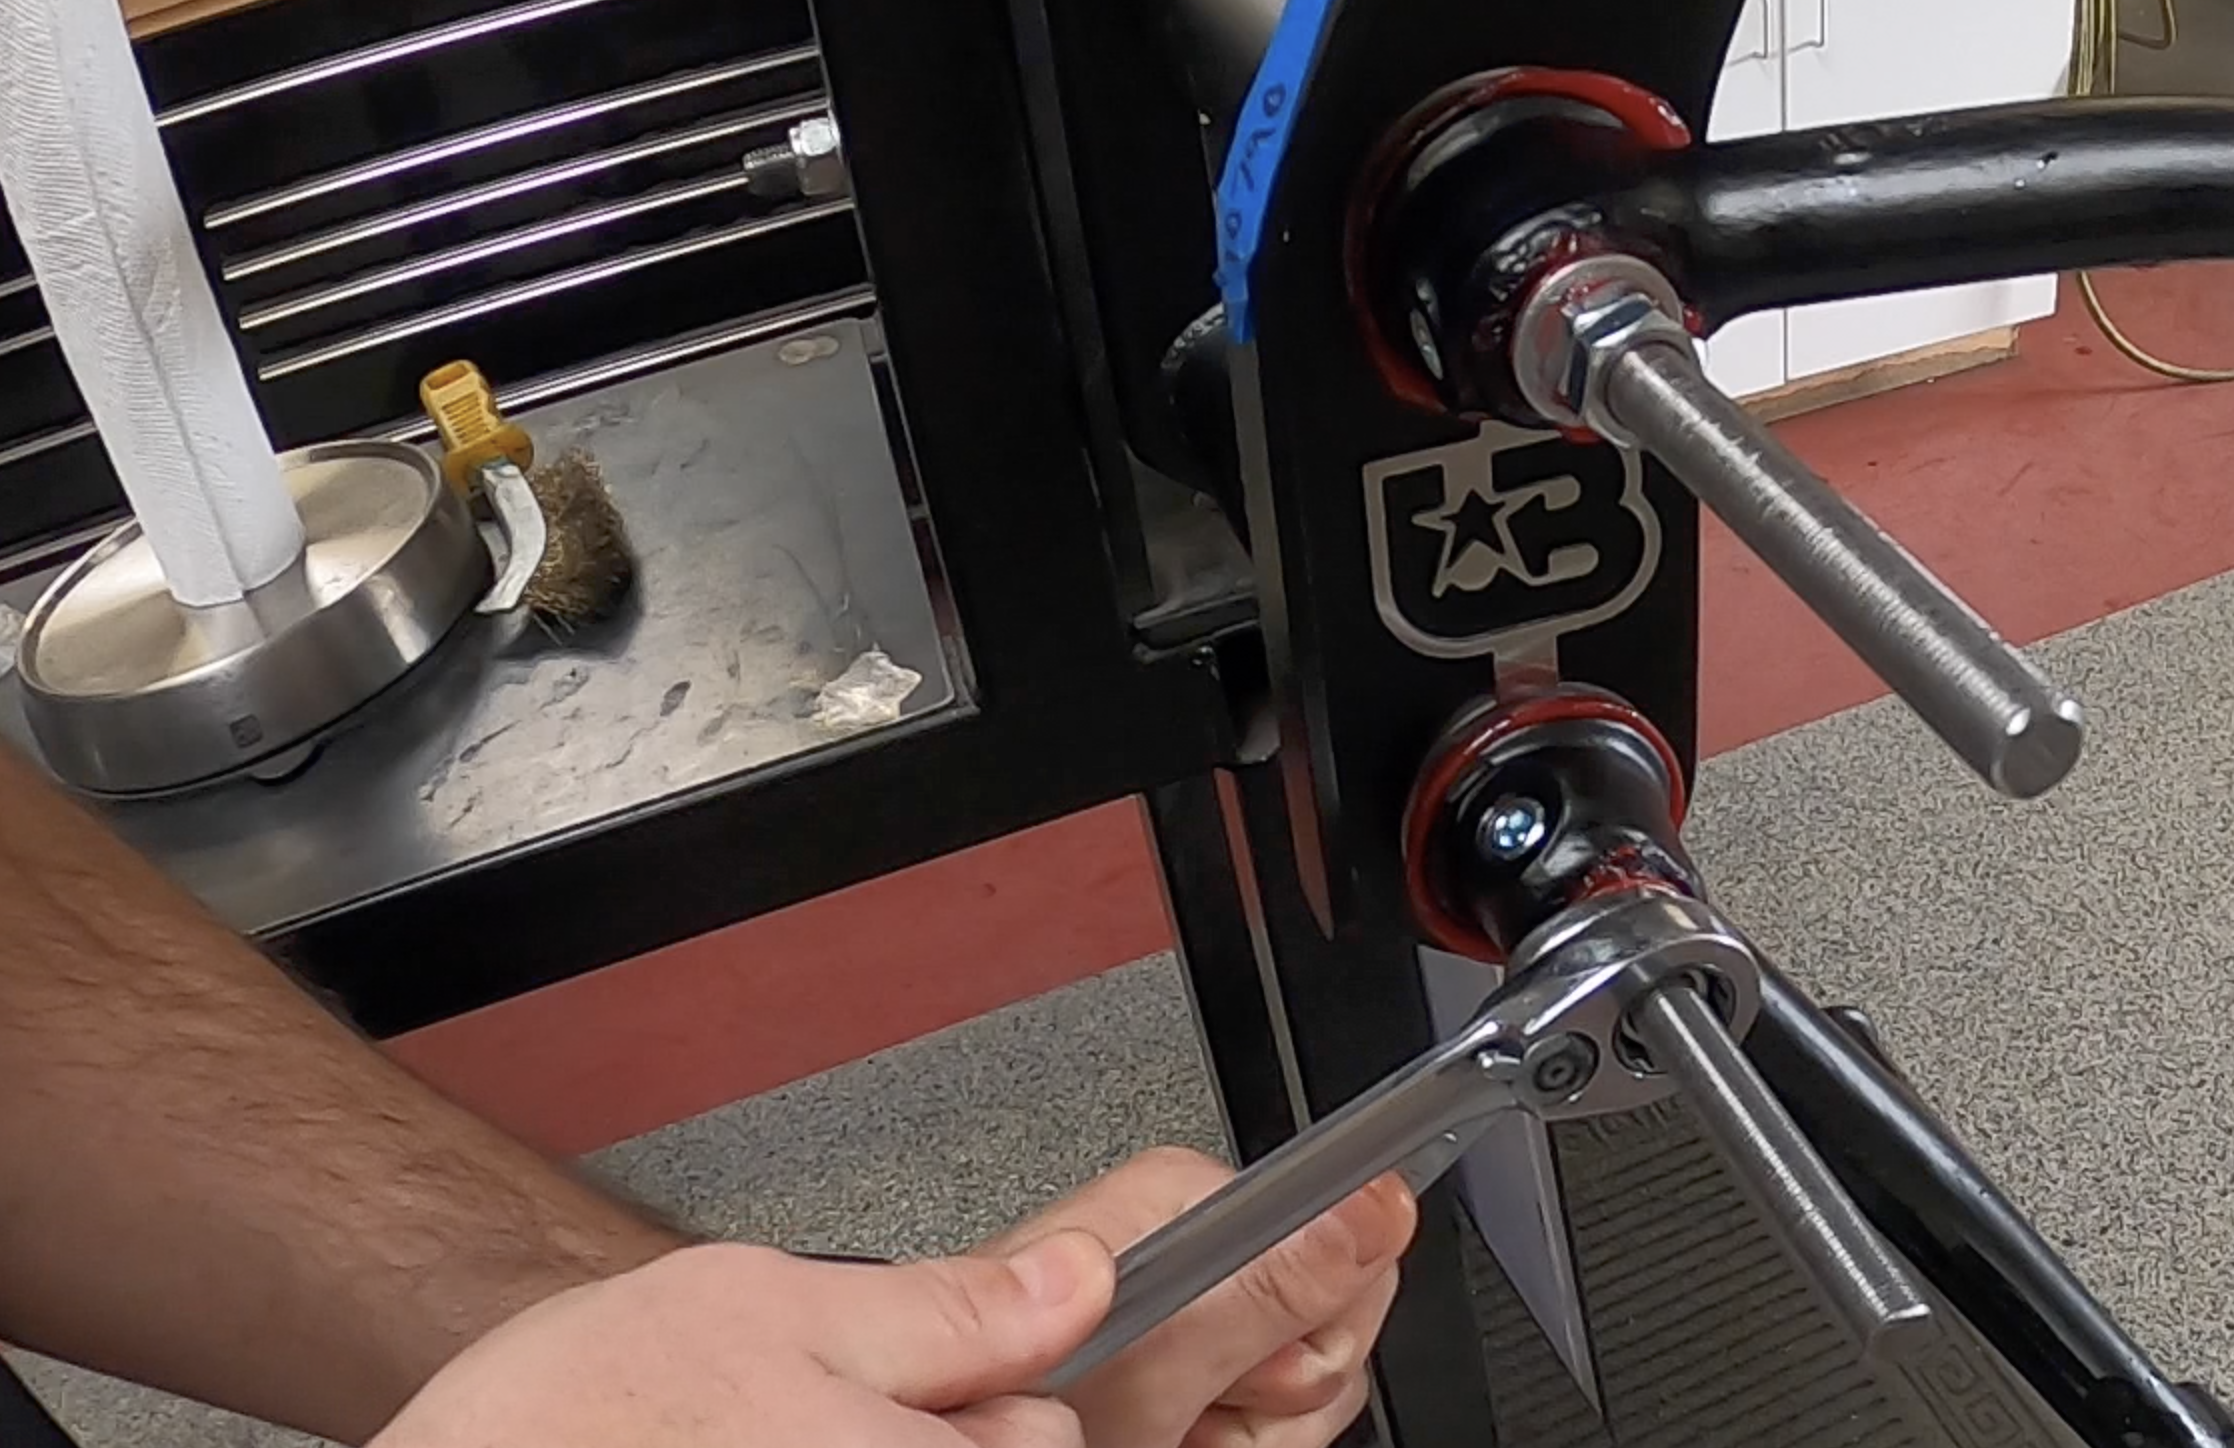
- Hardware order on each side: washer · thrust bearing · washer · jam nut · jam nut.
- Tighten the inner jam nut until the arm just stops moving, then back off EXACTLY 1/4 turn. Lock with the second jam nut. Cut the excess rod, smooth the cut, paint.
- Pump 10–12 shots of grease into the four beam zerks.
While the spindle is off, check your ball joints. Any up-and-down play in the joint = time to replace. Discovering bad joints AFTER reassembly means tearing the front end down a second time. Airkewld ECObuilt and PRObuilt arms ship with premium ball joints already broken in correctly.
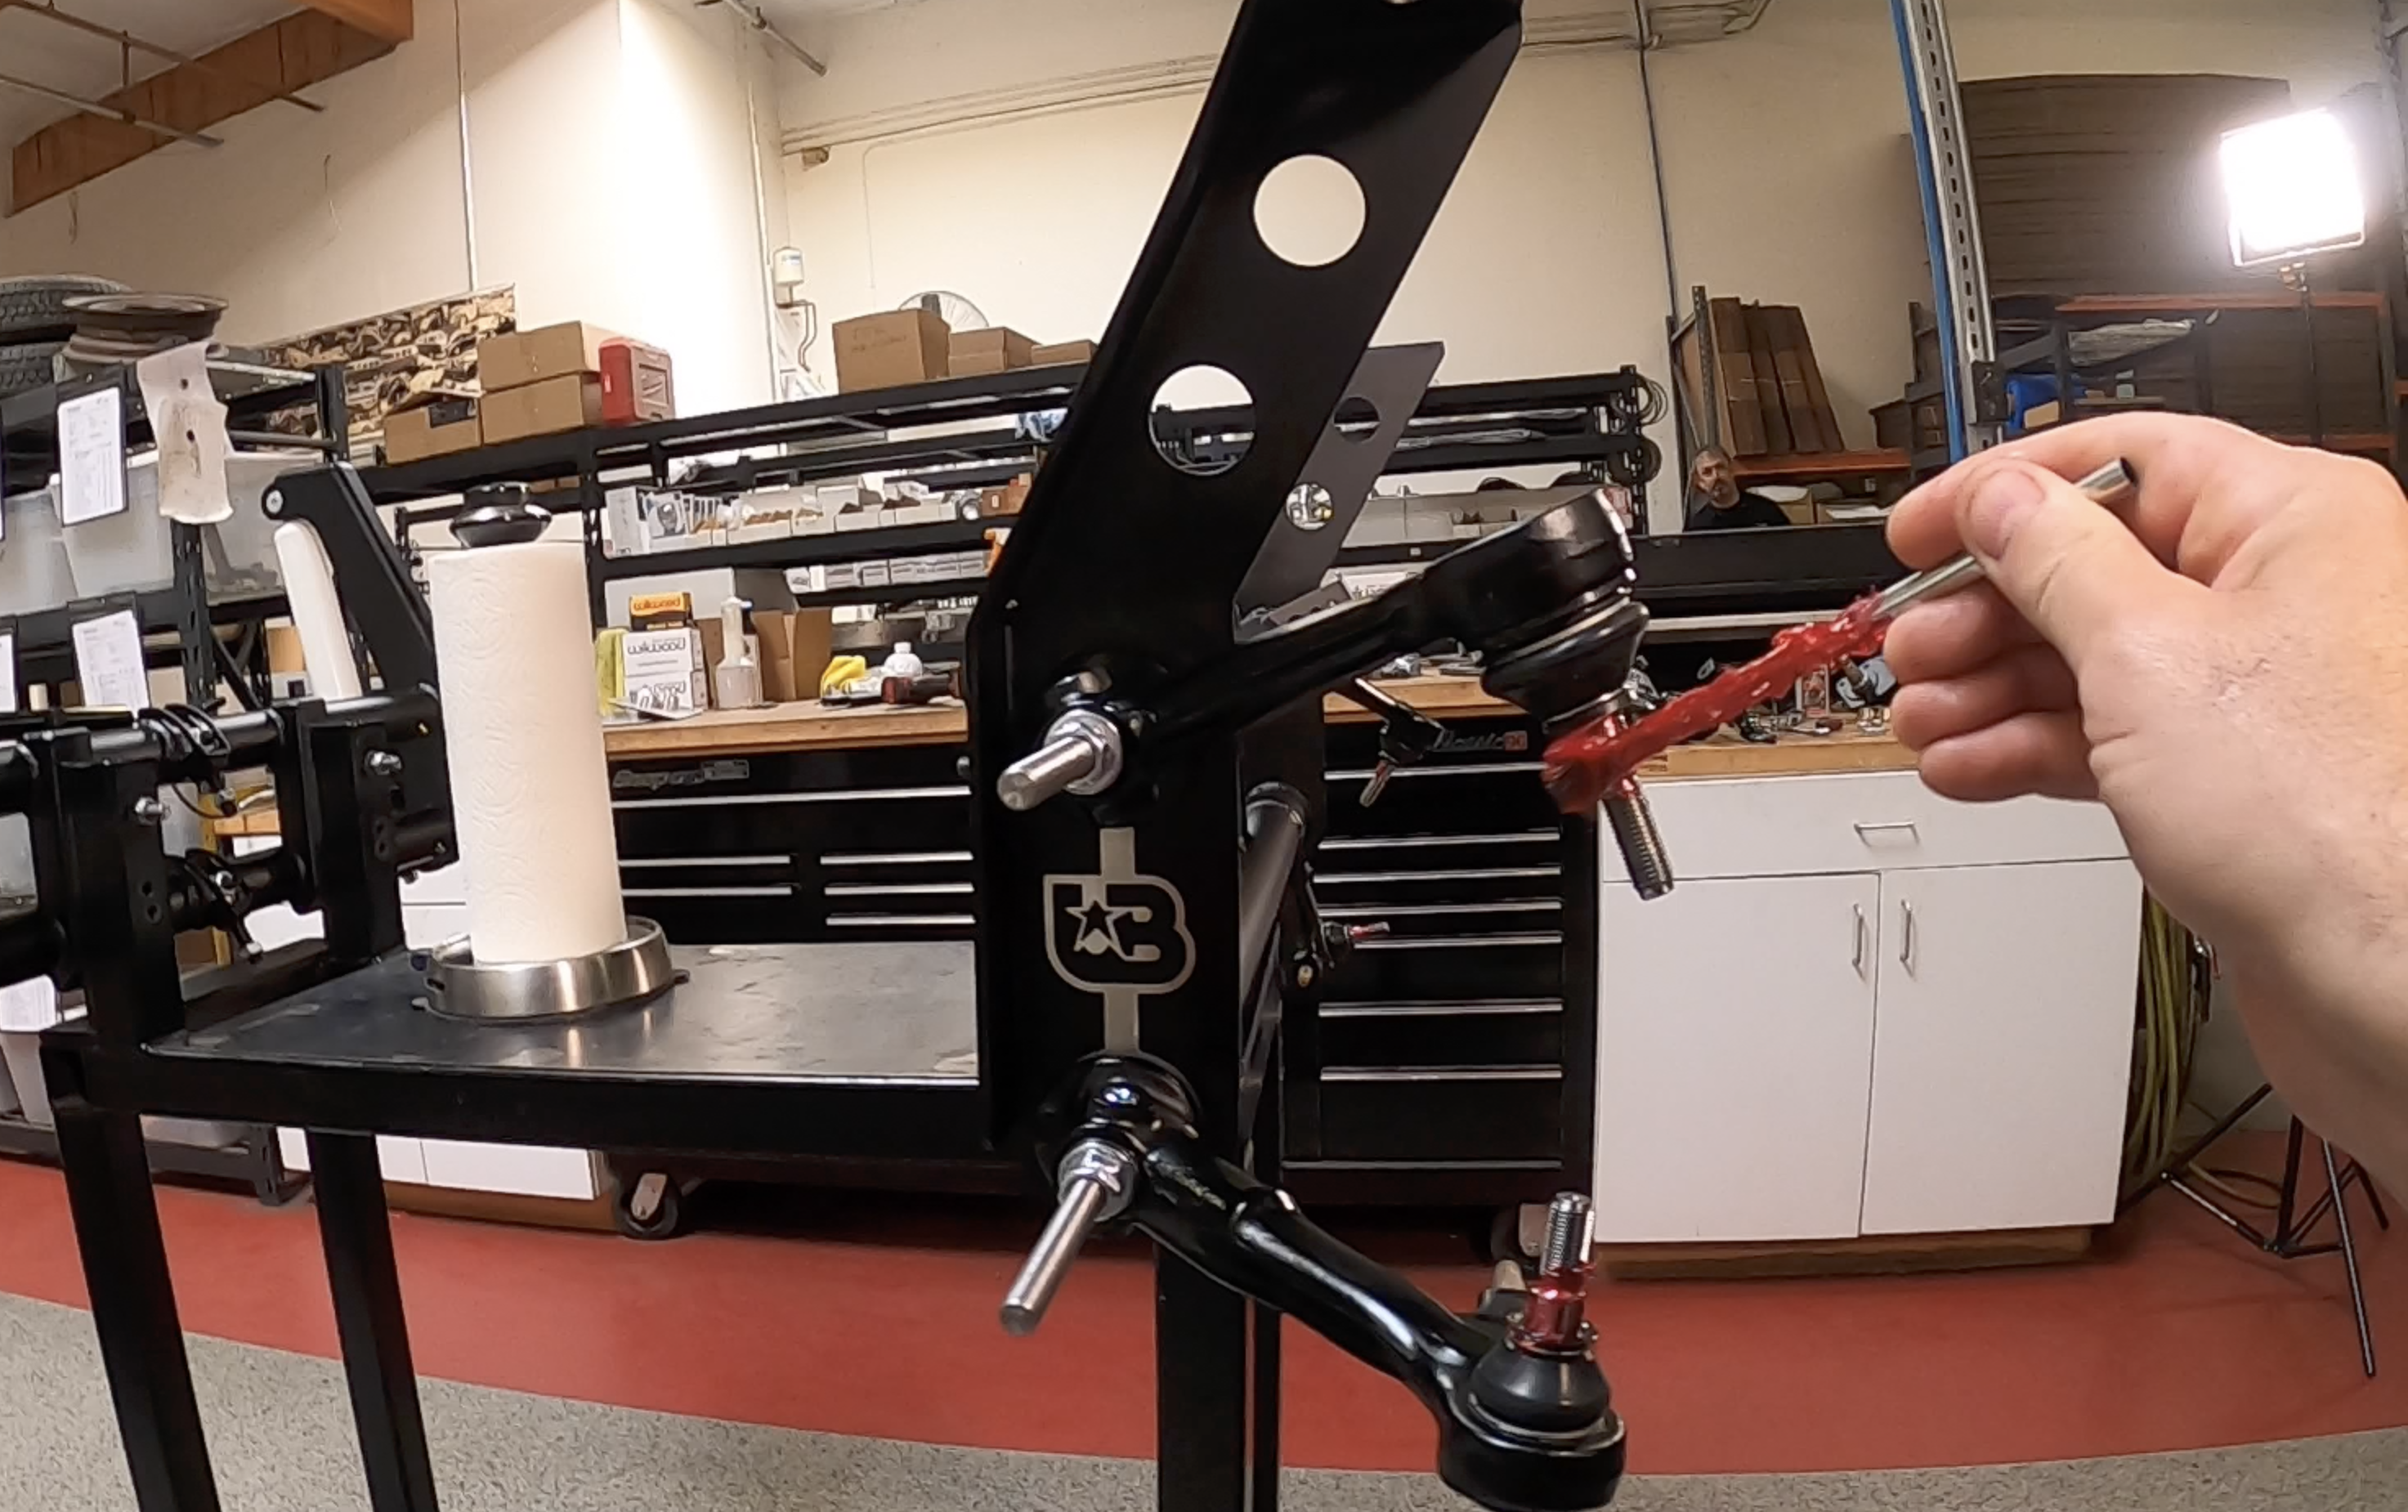
Spindles & Eccentrics
- Slide the spindles onto the control arms with the original hardware.
- Lube the ball joint bores. Tighten the ball joint nuts to about 70% — not final torque yet.
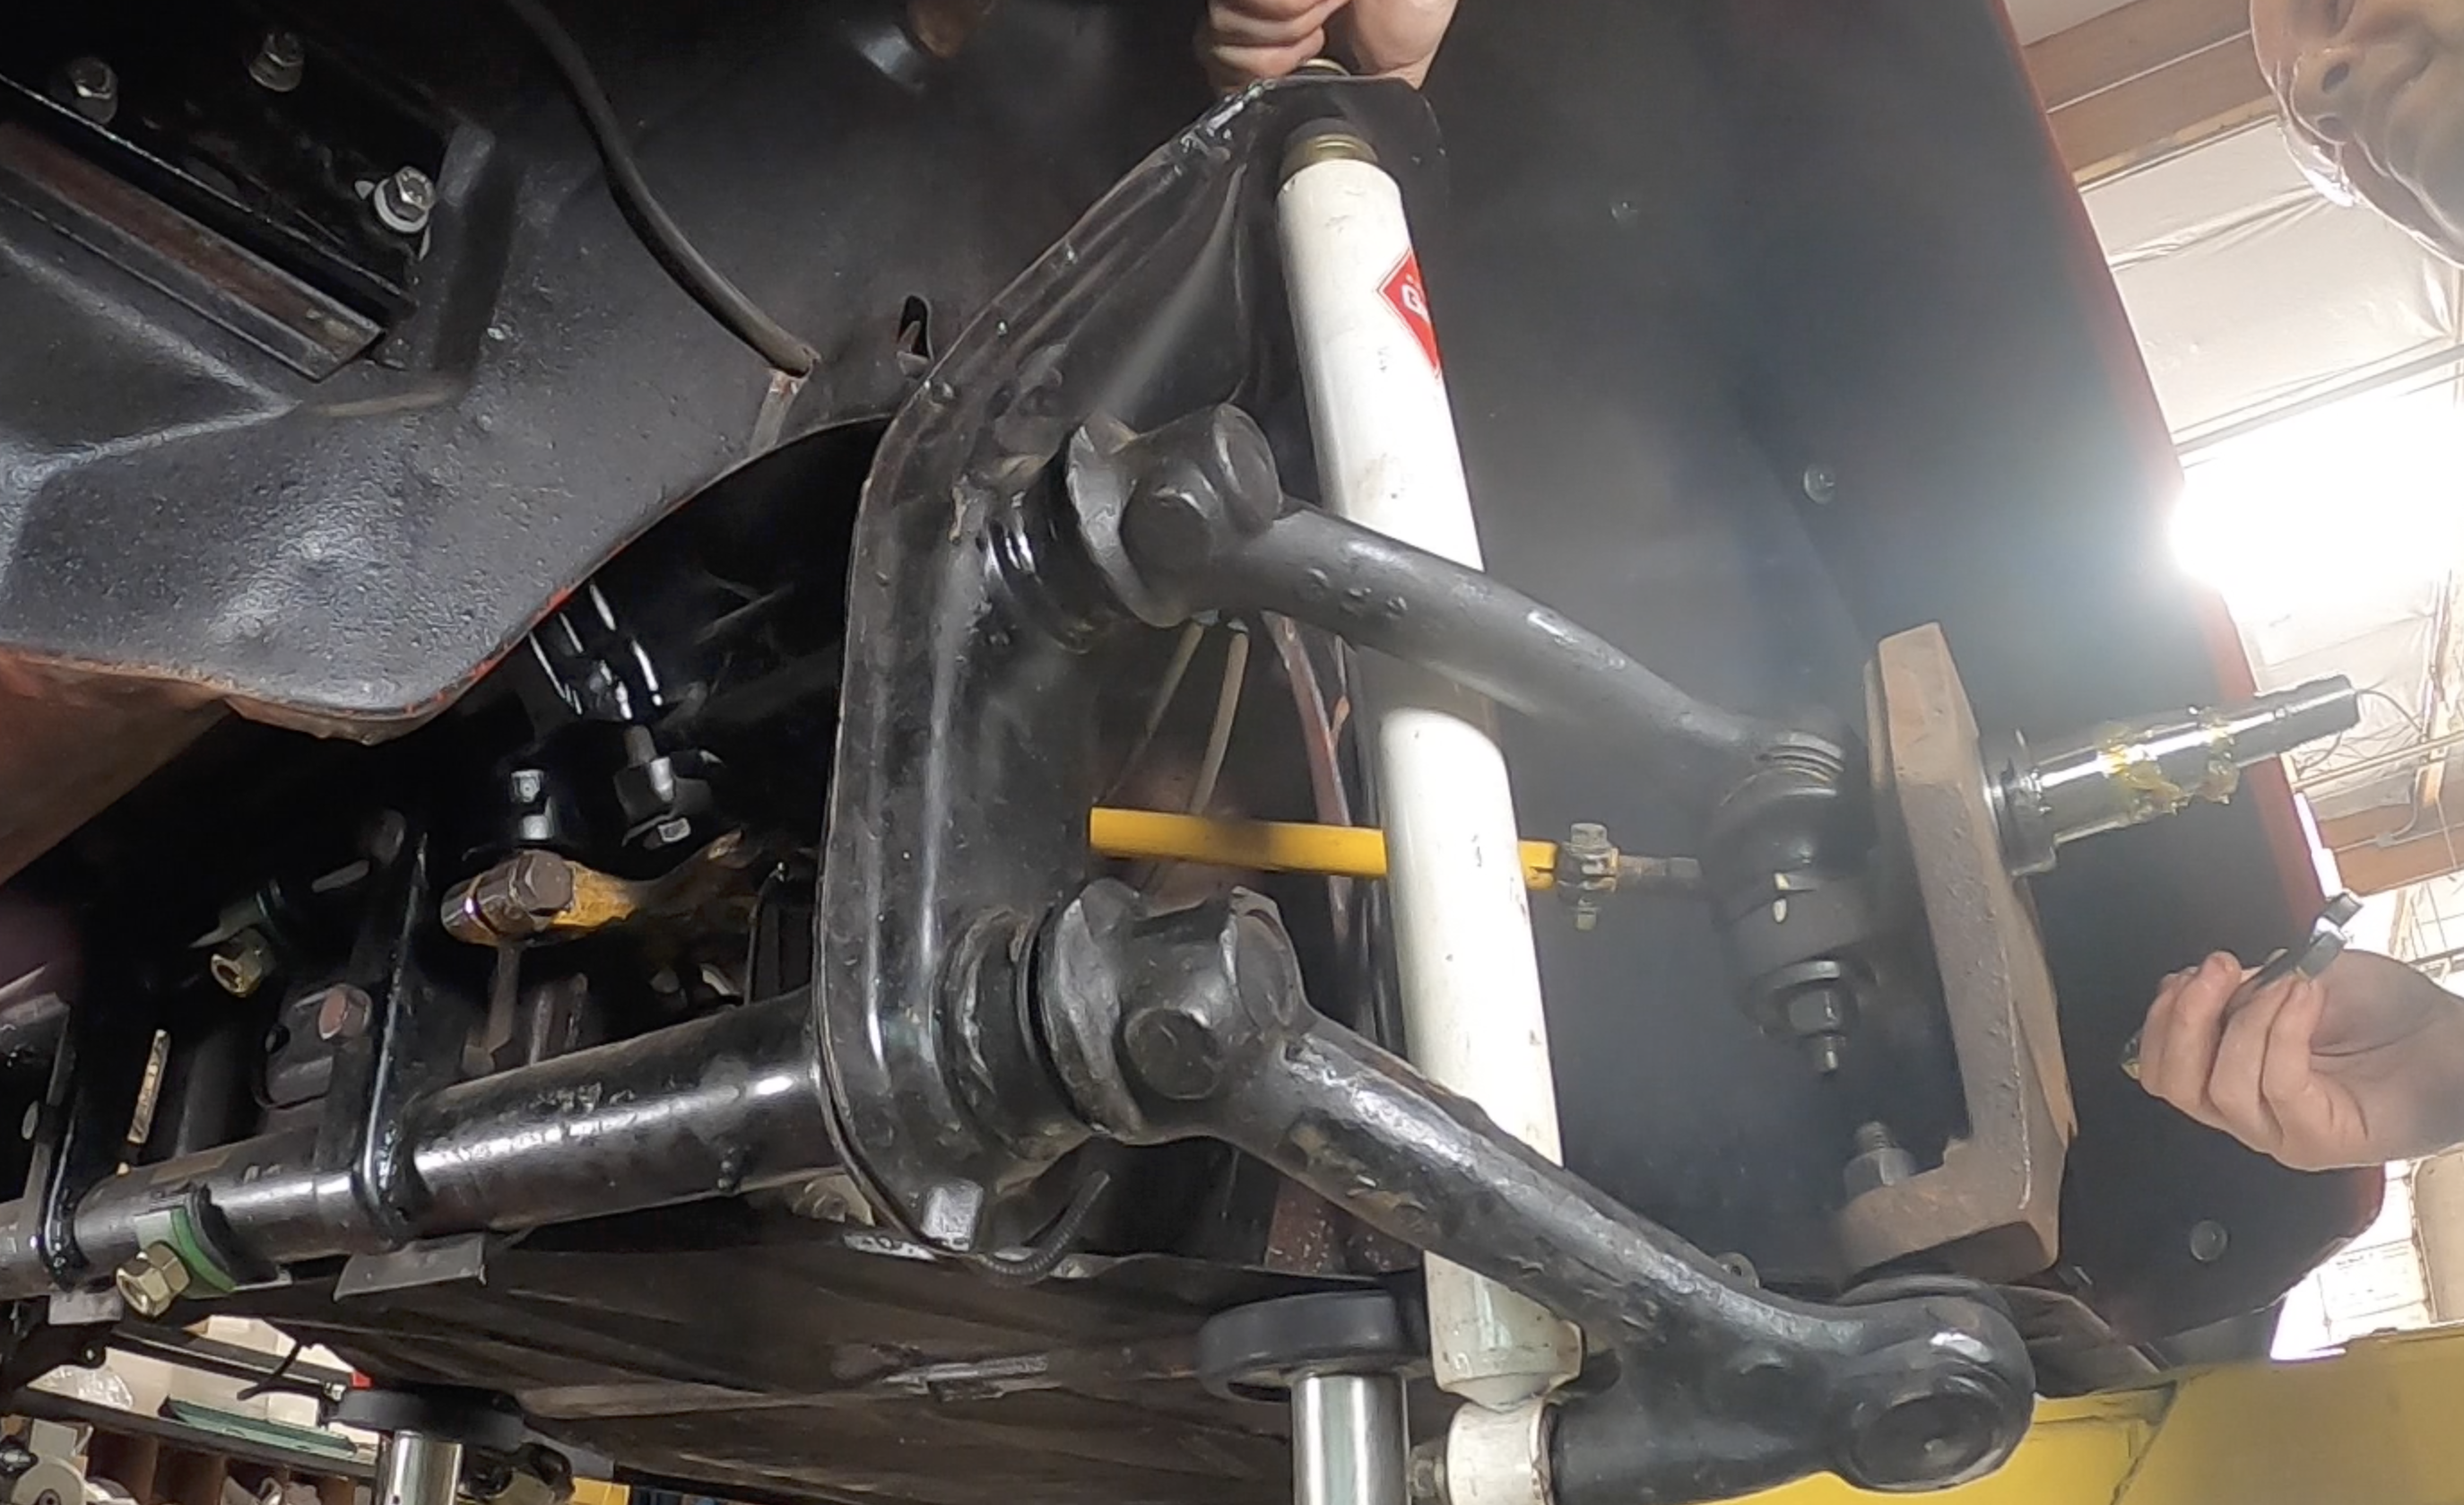
- Place a level / angle finder on the spindle face. Rotate the eccentrics to 90° perpendicular to ground.
- NOW snug the ball joint nuts — after the eccentrics are dialed, not before.
- Reinstall the backing plates and drum / rotor. Drum nut: tight to no spin, then back off 1/4 turn. Thrust washer + spindle nut + dust cap + speedo cable.
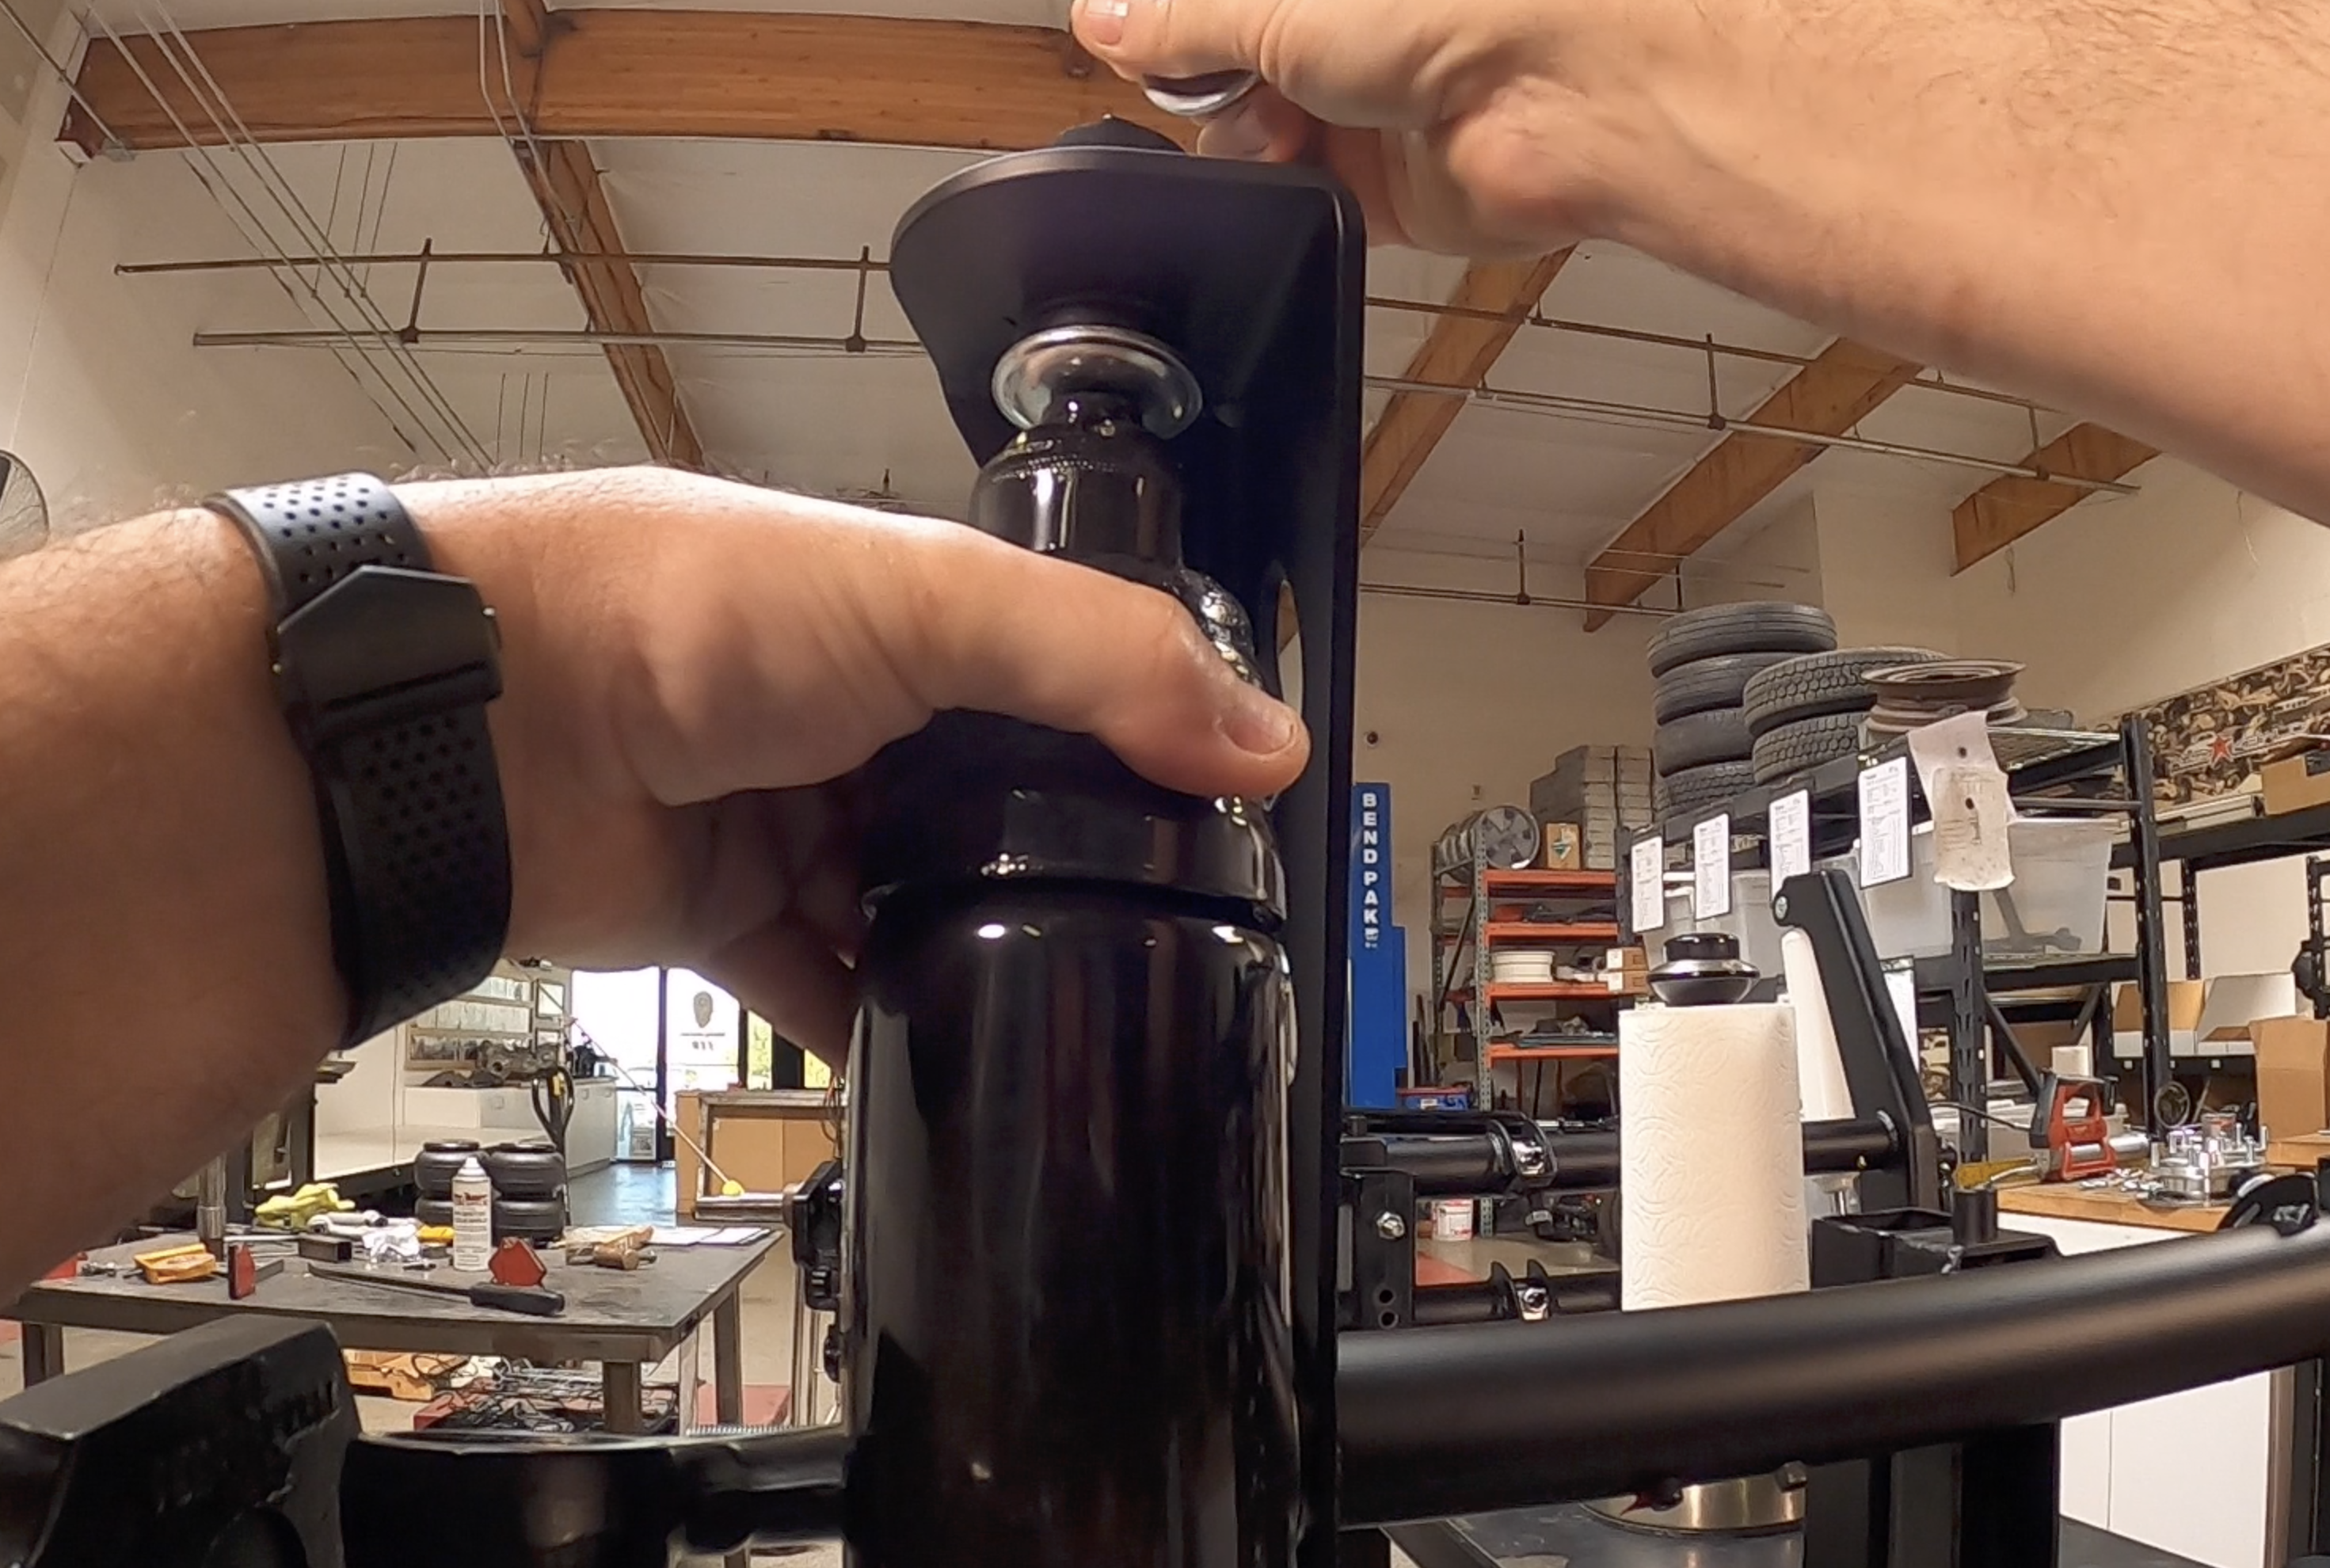
Air Shocks
- Install the air shocks with the fittings facing the FRONT of the vehicle. Use the supplied hardware.
- Apply Teflon tape to the shock fittings. DO NOT overtighten — the fitting body splits if you go gorilla on it.
- Cycle the suspension full travel — verify NOTHING rubs or binds at any point.
- Adjust position if anything contacts. The shocks must move freely through the entire range.
Front end won't lift? 99% of the time it's binding somewhere. Check in this order: through rods over-tight (back the inner jam nut off exactly 1/4 turn), control arms not polished or greased, eccentrics not set perpendicular. Normal lift range is 65–95 PSI. Above 150 PSI = something is binding. Fix the bind — don't just keep adding air.
Air Lines & Final Setup
- Cut tubing SQUARE; push fully into the push-to-connect fittings; pull-test EVERY joint. Soap-test all connections under pressure.
- Route lines AWAY from suspension travel and steering linkage. Secure with clamps; verify clearance through full motion.
- Inflate the system BEFORE lowering the vehicle. This avoids damaging the front apron with the floor jack.
- Reinstall wheels; remove stands. Set ride height to mid-travel.
- Poor-man's toe alignment: tires parallel to the fenders, equal front-and-back tread measurements. Then book a digital 4-wheel for the final dial-in.

"Three hours start to finish, no welder, front lifts at 70 PSI like clockwork. Best money I've spent on this Beetle."
— Posted by jim Thomas"Polished the bearing surfaces, set the eccentrics perpendicular, dialed the jam nuts — lifted on the first shot. Soft ride, and it lays low at every show."
— posted by Bill Jones II"Bought the PRObuilt bundle so I didn't have to think about beam compatibility. Bolted right in, dropped the car at the show. Easiest air ride install I've done."
— Posted by Brad SutcliffeThe Questions We Get Most
Is welding required for this kit?
No. The only optional weld is the through-rod joint — you can either Loctite or weld the male and female halves together. Everything else is bolt-in.
Does the body need to come off to install the air ride?
No. Front-end-only install. Car on jack stands, wheels off, and you have full access to everything you need.
Will this work with my existing narrowed beam?
If it looks like a stock beam and still has factory towers and roller bearings inside the beam, yes. All others, no — custom-tower beams and beams with urethane bushings are not compatible. If you're unsure, send us a photo before you order.
How long does the install take?
About 3 hours if your beam is right and your ball joints are healthy. Add time if you discover bad joints or need to polish heavily worn bearing surfaces.
Do I need drop spindles with this air ride kit?
Yes. The kit was designed with drop spindles in mind. Without them you won't get the maximum drop the kit is capable of. If you need advice on which spindles make the most sense for your build, give us a call.
Can I use an electronic air management kit (AMK) with your air ride?
You can. Heads up though: we won't be able to tech-support any AMK-specific issue, because we don't have the ability to recreate problems with every vendor's AMK and their firmware updates. The mechanical install in this guide doesn't change — only the controller wiring on top of it.
Can I use this kit with EMPI lowered ball joints?
Yes — but be warned. EMPI lowered ball joints will let you go lower, but they tend to fall apart rather quickly. We've seen them fail well before they should. If lay-frame is the goal, drop spindles + a dialed-in eccentric setup is the better path.
Is there anything else I'll need with this kit?
No — the kit ships complete with through rods, air sleeve shocks, Delrin spacers, and hardware. You'll add the standard tools listed above plus Loctite, Teflon tape, assembly grease, and a tube of chassis grease for the beam zerks.
My front end won't lift — what's wrong?
99% of the time it's binding. Check in this order: (1) through rods over-tight — back the inner jam nut off EXACTLY 1/4 turn; (2) control arm bearing surfaces not polished or greased; (3) eccentrics not set perpendicular. Normal lift pressure is 165–195 PSI. Above 200 PSI you're not "needing more air" — you're fighting a bind. Fix the bind, don't just add pressure.
What's your warranty?
If any component in the kit ever fails from a manufacturing defect, we replace it. Period. Email help@airkewld.com with a photo and your order number.
Real Humans. Real Phones. Real VW People.
Beam compatibility questions, bind diagnosis, eccentric setup, won't-lift troubleshooting — reach out before you make a cut you can't undo. We pick up the phone. We answer the email.