 US Dollars
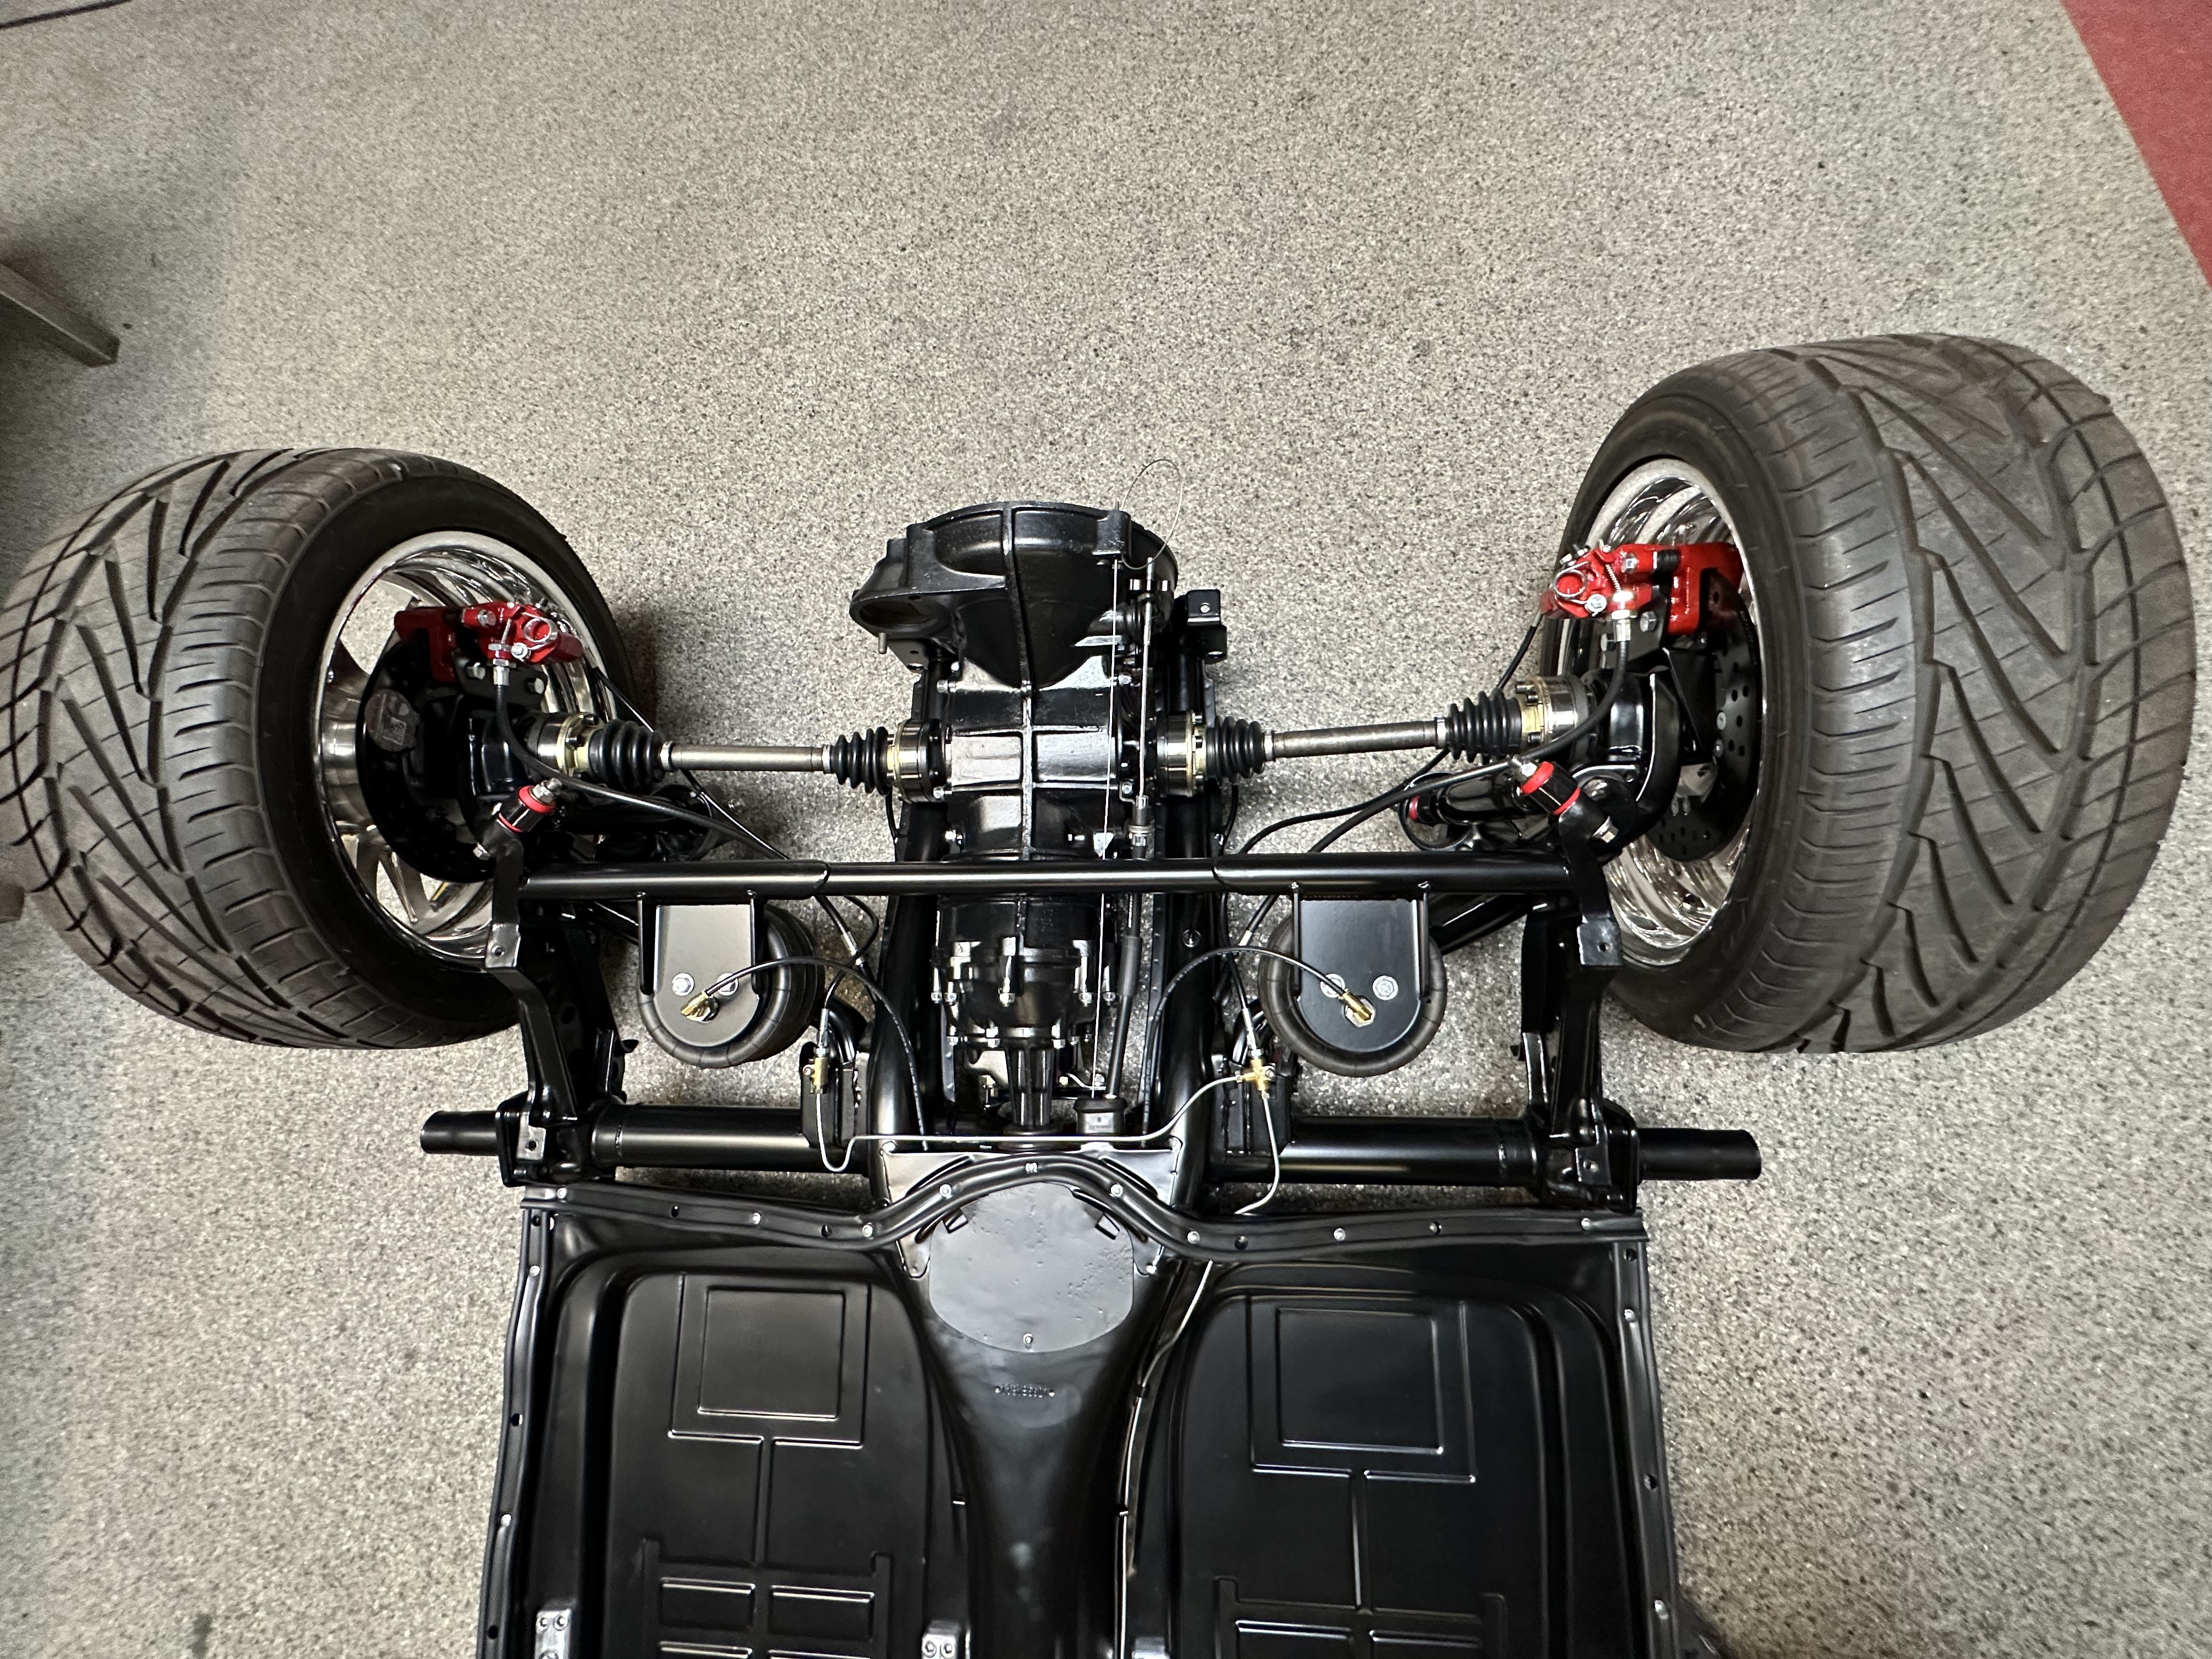
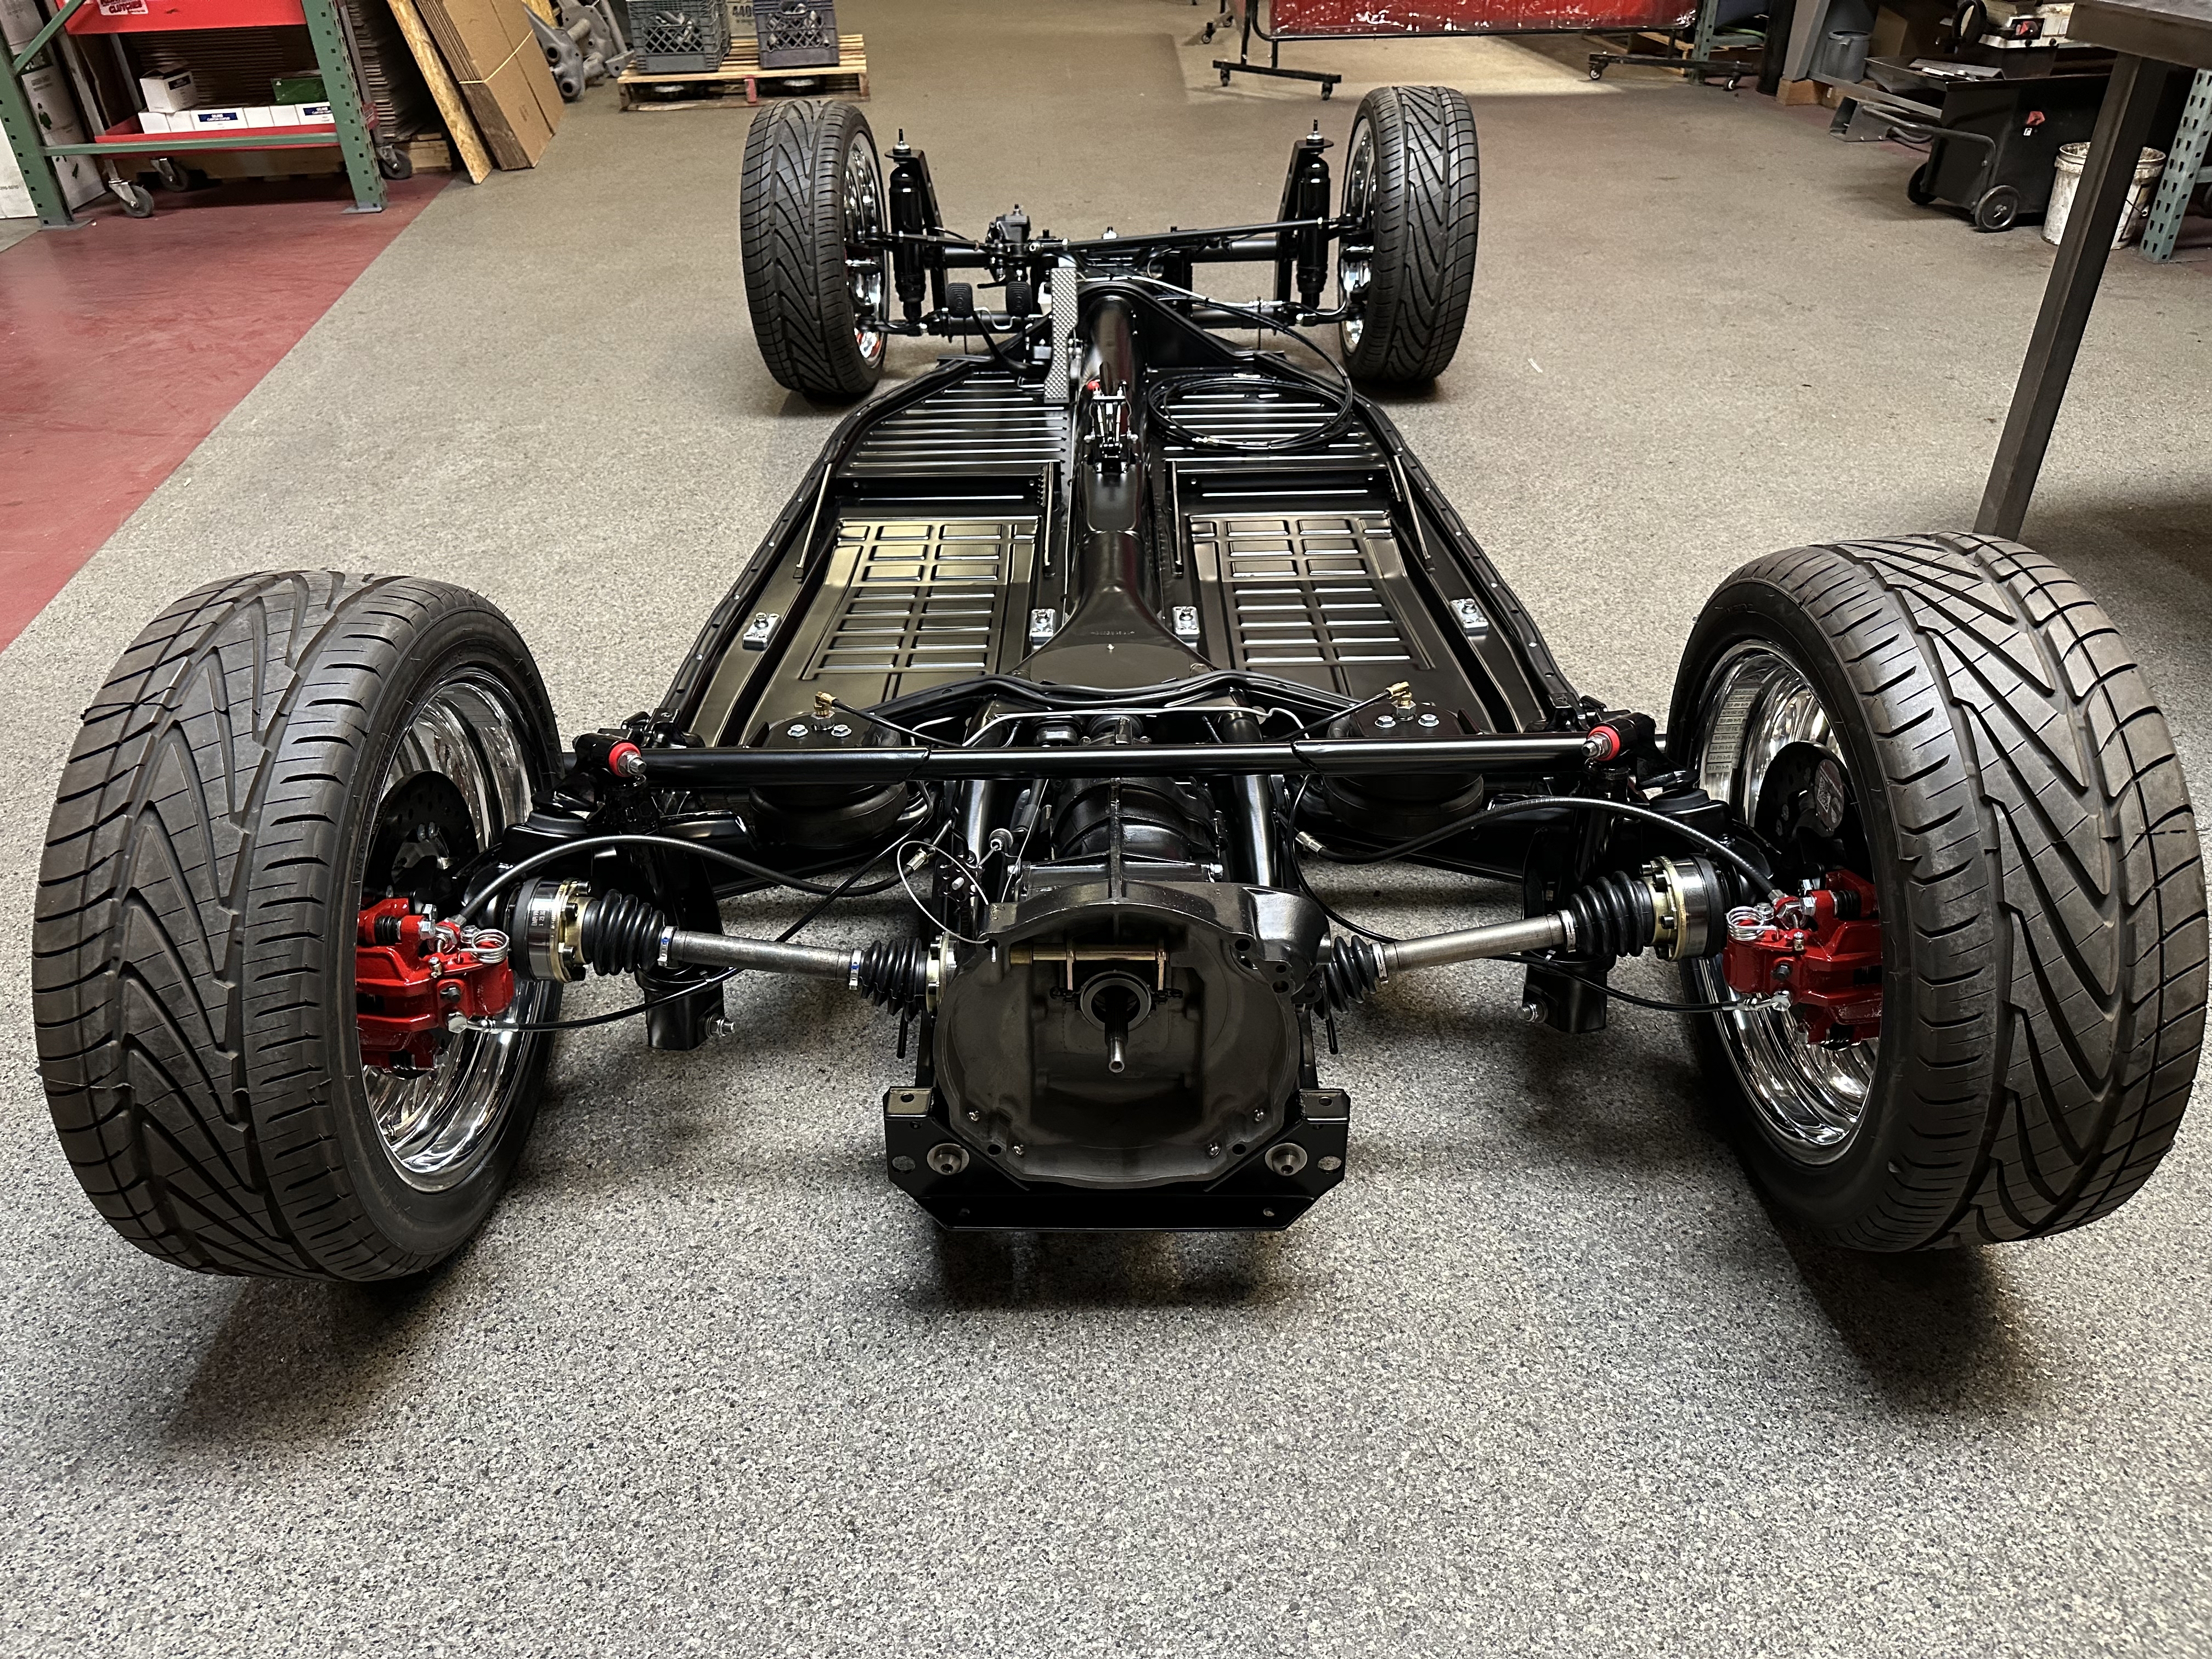
IRS Axle Air Ride Install
The cleanest way to convert your 1969–1977 IRS-equipped VW from torsion-sprung to floating air ride. Doetsch Tech shocks, urethane bump stops, 2,500lb bags, and the bag-mount hardware — a body-on weekend project that gives you on-the-fly stance for life.
"Take control of your ride height anytime, anywhere. Our premium Air Ride Kit turns your Classic VW into the perfect blend of style, comfort, and adjustability."
From Torsion-Sprung to Floating on a Pillow.
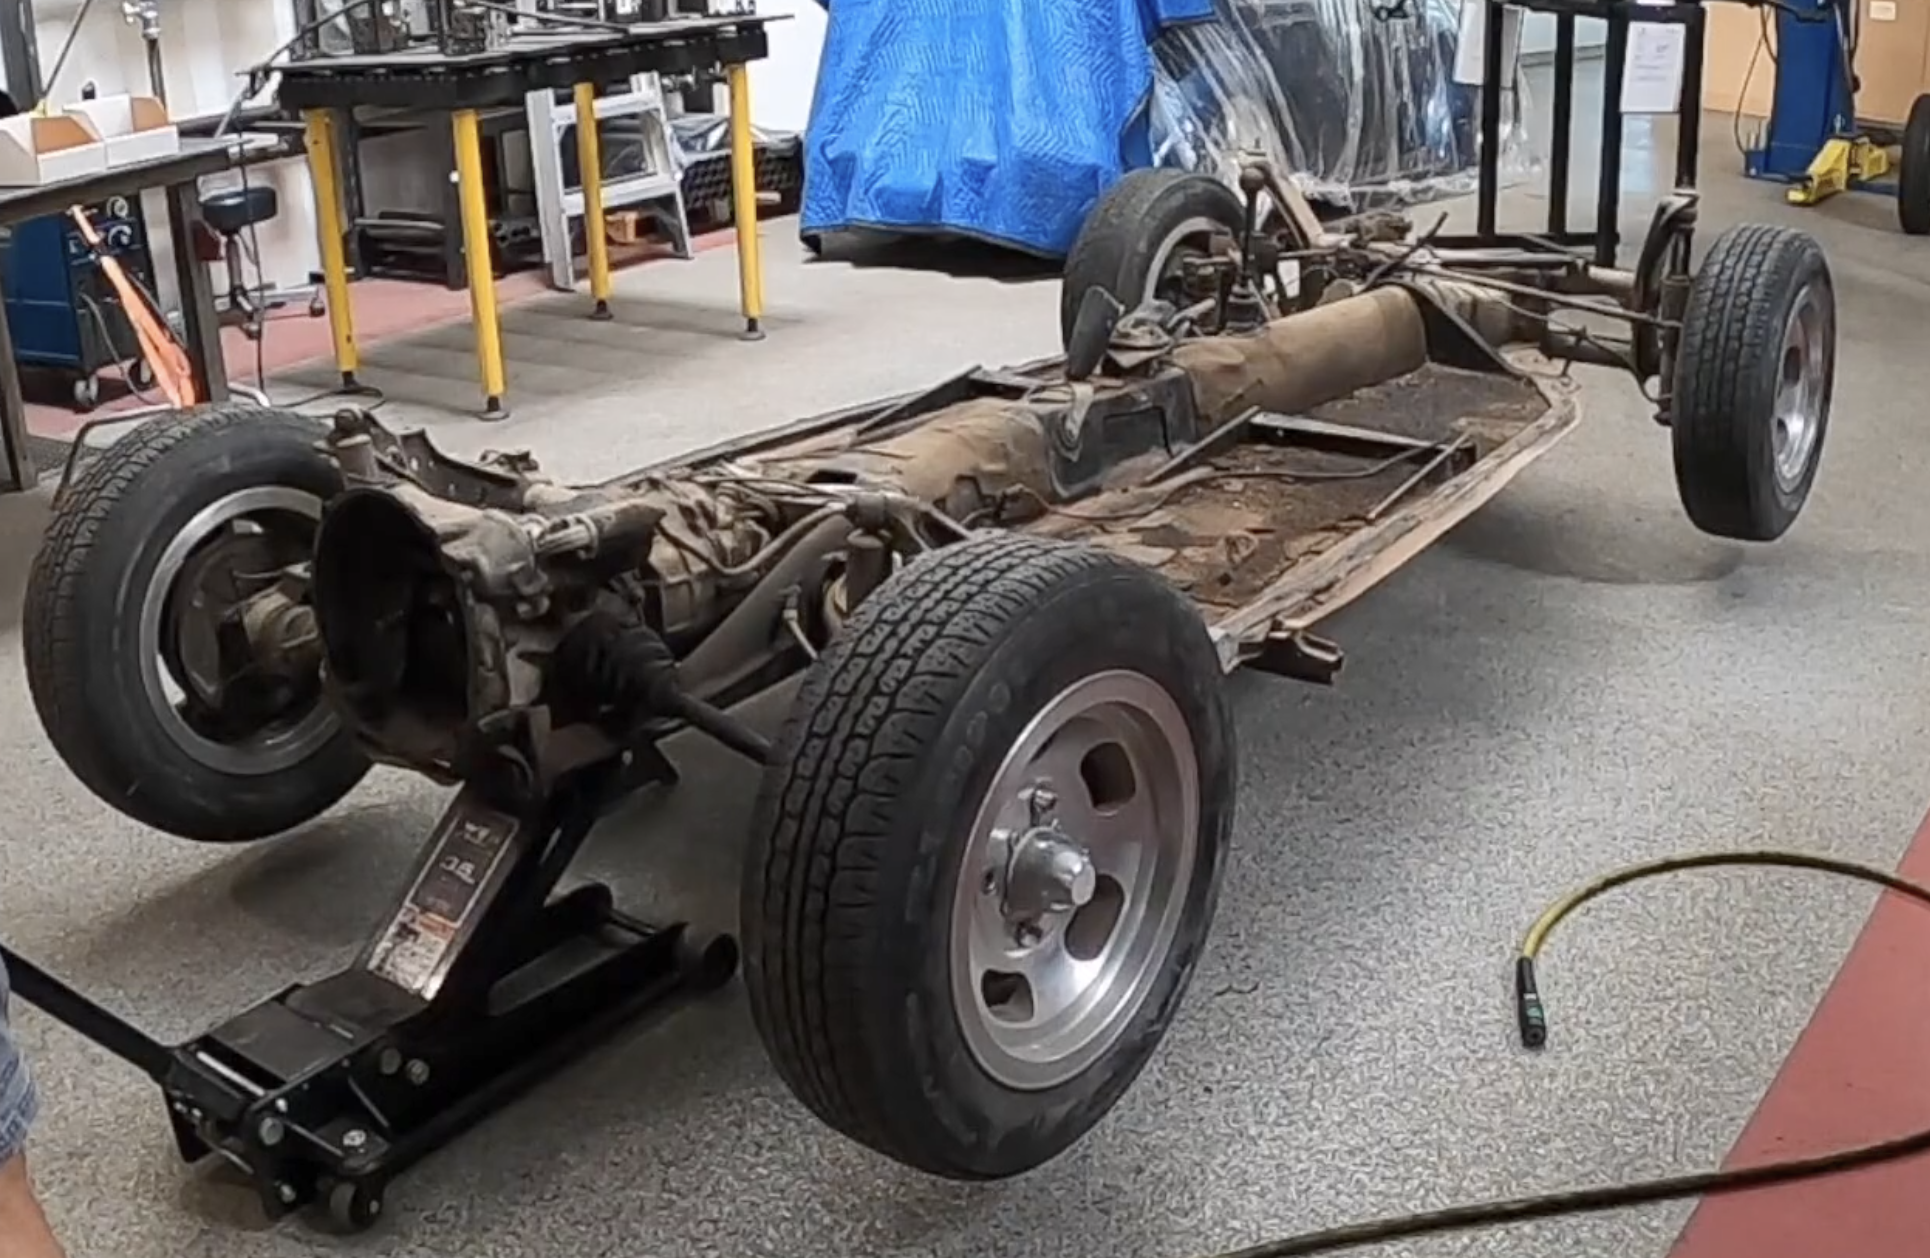
The IRS rear suspension that VW dropped into the 1969 Beetle was a big upgrade over the swing axle — CV joints, diagonal trailing arms, way better handling at speed. But the torsion bars are still torsion bars, and the ride is still 1970s rough.
The Airkewld IRS Air Ride Kit pulls the torsion bars, re-uses the rubber doughnuts so the trailing arm swings free, and replaces the spring with 2,500lb air bags on a telescoping upper mount and a lower bag circle that welds into the existing trailing arm. Doetsch Tech shocks and urethane bump stops complete the package.
Soft ride. Show stance on demand. Built for the car you actually drive.
Fits 1969–1977 IRS-equipped Beetle, Ghia, Super Beetle, and Thing. Body stays on the chassis — the entire install happens with the car on jack stands and the rear wheels off. Available as a standalone rear kit or as part of a complete (front + rear) bundle.
Read This Step Before You Pry the Spring Plate.
When you pry the spring plate off its perch, the torsion bar releases all of its stored tension at once. The spring plate snaps DOWN extremely fast. Stand to the FRONT of the car and pry from underneath so the spring plate travels away from you, not into you. Goggles on. Don't rush this step.
- Stand to the FRONT when releasing torsion bar tension. Goggles on. Long pry bar.
- Do NOT damage the rubber doughnuts coming off — they get re-installed onto the spring plate (lubed up) so the trailing arm swings free. Damage them and you'll be sourcing replacements before you can finish.
- Don't fully weld bag mounts on first pass. Tack only, cycle the suspension, verify the bag clears the torsion housing through full travel, THEN finish-weld.
- Locktite the reused axle bolts. Use removable Locktite on every original bolt that goes back in — you don't want them backing out on you down the road.
The Numbers You Need Before You Cut
Air Bags
2,500 lbOne pair, rear
Shocks
Doetsch TechSteel spacers included
Install Type
Body-OnOn jack stands
Welding
Tack → Cycle → WeldNever weld first
IRS-Only · 1969 and Newer
✓ Fits
- 1969–1977 Beetle
- 1969–1975 Karmann Ghia
- 1971–1979 Super Beetle
- 1973–1974 Type 181 Thing
- Kit cars on a Type 1 IRS rear suspension
✗ Does NOT Fit
- Type 2 Bus — different rear architecture
- Type 3 (Squareback, Notchback, Fastback) — different chassis
- Swing-axle rear suspensions (1949–1968) — see the link below
- Stock reduction-gear-box transaxles
- Straight-axle conversions
Complete IRS Rear Kit Contents
Everything you need to convert the IRS rear from torsion-sprung to air ride. Add basic shop tools and a welder (next section) and you're ready to start.
- Telescoping Upper Bag Mounts — weld to the chassis at the upper shock mount area
- Lower Bag Circles — cut into and welded to the existing trailing arm
- 2,500 lb Air Bags (1 pair, rear)
- Doetsch Tech Shocks with steel spacers (prevent bushing crush)
- Urethane Bump Stops — replace the original snubber ball
- 1/2″ Bushings & 90° Push-Loc Fittings for the air-line connections
- Hardware Pack — bolts, washers, nylocs, 16 shock spacers
- Printed Instructions (this guide)

Two Ways to Air Ride Your IRS Build
Just doing the rear? Grab the standalone kit. Want front + rear in one box? Pick the complete kit.

IRS Rear Air Ride Kit
Just the rear. For builders who already have a front air-ride solution or are doing the rear separately. Fits 1969–1977 IRS Beetle, Ghia, Super, and Thing. Part #111 000 007.
Shop Rear Kit →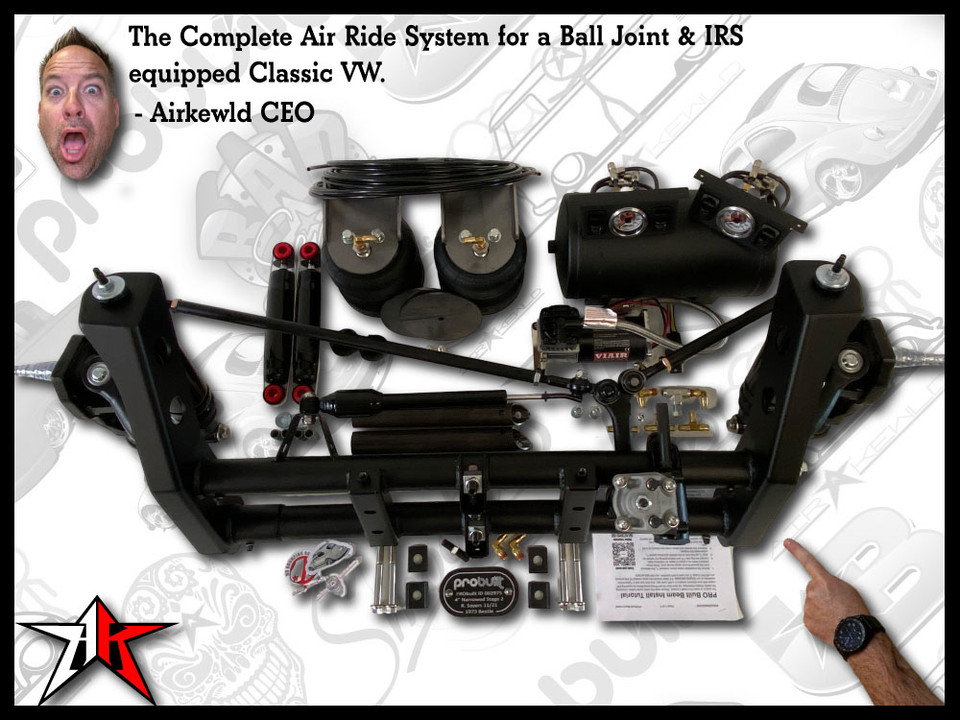
Complete Air Ride Kit
Front + rear in one box. The most popular pick for 1969–1977 IRS builds — Beetle, Ghia, Super Beetle, and Thing on a single PO. Part #111 000 399.
Shop Complete →Filming the Install Series
We're shooting an end-to-end IRS air-ride install series the same way we did for the swing-axle kit. Drops on YouTube as soon as it's edited.
Subscribe to Airkewld on YouTube for the alert when it goes live.
The Top 5 Install Mistakes — And How to Avoid Them
These five are the difference between a clean install and a rework. Read them. Live them.
Damaging the Rubber Doughnuts
Those doughnuts come back out, get lubed up with Valvoline grease, and go right back onto the spring plate so the trailing arm can swing free. Tear them on the way out and you're sourcing replacements (or springing for urethane) before you can keep going.
Standing Behind the Spring Plate at Release
Stand to the FRONT of the car and pry the spring plate from underneath so it travels away from you. Goggles on, long pry bar. The release is fast and violent — respect it.
Welding Bag Mounts Before Cycling
Tack-weld upper mounts and the lower bag circle, install the bag, cycle the suspension full travel, verify the bag never touches the torsion housing. THEN remove the bag and finish-weld. Locking in a contact point first means the bag pays for it.
Skipping the Steel Shock Spacers
The Doetsch shocks ship with 16 steel spacers in the box for a reason — they press into the shock ends so you can torque the hardware down without crushing the bushings. Forget them and you'll be replacing bushings before the season is out.
Skipping the Soap Test on Air Lines
Teflon-tape every fitting, then pressurize and spray every joint with soapy water before you button up. Fix every bubble now — chasing slow leaks once the body's back over everything is brutal.
Tools Required · Shop the Build
A welder is non-negotiable for this install. If you don't own one, find a friend with a MIG or a local fab shop. You'll also want a Sawz-all (or hack saw) and a 3/8″ drill bit for the snubber-ball conversion, plus removable Locktite, Valvoline grease, and a rust-prevention paint. Affiliate links support the channel — same price to you.

Jack & Jack Stands
Lift the rear of the car high — the higher you raise it, the easier the install gets. Stands rated for vehicle weight; the car rides on them while you work.
Shop on Amazon
Metric Socket Set
For the (4) trailing-arm-to-spring-plate bolts, the (4) spring-plate-cap bolts, the shock hardware, and the wheels. Full metric range covers it all.
Shop on Amazon
Long Pry Bar
For releasing the spring plate from its perch. Length = leverage = distance from the violent release.
Shop on Amazon
Angle Grinder
For grinding paint and undercoating off the upper-shock-mount area where the upper bag mounts weld to the chassis, and for cleaning the trailing arm where the lower bag circle goes in.
Shop on Amazon
MIG Welder
Required. Upper bag mounts to chassis, 3/8″ bolt to lower bag circle, lower bag circle into the trailing arm. Tack first, cycle, then finish-weld.
Shop on Amazon
Safety Goggles
Non-negotiable. Spring-plate release sends old undercoat and casting flash flying. Welding sparks, grinding sparks, Sawz-all chips — eyes get protected the whole way through.
Shop on Amazon
Teflon Tape
For the 1/2″ bushing-to-bag and 90° push-loc-fitting connections. Tape goes on the male threads only.
Shop on Amazon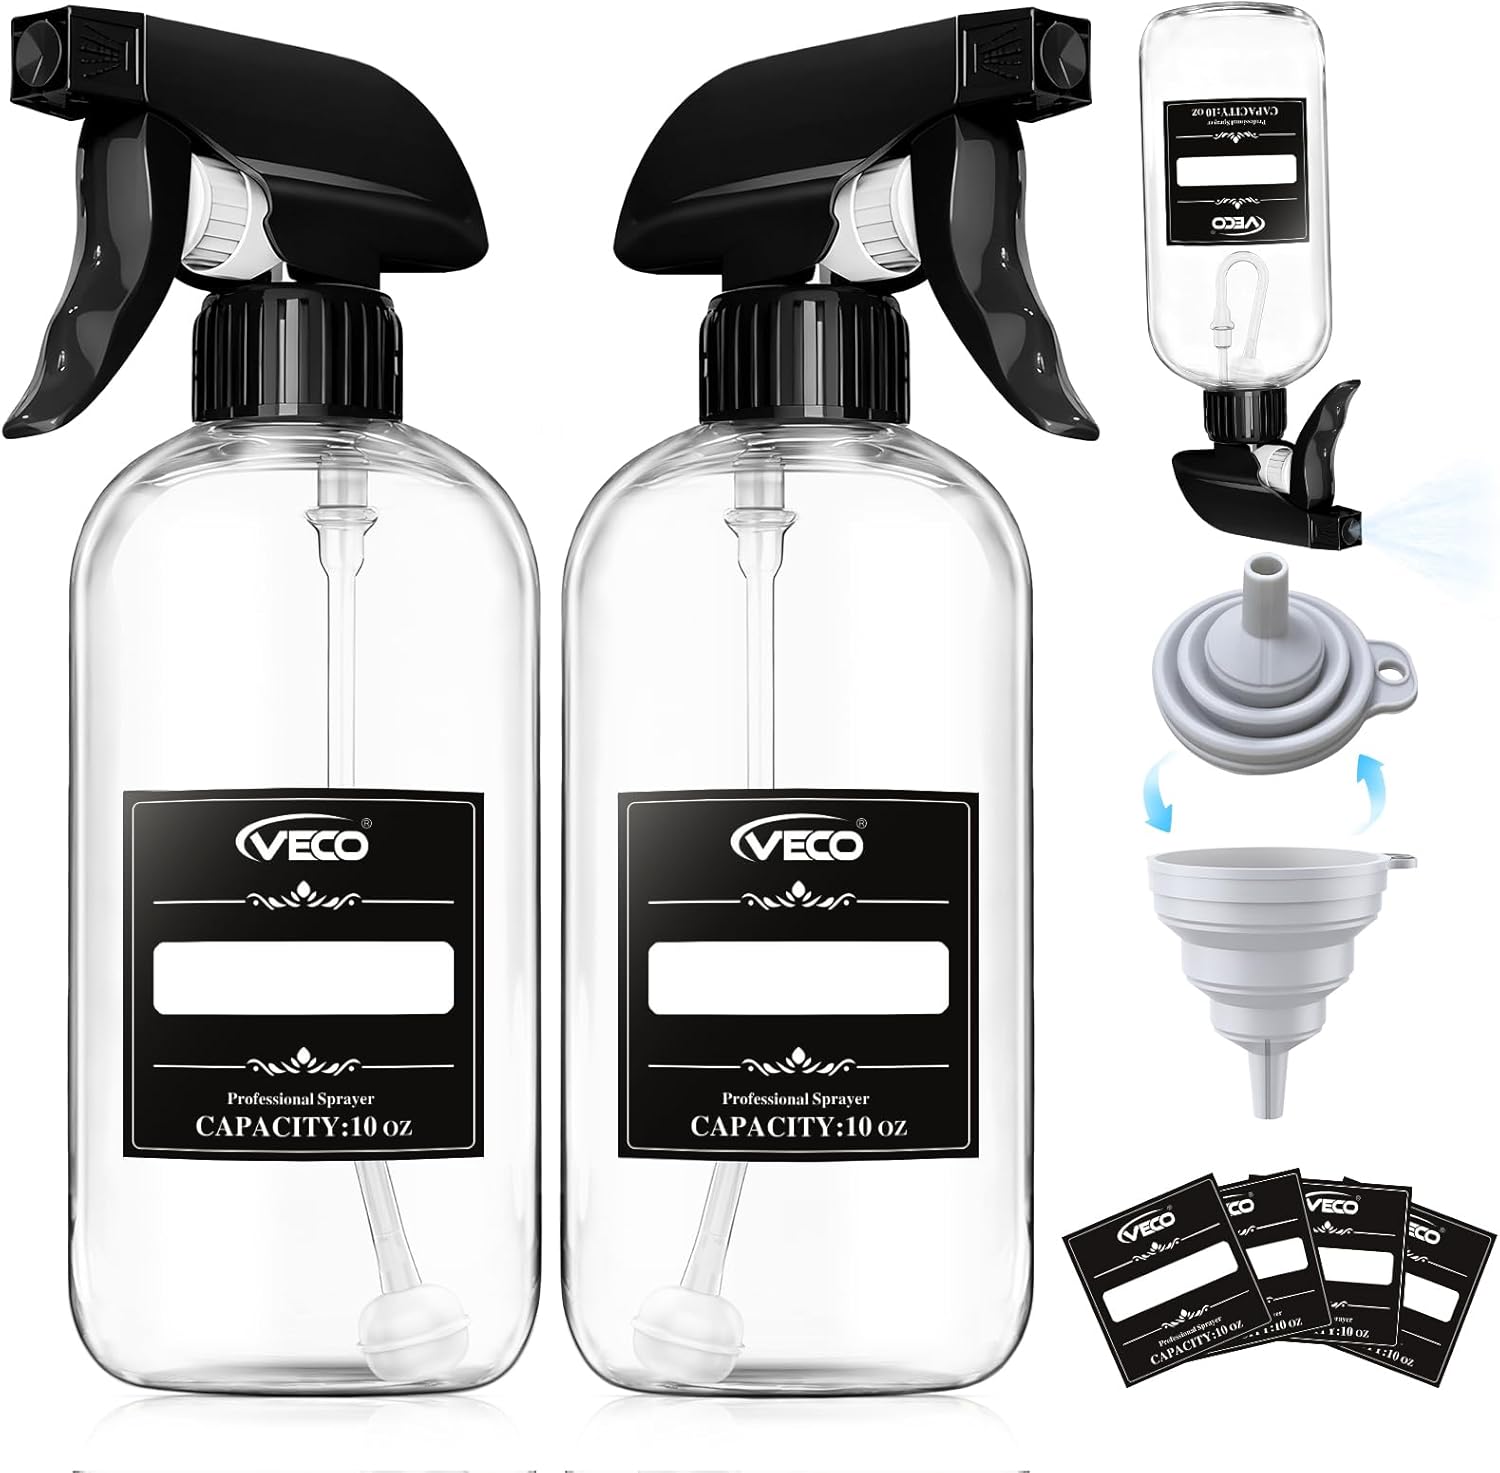
Soapy Solution
Spray bottle of dish soap + water. For leak-testing every air-line connection under pressure before you call it done.
Shop on AmazonAirkewld is a participant in the Amazon Services LLC Associates Program. As an Amazon Associate, we earn from qualifying purchases — at no additional cost to you.
Step by Step · The Way We'd Run It
Read each phase before you start it. Don't skip the Pro Tips. You might have installed something similar before — but you haven't installed THIS one. Read the guide. Understand the guide.
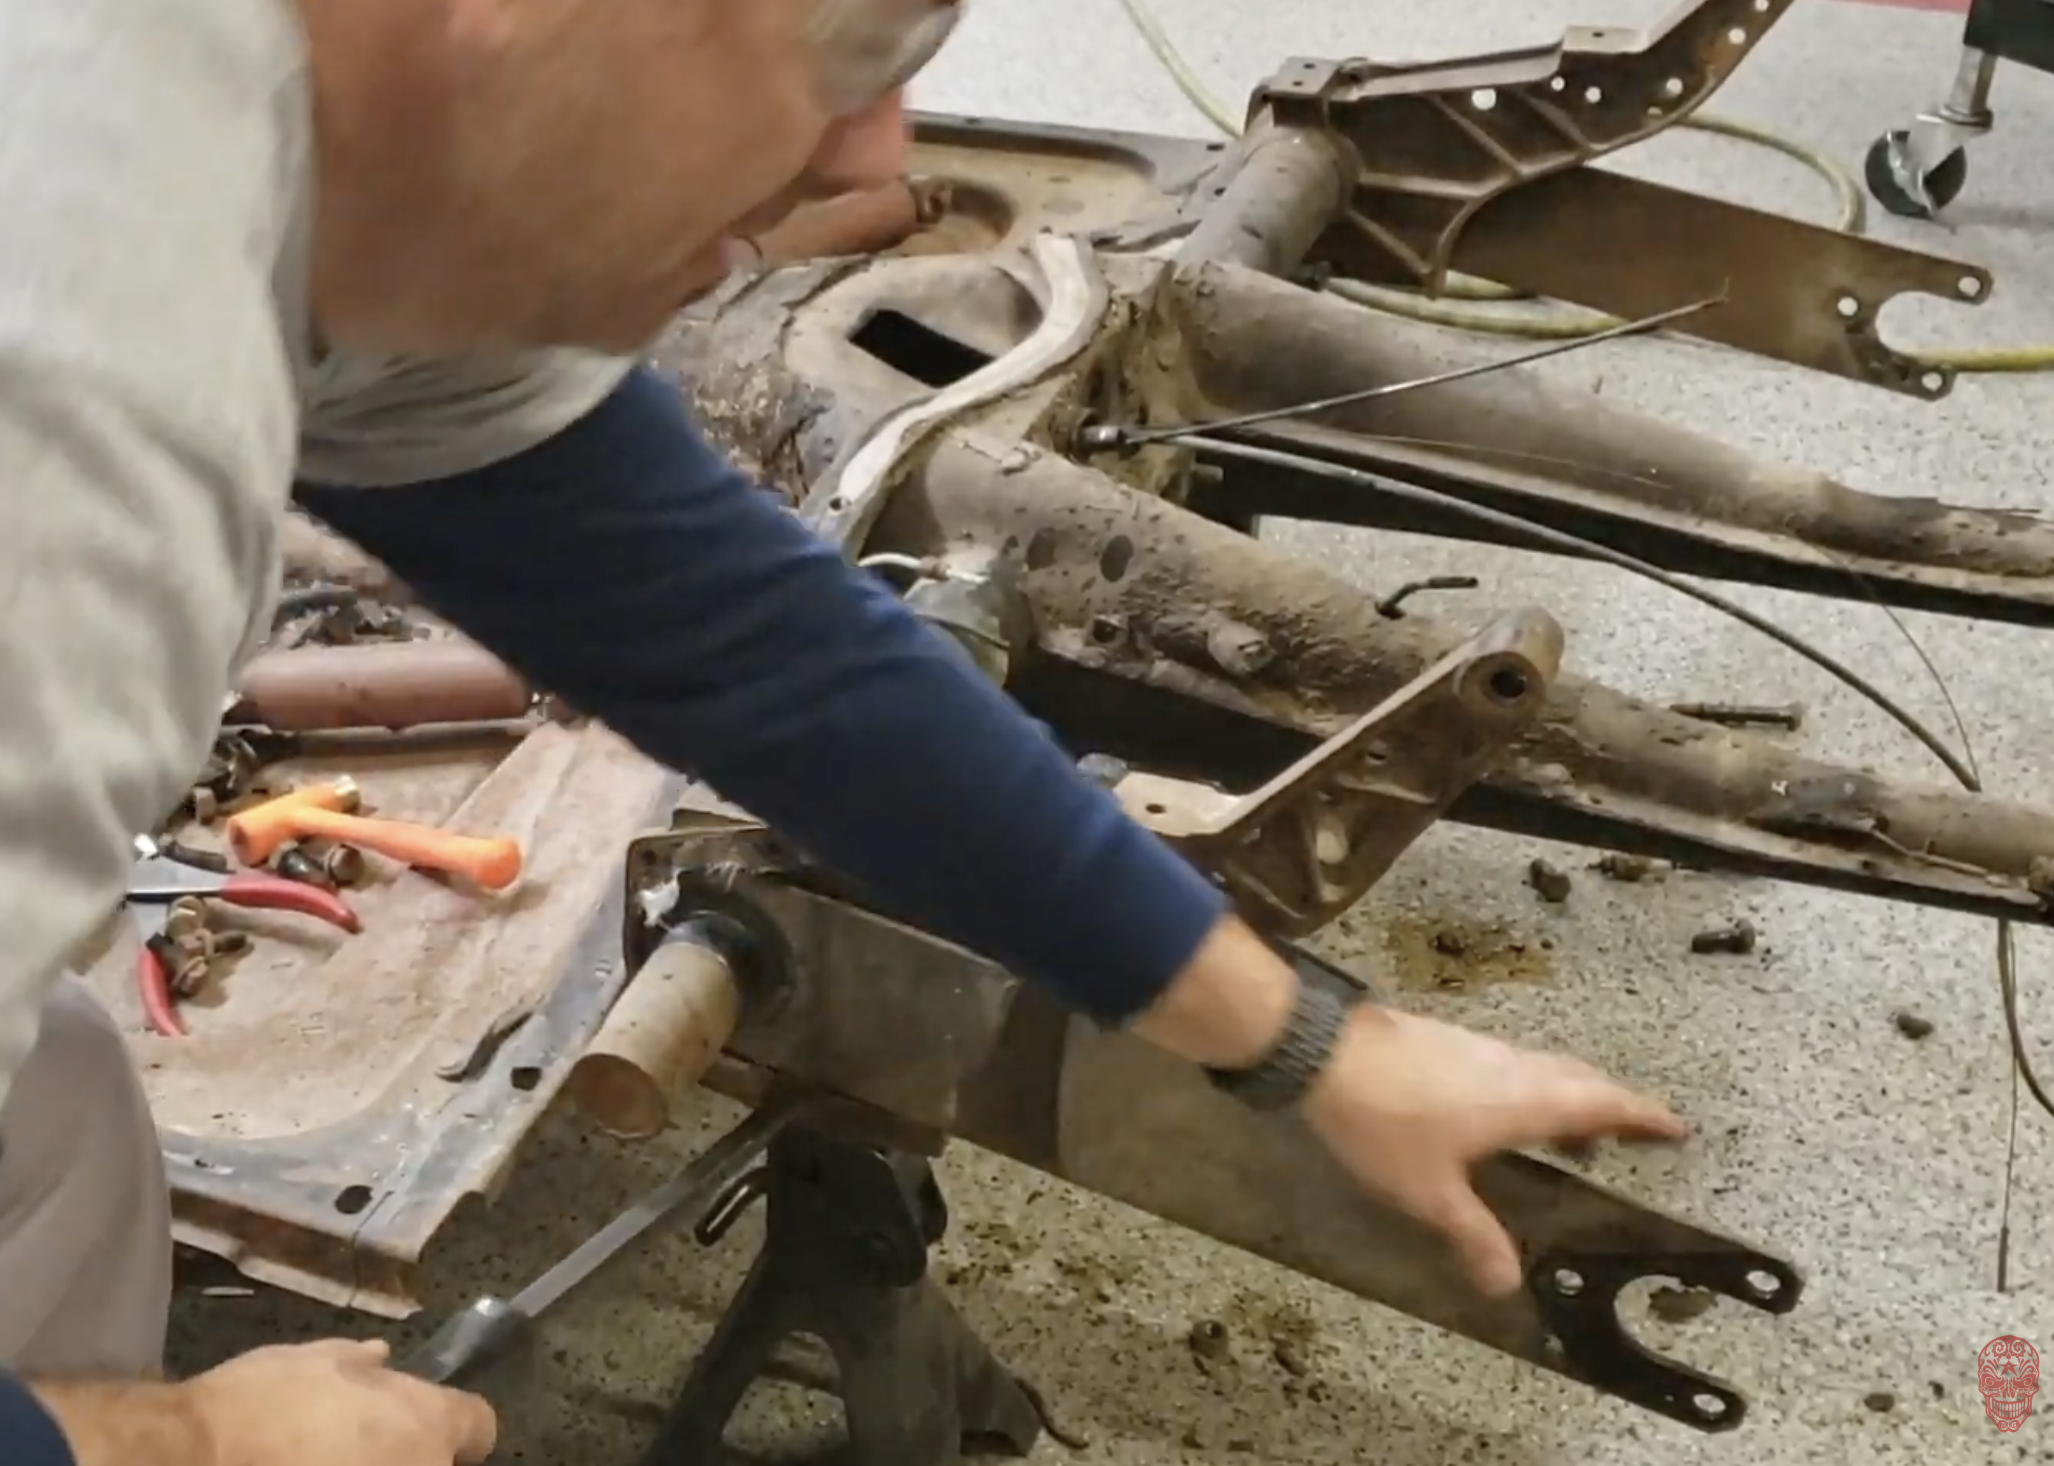
Vehicle Prep & Disassembly
- Disconnect the battery.
- Raise the car and put it on jack stands. The higher you lift, the easier the install.
- Remove the rear wheels.
- Disconnect the e-brake cables inside the vehicle.
- Remove the (4) bolts holding the IRS trailing arm to the spring plate. Save these — they get reused.
- Remove the shock absorber (upper + lower bolts). Save the hardware.
- Remove the (4) bolts holding the spring-plate cap.
Torsion Bar Release & Doughnut Save
- SAFETY: Goggles on. Stand to the FRONT of the car. Pry the spring plate from underneath using a long pry bar.
- Release the tension — the spring plate is going to spring DOWN extremely fast. Step clear as it travels.
- Pull the torsion bar (no longer needed) and carefully remove the rubber doughnuts. Do NOT damage the doughnuts — they go right back in.
- Lube the doughnuts with Valvoline grease and re-install them onto the spring plate.
- Bolt the spring-plate cap back on with the original hardware. The trailing arm now swings free — up and down with no torsion-bar resistance. (Optional: replace doughnuts with fresh rubber or urethane while you're in there.)
- Re-install the (4) trailing-arm-to-spring-plate bolts — use removable Locktite on every original bolt that goes back in.
The rubber doughnuts are what let the spring plate (and therefore the trailing arm) pivot in the chassis. Without them, you have nothing for the trailing arm to swing on. Pull the torsion bar gently, work the doughnuts off without slicing or tearing them, and you'll save yourself an unplanned parts-store run.

Bump Stop Conversion
- Locate the original snubber ball on the trailing arm.
- Using a Sawz-all or hack saw, cut the top half of the snubber ball off so the remaining stub sits flush with the trailing arm.
- Drill a 3/8″ hole through the center of what's left.
- Bolt in the supplied urethane bump stop. This sets your maximum upward suspension travel — the trailing arm contacts this stop at full bag inflation, which keeps the trailing arm clear of the chassis and prevents the shock from over-compressing.
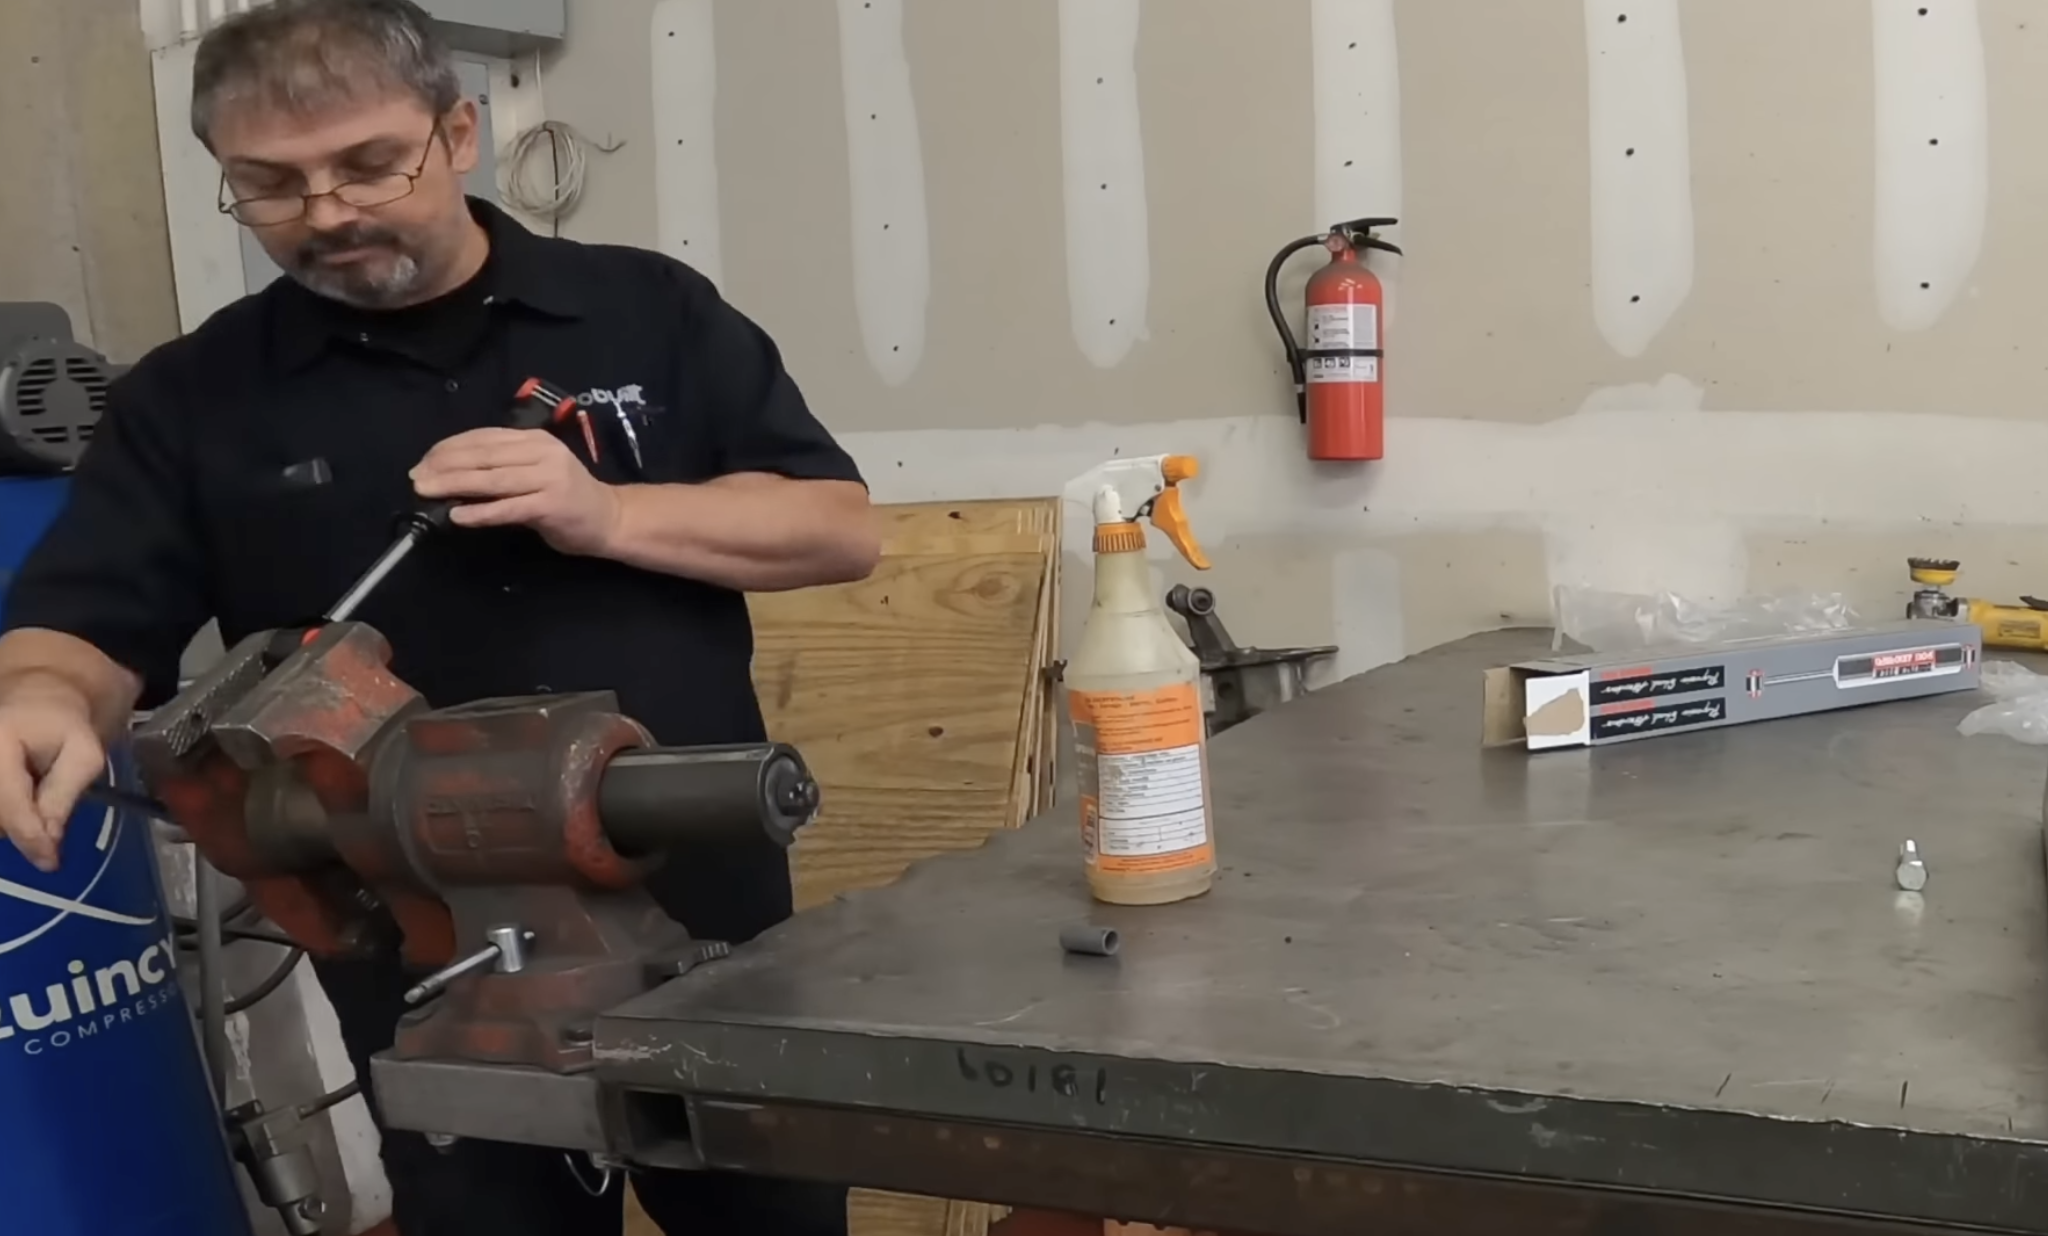
Doetsch Tech Shocks
- Open the Doetsch box. Press the supplied steel spacers into both shock ends. These keep the shock bushings from getting smashed when you torque the hardware.
- Install the new shocks using the original mounting hardware plus the 16 supplied spacers.
- Tighten so the shocks are spaced evenly in the lower pockets. (Locktite the original hardware on the way back in.)
Those steel spacers in the bottom of the shock box look like packing material. They're not. They press into the shock ends so the bushings don't crush when you torque the bolts. Forget them and you'll be replacing bushings before the season is over.
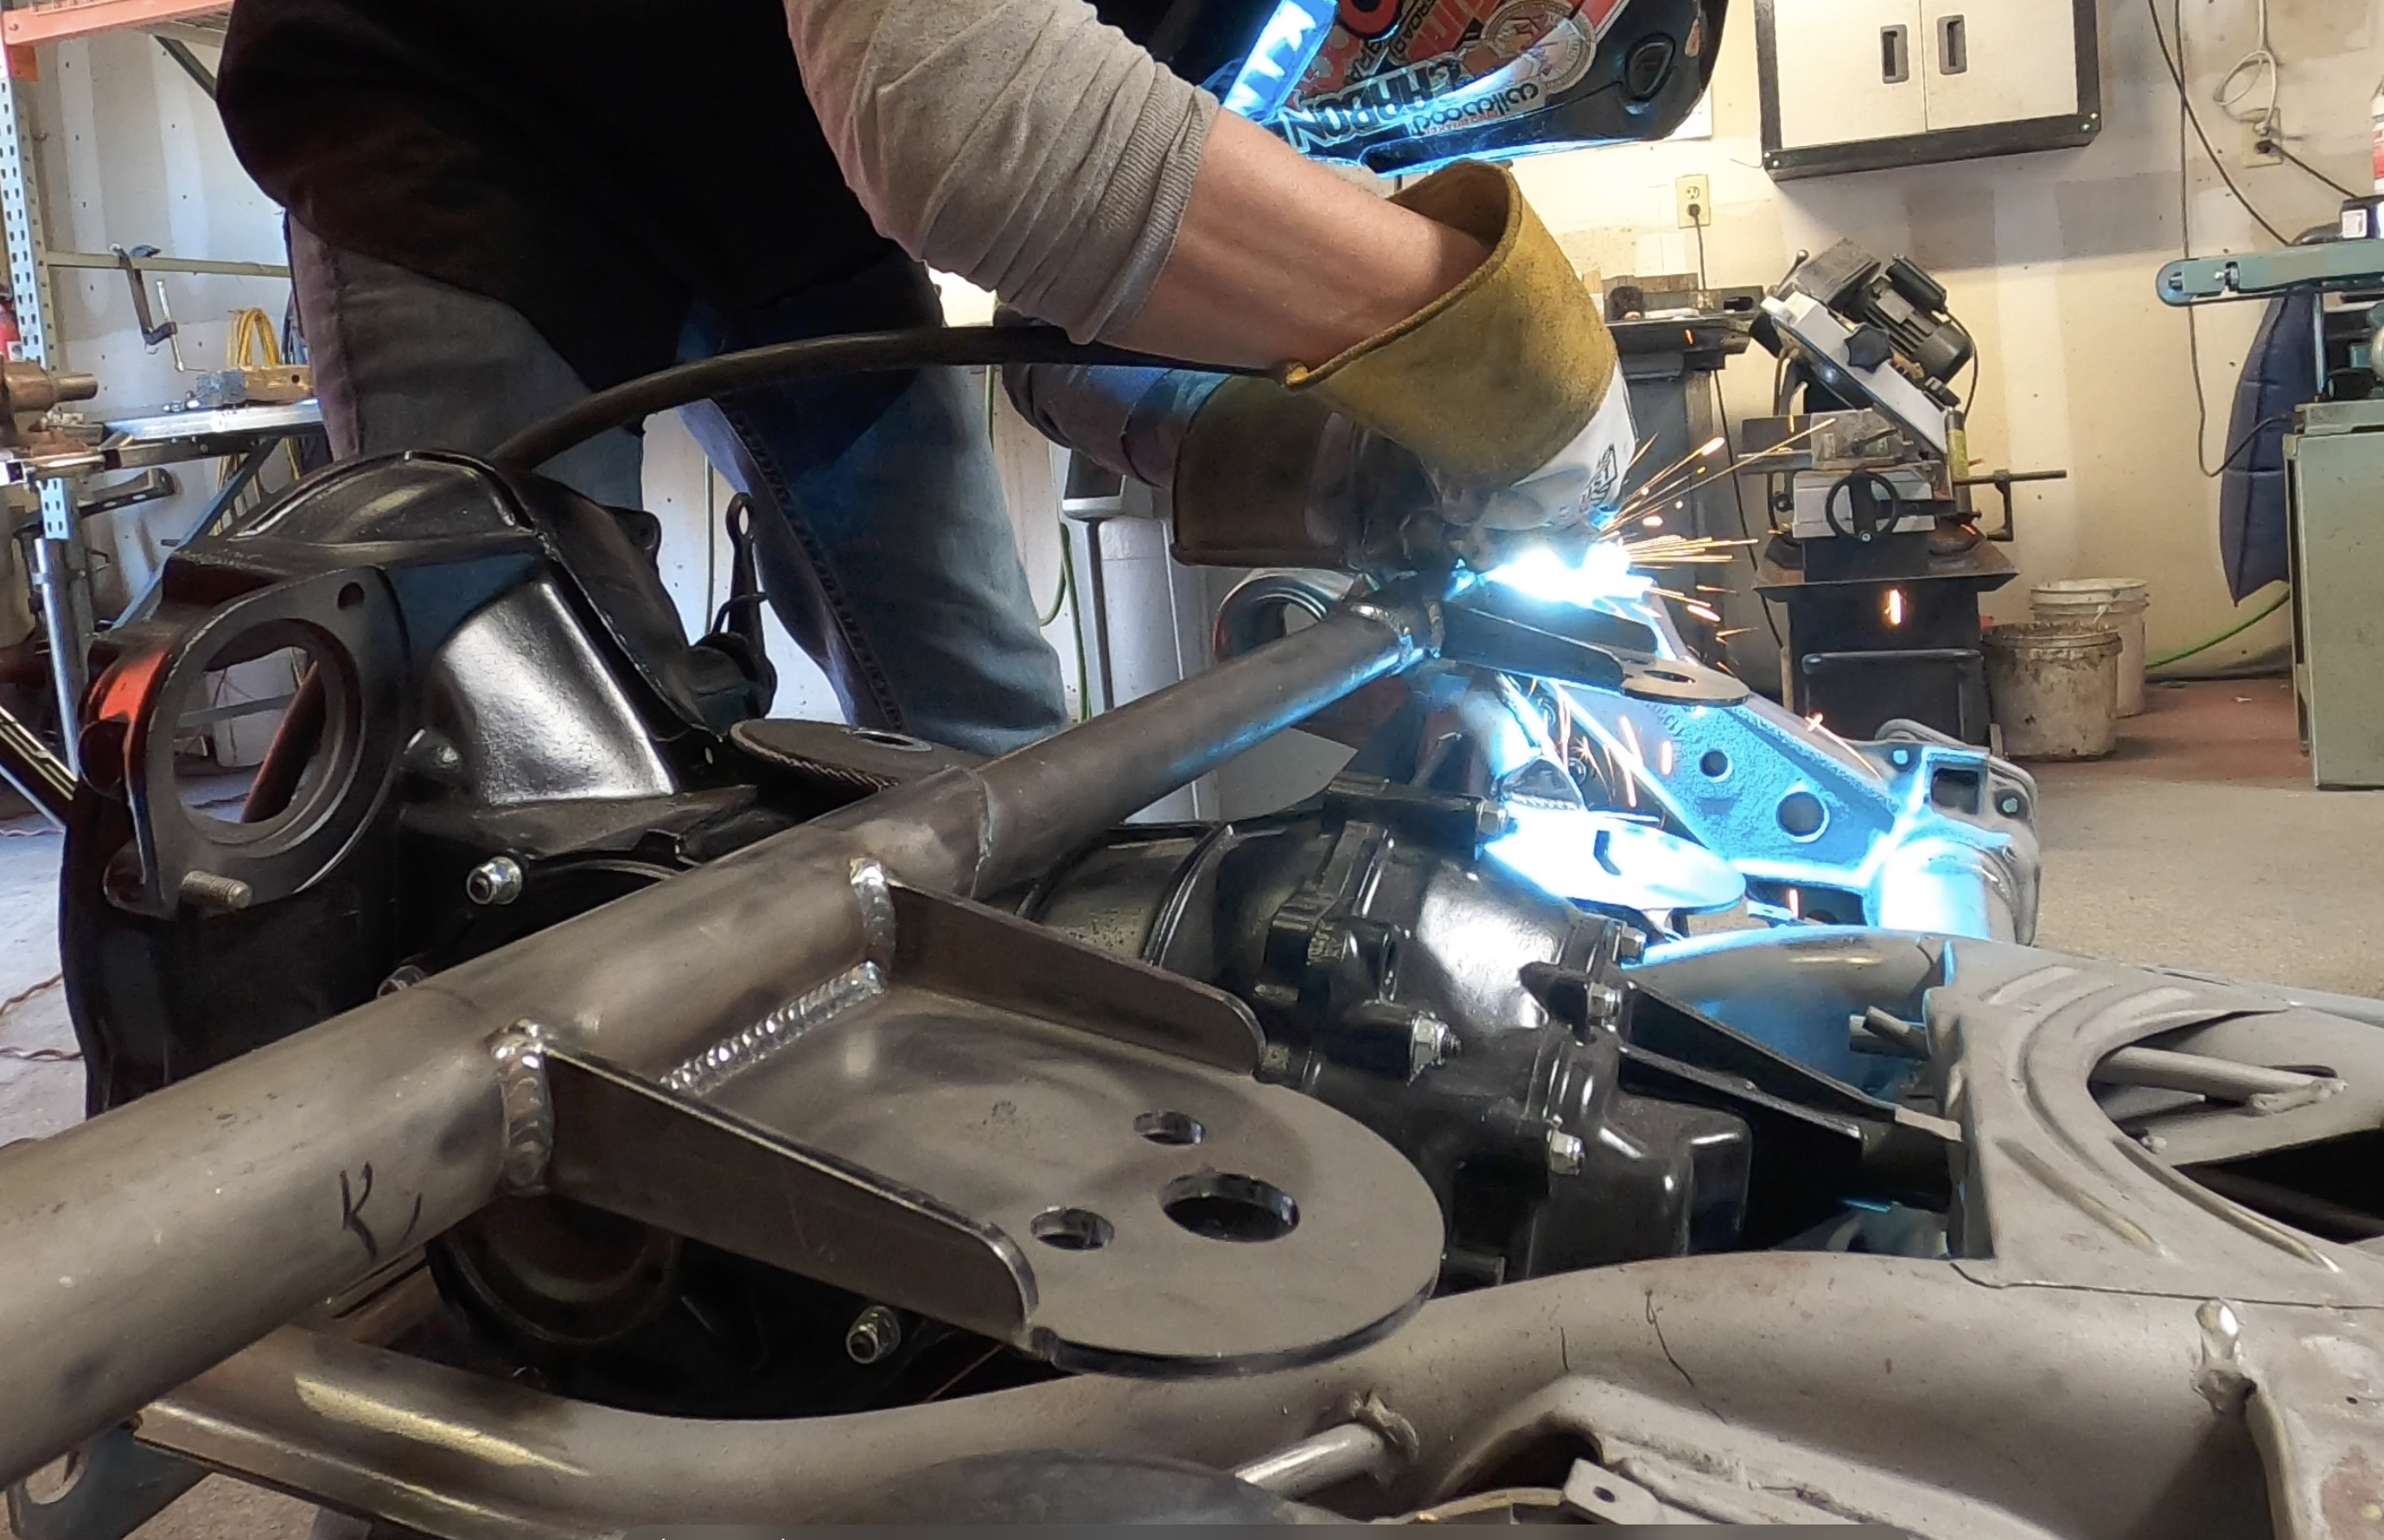
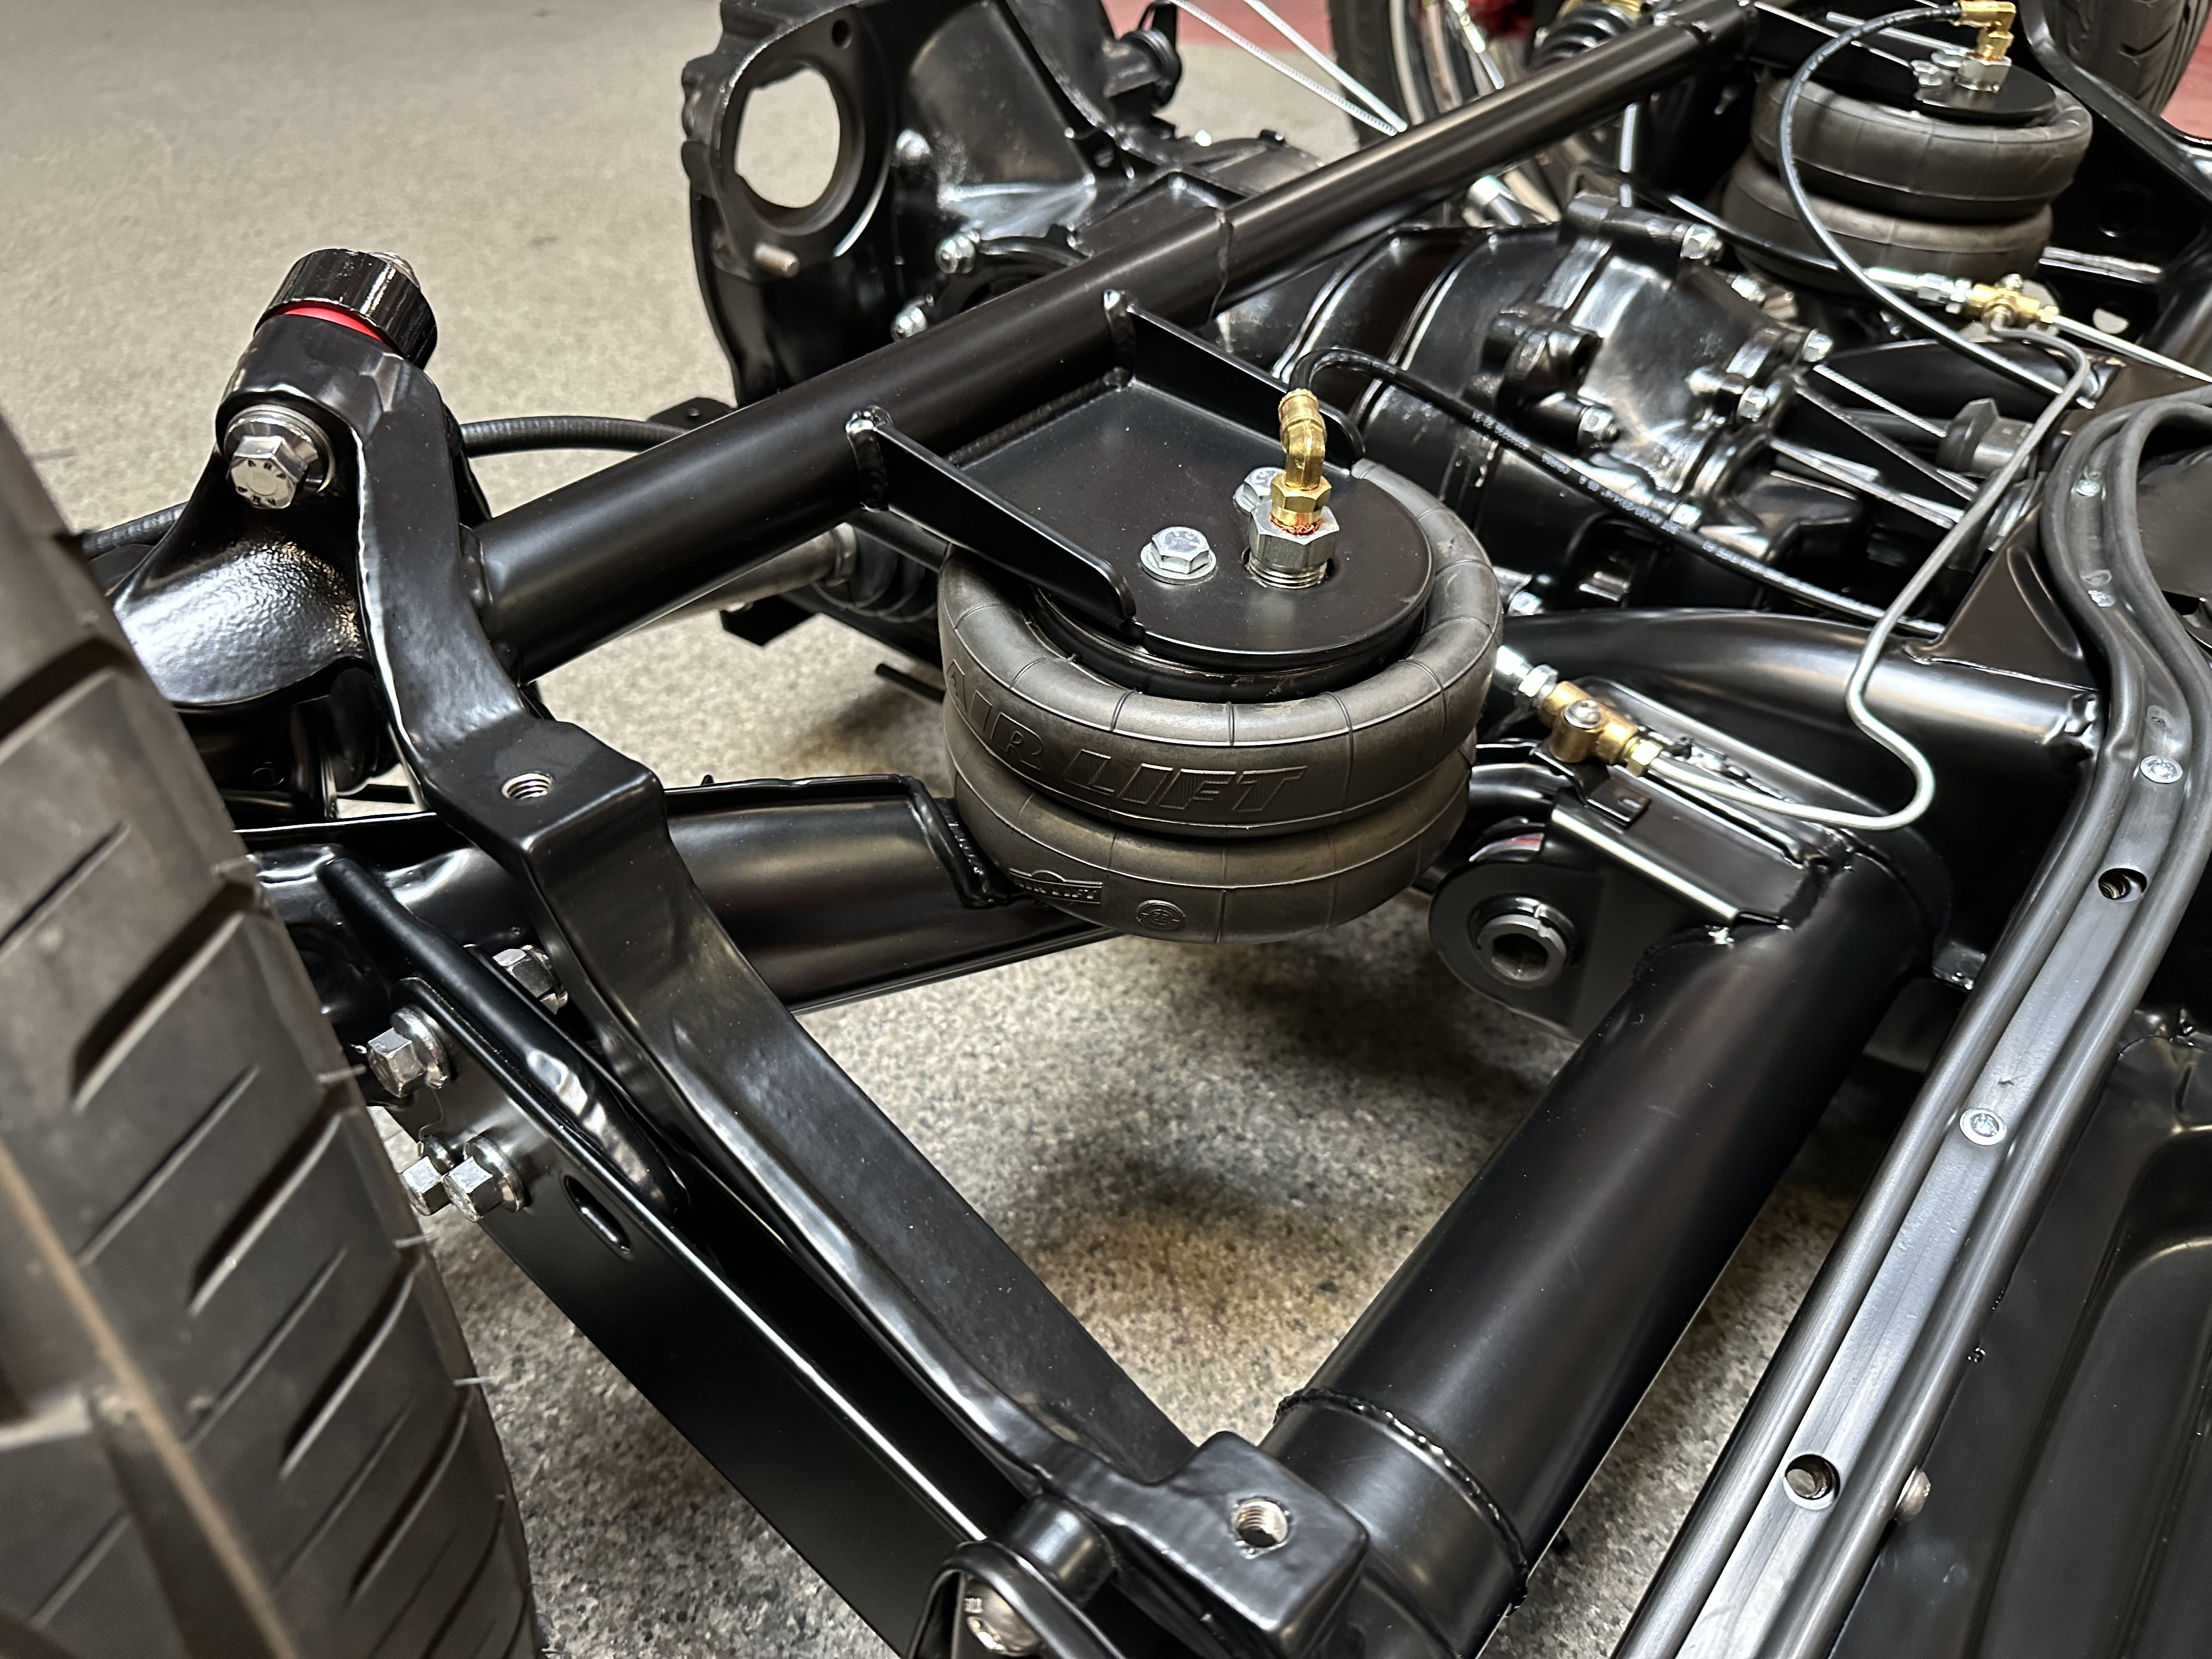
Bag Mounts — Upper & Lower (Welding)
- Grind the surface paint and undercoating off the chassis around the upper shock-mount area — that's where the upper bag mounts weld in.
- Mount the air bags to the supplied telescoping upper mounts and the lower bag circles (loose).
- Jack up the axle until the shock bottoms out and the trailing arm is hitting the new urethane bump stop. This is your full-up reference position.
- Position the upper bag mount so the center of the trailing arm sits just below the upper bag mount, and the angle of the trailing arm matches the angle of the upper bag mount. Twist the telescoping mount until they line up.
- Tack-weld the upper mount in. Do NOT fully weld yet.
- With a Sharpie, draw a line around the lower bag circle onto the trailing arm. Cut the trailing arm out along the marked circle.
- Weld a 3/8″ bolt to the lower bag circle. Jack the trailing arm up until the bag circle sits flush inside the trailing arm cutout. Tack it in place.
- Cycle full travel. Lower and raise the suspension and confirm the air bag does NOT touch the torsion housing at any point. Contact = rubbing = puncture.
- Once you're completely satisfied with travel and clearance: remove the air bag, finish-weld both mounts, let cool, paint to prevent rust, and re-install the bag.
The 2015 telescoping upper mount is built specifically for this — tack it in, install the bag, cycle the suspension, and verify clearance through the entire stroke. Only when you've confirmed nothing rubs the torsion housing do you pull the bag and lay your final beads. Welding first locks any contact point in permanently and the bag is the part that loses.
Air Lines, Leak Test & Drop the Car
- Apply Teflon tape (or thread compound) to the supplied 1/2″ bushings and thread them into the air bags.
- Tape the threads on the 90° push-loc fittings and thread them into the bushings.
- Cut tubing SQUARE; push fully into the push-loc fittings; pull-test every joint.
- Soap-test every connection under pressure. Spray, watch for bubbles, fix anything that leaks before you button up.
- Re-install wheels, tires, and e-brake cables.
- Air the bags up before you drop the jack — you need air in there to clear the jack out.
- Set the car down. Now deflate. BOOM — rock bottom.
"Took my time, followed the steps, install was clean. Trailing arms swing free, ride height adjustable, no surprises."
— Posted by Jim Flowers"Bump-stop conversion was easier than I expected, bag clears the torsion housing through full travel, whole rear floats."
— posted by raymond Miller"Knocked it out over a weekend on jack stands. Daily-driver Super Beetle that lays frame at every show."
— posted by Jon WhyteThe Questions We Get Most
Is welding required for this kit?
Yes. The upper bag mounts weld to the chassis at the upper shock-mount area, and the lower bag circle (with a 3/8″ bolt welded to it) gets welded into a hole you cut in the existing trailing arm. MIG is recommended. If you don't own a welder, find a friend with a MIG or a local fab shop.
Does the body need to come off to install this kit?
No. The IRS install is body-on. With the car up on jack stands and the rear wheels off, you have access to everything you need: spring-plate cap, torsion bar, trailing-arm bolts, shock mounts, snubber ball, and the upper-shock-mount weld area. Lift the car as high as your stands will safely allow — the higher it sits, the easier the work.
Can the heaters still work with the air ride kit installed?
Simple answer: no. If you're fabrication-friendly, you can make it work — but it requires custom routing around the new bag mount and trailing-arm hardware. Most builders accept the heat-loss tradeoff for the ride quality.
How long does the install take?
About 16 hours — one weekend. Plan a Saturday + Sunday (or two long evenings) and you'll have time for the disassembly, the bump-stop conversion, the welding, the leak test, and the final drop.
Will it fit my VW?
Yes if you have a 1969–1977 Type 1 with the IRS rear suspension — that includes the Beetle (1969–1977), Karmann Ghia (1969–1975), Super Beetle (1971–1979), Type 181 Thing (1973–1974), and kit cars on the same IRS rear. Does NOT fit Type 2 Bus, Type 3, swing-axle rears (1949–1968 — we have a separate kit for those), or straight-axle conversions.
Can I use an electronic air management kit (AMK) with your air ride?
You can. Heads up though: we won't be able to tech-support any AMK-specific issue, because we don't have the ability to recreate problems with every vendor's AMK and their firmware updates. The mechanical install on this guide doesn't change — only the controller wiring after the bags are mounted.
What do the bump stops actually do?
They limit upward suspension travel. You cut the top of the original VW snubber ball flush with the trailing arm, drill 3/8″ through the center, and bolt the supplied urethane bump stop in. When the bags inflate to full-up, the trailing arm contacts this stop — which prevents the arm from slamming the chassis and keeps the shock from over-compressing. Don't shortcut this step.
Is there anything else I'll need with this kit?
The kit ships with everything mechanical — upper bag mounts, lower bag circles, urethane bump stops, Doetsch Tech shocks with steel spacers, 1/2″ bushings, 90° push-loc fittings, and hardware. You'll add basic shop tools (jack & stands, sockets, pry bar, drill with a 3/8″ bit, Sawz-all or hack saw, MIG welder, angle grinder), plus consumables: removable Locktite, Valvoline grease, Teflon tape, and a rust-prevention paint to seal the welds.
What's the difference between the Standalone and the Complete kit?
The Standalone IRS Rear Kit (#111 000 007) is just the rear air-ride conversion (this install guide). The Complete Kit (#111 000 003) bundles the rear with our front air-ride solution — everything you need to put a 1969–1977 IRS Beetle, Ghia, Super, or Thing on air front-and-back.
What's your warranty?
If any component in the kit ever fails from a manufacturing defect, we replace it. Period. Email help@airkewld.com with a photo and your order number.
Real Humans. Real Phones. Real VW People.
Compatibility questions, torsion-bar release worries, mid-install confusion — reach out before you make a cut you can't undo. We pick up the phone. We answer the email.